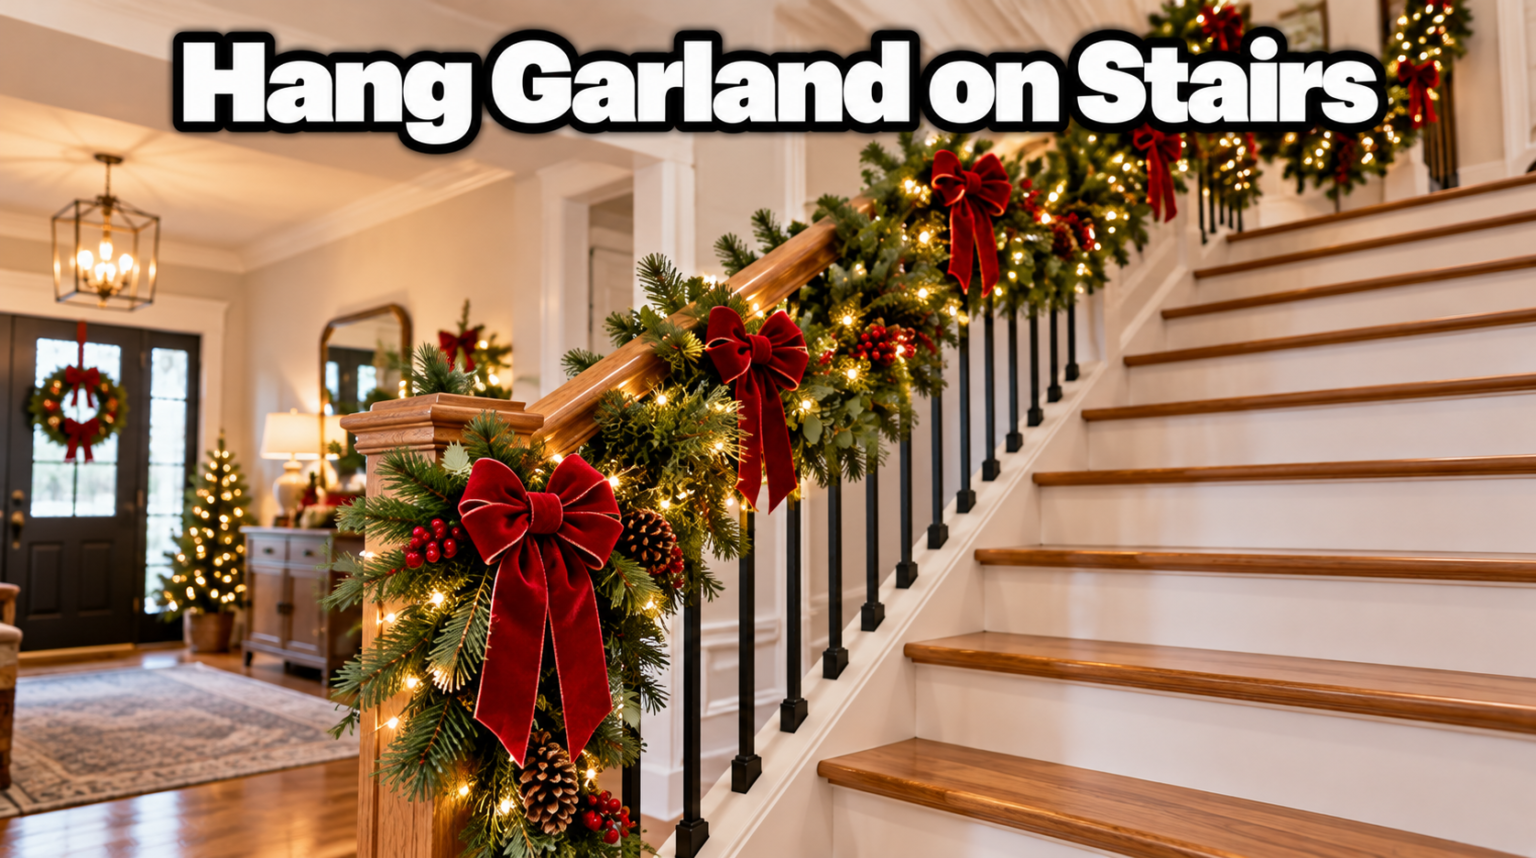

To hang garland on stairs, run it along the outside or underside of the handrail and fasten it every two to three feet with garland twist ties or green zip ties, starting at the top newel post and working down. Keep the top of the rail clear so you can still grip it, hide the ties with greenery or ribbon, then fluff the branches and add lights, picks, and bows.
Done well, the whole thing takes under an hour and leaves no marks on your wood. Here is how to handle each part so it looks full, stays put, and comes down clean in January.
Garland on a staircase is one of the quickest wins in holiday decorating. It frames the entry, catches the eye the moment someone walks in, and works with almost any style of home. The steps below take you from an empty rail to a finished, glowing display.
What you need to hang stair garland
You do not need much. The core kit is garland, something to tie it with, and a pair of scissors. Everything else just makes it look better.
- Garland, faux or real, enough to cover your rail (sizing is below)
- Garland twist ties or green zip ties for the main attachment
- 22 gauge floral wire for clusters and accents
- Scissors or wire cutters
- Ribbon, at least 1.5 inches wide, for bows and to hide ties
- Picks, berry stems, or pinecones to fill gaps (optional)
- Battery string lights (optional)
Garland twist ties are the easiest choice for most people. They blend into faux greenery and leave no mark on the rail. For a heavy rail or two stacked garlands, green zip ties hold firmer, and you can join two ties together to reach around a thick banister. If you would rather not tie anything to the wood at all, Command’s damage-free hooks stuck to the underside of the rail give you an anchor point that peels off later.
Choosing the right garland for your stairs
Pick garland by how wide your space is and how much work you want to do later. A fuller, wider garland, around 9 to 12 inches across, makes a bold statement on an open staircase and hides your ties with ease. A slimmer strand suits a narrow stairwell where a thick garland would brush your arms or block the steps.
You will also choose between plain and pre-lit. Plain garland costs less and lets you add your own lights and color, which is handy if you redecorate often. A pre-lit garland saves you the weaving step and gives an even glow, though you are stuck with the bulb color it comes with. Either way, match the greenery style to your home: a mixed pine and cedar look reads natural, while a flocked or berry-heavy strand feels more decorative.
How much garland do you need?
Measure your handrail first, then buy more than that length. A flat, straight run needs garland at least as long as the rail. For the draped, swooping look most people want, plan on about 1.5 times the rail length, plus roughly 3 feet for each end you want to spill down at the top or bottom.
So for a common 8 foot banister with a swag that reaches toward the floor, the math is (8 x 1.5) + 3, which comes to 15 feet. Buy the next size up from there so you have slack to drape.
| Banister length | Flat look | Draped look (1.5x + one 3 ft tail) |
| 4 ft | 4 ft | 9 ft |
| 6 ft | 6 ft | 12 ft |
| 8 ft | 8 ft | 15 ft |
| 10 ft | 10 ft | 18 ft |
An open staircase, where one side of the rail is on show, often needs the longer continuous rolls so the garland runs unbroken down the full flight. A closed staircase against a wall usually only shows the top and one side, so you can use a little less and focus the fullness where people actually see it.
Buying one long piece is cleaner than joining several, and open staircases often take 15 to 100 foot rolls. If you do join pieces, overlap the ends by a few inches and wire them together so the seam disappears into the branches.
How to hang garland on stairs, step by step
Work from the top of the stairs down, and tie as you go. Starting at the top gives the weight something to hang from instead of dragging everything downhill.
Before you tie anything, clear the stairs and lay the garland along the rail to test the length and the drape. A quick dry run shows you where the swags will fall and whether you need another strand, so you are not untying knots halfway through.
- Join your garland if you are using more than one piece. Lay the strands end to end, overlap them by about 4 inches, and twist them together with floral wire so they read as one continuous length.
- Anchor the top end at the upper newel post. Wrap it around the post once or twice, or tie it tight to the top of the rail, so the whole run has something to pull against.
- Lay the garland along the side or underside of the rail, not across the top. Fasten it with a twist tie or zip tie every 2 to 3 feet, following the line of the handrail.
- Drape the slack between ties into gentle swags if you want the swooping look, or keep it snug for a cleaner, straighter line.
- Trim the tie ends. Snip off any zip tie tails so nothing sticks up or scratches a hand on the way past.
- Finish the bottom. Let the end spill down the lower newel post or coil it softly on the floor for a full landing.
Stand back after the third step and check the drape from a few feet away. It is far easier to even out the swags now than after the lights and picks are on.
How to attach garland without damaging the banister
The rule is simple: never tie to the top of the rail, and never screw or nail anything into the wood. Garland twist ties and green zip ties wrap around the rail and come off with a single snip, so the finish stays untouched. Space them every 2 to 3 feet so the weight is shared instead of pulling at one spot.
Tie on the side or underside of the handrail. This keeps the top clear so anyone on the stairs can still hold the rail safely, and it hides the ties from view at the same time. If your staircase has spindles or balusters, loop a tie around one here and there. That stops the garland sliding down the rail without putting any strain on the wood.
Tip: hang the heaviest ornaments and clusters from the rail itself with their own tie, not from the garland. That way the garland holds its shape instead of sagging under the weight.
If you truly cannot tie to your rail, stick a few damage-free hooks to the underside and rest the garland in them. Press them on at least an hour before you load any weight so the adhesive has time to set.
How to make the garland look full
Full garland comes from two things: fluffing and layering. Faux garland arrives flat and squashed from the box, so before you tie anything, run your hands down each branch and bend the tips out in different directions. A flat strand looks fake. A fluffed one fills twice the space and hides your ties on its own.
Once it is up, layer in extras to fill the thin spots. Make small clusters of pinecones or berries by wrapping a 2 foot piece of floral wire around their stems, then twist each cluster onto the garland wherever it looks sparse. Tuck in picks, sprays, or a few dried orange slices the same way. Mixing a couple of greenery types, or adding a few real cuttings to a faux base, reads as more natural than one uniform strand.
Decide on a color or theme before you add accents, so the extras pull in one direction instead of looking random. Two or three colors is plenty, for example green with red berries and natural pinecones, or green with gold and white. Repeat each accent along the whole run rather than clustering it all in one spot, and the eye will read the garland as one finished piece.
Keep the fullest, prettiest side facing out and down the stairs, since that is the view people get as they walk up.
How to decorate the top and bottom newel posts
The newel posts are the thick posts at the top and bottom of the rail, and they are where a staircase display earns its wow. Let the garland pool and spill around each post rather than stopping flat at the end. At the bottom post, gather a little extra length and let it cascade onto the floor or wrap down the post in a loose spiral.
Tie a large bow at the base of the bottom post, where it sits at eye level as you walk in, and a smaller one at the top. If you have matching greenery left over, a small cluster of picks or a lantern at the foot of the stairs ties the whole look together. Keep anything you set on the floor to the side of the step, clear of the path.
How to add lights and ribbon
Add lights first, then ribbon. Weave a strand of battery powered string lights through the garland from the top down, pushing the wire deep into the branches so only the bulbs show. Battery packs let you skip hunting for an outlet near the stairs, and you can tuck each pack behind the greenery. Warm white lights suit most greenery, and about 100 lights per 6 to 9 feet of garland gives an even glow without hot spots.
Plug the lights into a timer, or use a battery pack with a built-in timer, so the display comes on each evening on its own. Keep the wire and the battery packs off the top of the rail so nothing blocks a hand reaching for support.
Ribbon goes on last. Tie short lengths of ribbon over any zip ties or wire you can still see to hide them. Then add bows wherever you want a lift, usually at the top post, the bottom post, and spaced evenly along the run. Non-wired ribbon in long tails cascades nicely down the newel post, while wired ribbon holds a crisper bow shape. Both work, so pick the look you like.
How to keep garland from falling off the banister
Garland slides and droops for three reasons: too few ties, nothing anchoring the ends, and too much weight hanging off the greenery. Fix all three and it will stay put all season.
Tie every 2 to 3 feet rather than just at the ends. Anchor both the top and the bottom to a newel post or a spindle so the run cannot creep downhill. And load heavy decorations onto the rail with their own ties, keeping the garland itself light. On a narrow staircase, keep the garland slim so it does not crowd the walking space or catch sleeves as people pass.
Check the garland once or twice over the season, since greenery settles and ties can loosen in the warmth of the house. A quick press back into place, and a fresh tie where one has slipped, keeps it looking new right through the holidays.
Real or faux garland for stairs?
Faux garland is the easier choice for a staircase. It holds its shape, takes weight well, stores for years, and never sheds. Real garland smells wonderful and looks the most natural, but it lasts about two weeks indoors at most, drops needles as it dries, and those needles on stairs are a slip risk. If you love the real thing, hang it late in the season, mist it to slow the drying, and sweep the steps often. For a display that stays up from late November, faux wins on effort alone.
Cost usually evens out in a year or two, since a good faux strand comes back out every December while real greenery is bought fresh each time. If you want the best of both, hang faux as the base and tuck in a few fresh cuttings for scent, replacing them when they fade.
Conclusion
Hanging stair garland comes down to a few simple moves: size your garland to about 1.5 times the rail, tie it to the side or underside every 2 to 3 feet with twist or zip ties, and anchor both ends to a post. Then fluff, light, and finish with ribbon. Keep the top of the rail clear and the heavy pieces on the rail, not the greenery, and you get a full, safe display that comes down without a mark.
Frequently asked questions
How much garland do I need for a staircase?
Measure your handrail, then plan on about 1.5 times that length for a draped look, plus 3 feet for each end you want to trail down. An 8 foot rail needs roughly 15 feet. Round up to the next size sold.
How do I attach garland without damaging the banister?
Use garland twist ties or green zip ties looped around the side or underside of the rail, spaced every 2 to 3 feet. They snip off clean and leave no marks. Damage-free adhesive hooks are a no-tie option.
How do I keep garland from sliding down the banister?
Anchor both ends to a newel post or spindle, tie every 2 to 3 feet instead of only at the ends, and hang heavy ornaments from the rail rather than the garland so it does not sag.
Do lights or ribbon go on first?
Lights first, ribbon last. Weave the string lights deep into the branches so only the bulbs show, then tie ribbon over any visible fasteners and add bows to finish.
Can I use real garland on stairs?
Yes, but it lasts about two weeks indoors and sheds needles that can make steps slippery. Hang it late, mist it to slow drying, and sweep often. Faux garland is the lower-maintenance choice for a long display.
Related Articles
How Tall Is a Standard Door? Complete Height Guide (2026)
What Type of Paint for Bathroom Walls? Complete Guide 2026
Can You Tile Over Tile: A Complete Guide 2026
How Do You Replace Ceiling Tiles? A Complete Step-by-Step Guide