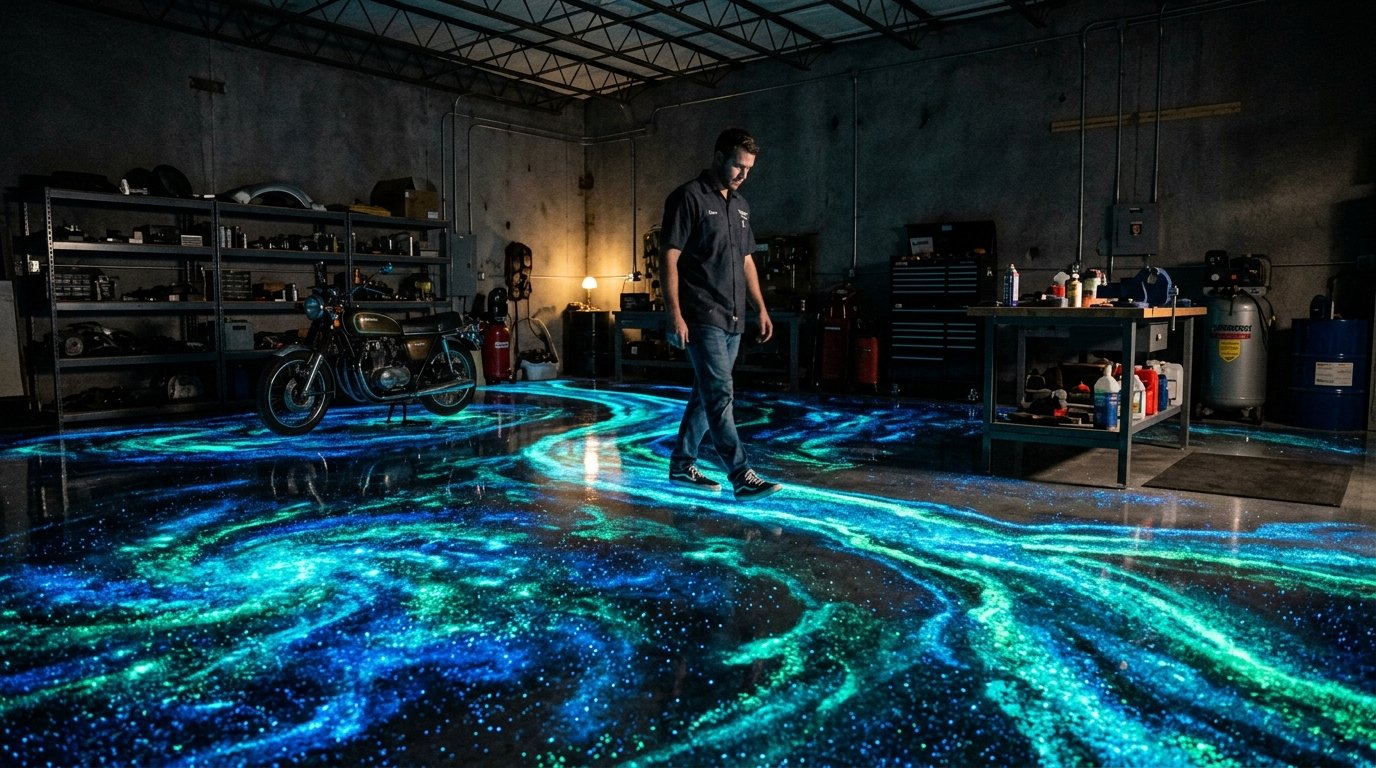

A glow in the dark epoxy floor is one of the most visually striking and functional flooring solutions available today. Whether you want to add a wow factor to a garage, basement, commercial space, or entertainment area, this special flooring combines the durability of epoxy with photoluminescent pigments that absorb light and emit a steady glow in low-light or dark conditions. Understanding how it works, what it costs, and how to install it correctly is key to getting the best results.
How Does a Glow in the Dark Epoxy Floor Work?
At its core, a glow in the dark epoxy floor works by embedding phot luminescent pigments inside a clear or tinted epoxy resin coating. These pigments are not radioactive or chemically active — they are entirely safe and passive.
The Science Behind the Glow
The pigments used in a glow in the dark epoxy floor absorb both natural sunlight and artificial light during the day. Once the lights go off, these charged pigments slowly release stored energy in the form of visible light, creating a soft, lasting glow that typically lasts between 8 to 12 hours depending on how long they were charged.
The most common pigment colors are green and blue-green, which produce the strongest visible glow, though newer formulas now offer purple, aqua, and white glowing tones.
What Activates the Glow
Any UV or visible light source charges the pigments effectively. Sunlight is the strongest activator, but standard LED or fluorescent indoor lighting also works well. The longer the floor is exposed to light before the room goes dark, the stronger and longer the glow will be.
How Long Does the Glow Last Per Charge
| Light Exposure Time | Glow Duration | Glow Intensity |
| 10 minutes | 2–3 hours | Low |
| 30 minutes | 4–6 hours | Moderate |
| 60 minutes | 8–10 hours | Strong |
| 90+ minutes | 10–12 hours | Maximum |
Types of Glow in the Dark Epoxy Floor Systems
There are several ways to achieve a glow in the dark epoxy floor, and each method suits a different application, budget, and aesthetic goal. The right system depends on how prominent you want the glow effect and whether you need it for safety, decoration, or both.
Broadcast Pigment System
This is the most popular approach. Photoluminescent powder or flakes are broadcast (sprinkled) directly into a wet clear epoxy base coat. Once cured, a clear topcoat seals everything in. This method gives you control over pigment density
you can go light for a subtle shimmer or heavy for a full neon-style effect. It is widely used in garages, basements, and entertainment rooms.
Glow-Infused Epoxy Paint
Some manufacturers offer pre-mixed epoxy paints that already contain phot luminescent pigments.
These are easier to apply and are better suited for DIY users. However, they tend to produce a less intense glow compared to broadcast systems because the pigment concentration is fixed and lower. They work well for decorative lines, pathways, or accent sections rather than full floors.
UV Reactive Epoxy (Black Light)
A UV reactive epoxy floor uses pigments that only become visible under ultraviolet (black light) illumination. Unlike standard glow in the dark epoxy, these floors look relatively normal under regular light and then burst into vivid color under UV exposure.
This is extremely popular in entertainment venues, escape rooms, and nightclubs where UV lighting is present.
Glow Aggregate Chips System
Instead of powder, some installers use pre-glowing aggregate chips mixed into the epoxy matrix. These chips glow at various intensities and create a terrazzo-like appearance with scattered points of light across the floor. This option gives a premium, high-end finish and works well in commercial lobbies, retail spaces, and luxury residential interiors.
Where Is a Glow in the Dark Epoxy Floor Best Used?
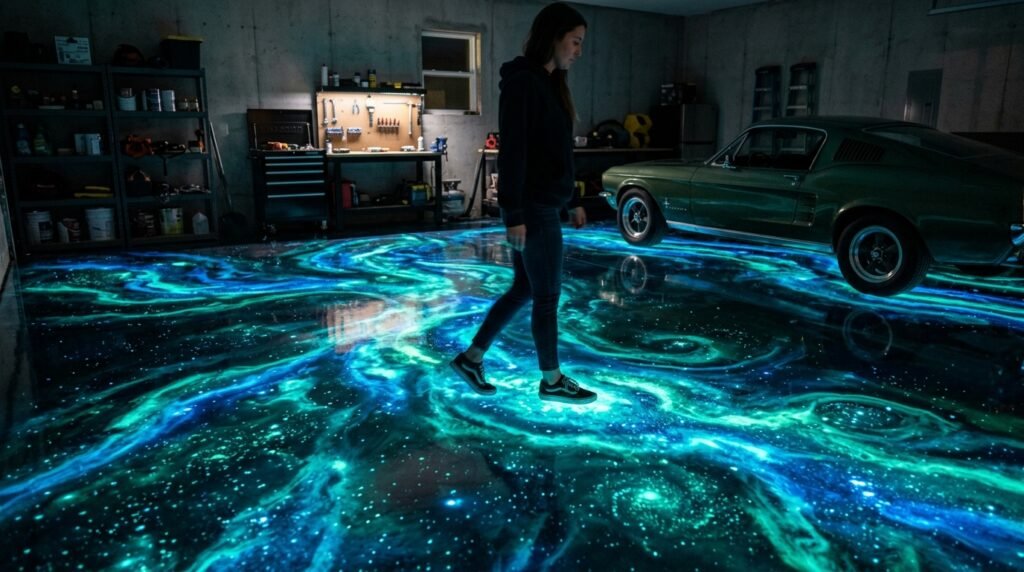
A glow in the dark epoxy floor is versatile enough for a wide range of applications. It is not purely decorative — many property owners install it for genuine safety and wayfinding purposes.
Common applications include:
- Garages and workshops — where the glow acts as a guide during power outages
- Basements and home theaters — for ambient lighting effects without installing additional fixtures
- Children’s playrooms — providing a fun, safe glow-at-night surface
- Commercial hallways and stairwells — for emergency egress markings that meet safety codes
- Nightclubs and entertainment venues — for visual impact under UV or dark conditions
- Pool decks and outdoor patios — where glow helps people navigate at night safely
- Retail stores and showrooms — for branding, aesthetic appeal, and customer engagement
Cost Breakdown: Glow in the Dark Epoxy Floor
The total cost of a glow in the dark epoxy floor depends on several variables including the size of the area, the system type, labor, and the quality of pigments used.
| Cost Factor | DIY Estimate | Professional Install |
| Epoxy base coat (per sq ft) | $0.50 – $1.50 | $1.50 – $3.00 |
| Photoluminescent pigment (per sq ft) | $0.30 – $0.80 | $0.50 – $1.20 |
| Clear topcoat (per sq ft) | $0.40 – $1.00 | $1.00 – $2.50 |
| Surface prep & labor (per sq ft) | Minimal | $2.00 – $5.00 |
| Total Estimated Cost (per sq ft) | $1.50 – $3.50 | $5.00 – $12.00 |
A 400 sq ft garage professionally done with a glow in the dark epoxy floor system typically runs between $2,000 and $4,800 depending on your location and the complexity of the design. DIY options can bring this down significantly but require careful preparation.
Step-by-Step Installation Guide
Installing a glow in the dark epoxy floor is a multi-stage process. Skipping steps — especially surface preparation — is the number one reason epoxy floors fail or peel.
Step 1: Surface Preparation
The concrete must be clean, dry, and free from oil, grease, paint, or existing coatings. Diamond grinding or acid etching opens the concrete pores and creates a mechanical bond for the epoxy. Any cracks should be filled with epoxy filler and allowed to cure before proceeding.
Step 2: Apply the Base Coat
Mix your epoxy base coat according to the manufacturer’s ratio (usually 2:1 or 1:1 resin to hardener). Apply it evenly using a notched squeegee and back-roll with a short nap roller to eliminate bubbles. Allow it to reach a tacky, gel-like state before the next step.
Step 3: Broadcast the Photoluminescent Pigment
While the base coat is still wet and tacky, broadcast the glow pigment powder or flakes evenly across the surface. Use a broadcast spreader for large areas or a gloved hand for precise pattern work. The density of application directly controls how strong the glow will be.
Step 4: Allow to Cure, Then Apply Topcoat
Once the base coat has cured (typically 12–24 hours at 70°F), apply one or two coats of clear polyaspartic or urethane topcoat. This seals the pigment, protects it from abrasion and UV degradation, and gives the floor its final sheen level (matte, satin, or high gloss).
Step 5: Full Cure and Light Charging
Allow the floor to fully cure for 48–72 hours before heavy foot traffic and 5–7 days before vehicle traffic. Once cured, expose the floor to strong light for at least 60 minutes before testing the glow in darkness.
Pros and Cons of Glow in the Dark Epoxy Floors
Advantages:
- Creates a unique, high-impact aesthetic that no other flooring material can replicate
- Improves safety during power outages by marking paths, stairs, and exits
- Durable epoxy base provides excellent resistance to chemicals, abrasion, and moisture
- Completely passive system — no electricity required for the glow effect
- Can be customized with patterns, logos, pathways, and mixed pigment colors
Disadvantages:
- Glow intensity fades over time with repeated charge-discharge cycles
- Requires thorough surface preparation — difficult for older, damaged concrete
- UV reactive and glow pigments increase material costs significantly
- DIY application carries risk of uneven glow distribution if pigment broadcast is not uniform
- Requires full room darkness to appreciate the glow effect fully
Maintenance Tips for Long-Lasting Results
A well-installed glow in the dark epoxy floor is low maintenance but does benefit from consistent care. Clean the floor with a pH-neutral cleaner and avoid harsh chemicals like bleach or ammonia, which can degrade the topcoat over time.
Avoid dragging heavy sharp objects across the surface to prevent topcoat scratches that reduce glow visibility. Recoating with a fresh clear topcoat every 5 to 7 years restores the floor’s sheen and provides renewed protection for the pigment layer beneath.
Frequently Asked Questions
Does a glow in the dark epoxy floor work in fully enclosed basements with no sunlight?
Yes, standard indoor LED or fluorescent lighting charges the photoluminescent pigments effectively. Natural sunlight is not required for the glow to activate.
How long do glow in the dark epoxy floors last?
The epoxy coating itself lasts 10–20 years with proper care. The glow pigments maintain strong output for approximately 10–15 years, after which glow intensity gradually diminishes but does not disappear entirely.
Is a glow in the dark epoxy floor safe for children and pets?
Yes. Modern photoluminescent pigments are non-toxic, non-radioactive, and completely safe once the epoxy is fully cured. Strontium aluminate, the most common pigment, is approved for residential use.
Can I install glow epoxy over existing tiles or vinyl?
It is not recommended. Epoxy bonds best to properly prepared bare concrete. Existing coatings should be removed for maximum adhesion and long-term durability.
Can the glow pattern be customized?
Absolutely. You can create logos, arrows, borders, or decorative patterns by taping off sections and broadcasting pigment only in selected areas for a fully custom design.
Conclusion
A glow in the dark epoxy floor is a smart investment for anyone who wants to combine industrial-grade durability with a truly distinctive, functional aesthetic. From garages to commercial entertainment spaces, the versatility of this flooring system is hard to match. The key to success lies in proper surface preparation, using quality photoluminescent pigments, and applying a durable topcoat that protects the investment long-term.
Whether you choose a DIY approach or hire a professional contractor, the result is a floor that performs reliably during the day and transforms dramatically after dark — an effect that never gets old.
Related Articles
Should You Paint the Walls Before Staining Stairs? What Pros Recommend
Average Door Thickness: A Complete Guide to Standard Sizes and Measuring Tips
Roof Repairs Worcester: Your Complete Local Guide to a Safe and Lasting Roof
Can You Use Ceiling Paint on Walls? The Surprising Benefits and Drawbacks