
If you have ever stood on a ladder holding a drill and wondered exactly where to put screws on a metal roof, you are not alone. This is one of the most common questions among first-time DIYers and even some new roofing crews, because metal roofing does not behave like shingles.
A single misplaced screw can turn into a slow, hidden leak that shows up months later as a water stain on the ceiling. The good news is that once you understand the basic anatomy of a metal panel and the logic behind screw placement, the process becomes simple and repeatable.
This guide walks through every part of the process in plain language, from the structure of the panels themselves to spacing charts, screw types, step-by-step installation, and the mistakes that cause the most callbacks for professional installers. By the end, you will know precisely where to put screws on a metal roof and why each rule exists.
Why Screw Placement Matters on Metal Roofs
Screw placement is not just a matter of preference; it directly affects three things: leak prevention, structural strength, and how long the roof lasts.
Metal roofing sheds water differently than asphalt shingles. Instead of layers that overlap and trap moisture below the surface, a metal panel relies on its raised ribs to channel water down and off the roof. If a screw is placed in the wrong spot, water can pool around it and slowly work its way through the hole, even if the screw itself is tight. Over years of freeze-thaw cycles, wind pressure, and thermal expansion, a poorly placed screw becomes a weak point that eventually fails.
Structural integrity is the second reason placement matters. Screws are what tie the panel to the purlins or rafters underneath, and in high-wind regions, uplift forces try to peel panels away from the frame. Screws placed too far apart, or in the wrong pattern, reduce the roof’s ability to resist that uplift.
Finally, correct placement affects longevity. A well-installed metal roof can last 40 to 70 years, but that lifespan assumes the fasteners were installed correctly from day one. Poor placement shortens that lifespan dramatically, sometimes cutting it down to a decade or less before major repairs are needed.
Understanding Metal Roof Panel Anatomy
Before getting into exact screw locations, it helps to understand the parts of a metal panel, since every placement rule refers back to this structure.
Ribs (Raised Sections)
The ribs are the raised, arched, or trapezoidal sections that run the length of the panel. They are the highest points of the panel profile and are designed to stay above the water line during rain or snowmelt.
Flats or Valleys
Between the ribs sit the flats, sometimes called valleys or pans. This is the lowest part of the panel profile, and it is where water naturally collects and flows toward the eaves.
Side Laps and Overlaps
Metal panels are installed side by side, and each panel overlaps its neighbor slightly. This overlapping edge is called the side lap, and it needs its own fastening pattern separate from the main field of the roof.
Purlins or Rafters
Underneath the metal panels are the structural framing members, either purlins (on metal-framed buildings) or rafters (on wood-framed homes). Every screw needs to land in solid framing, not just in the panel or the sheathing alone.
General Rule — Screw Through the Ribs, Not the Flats
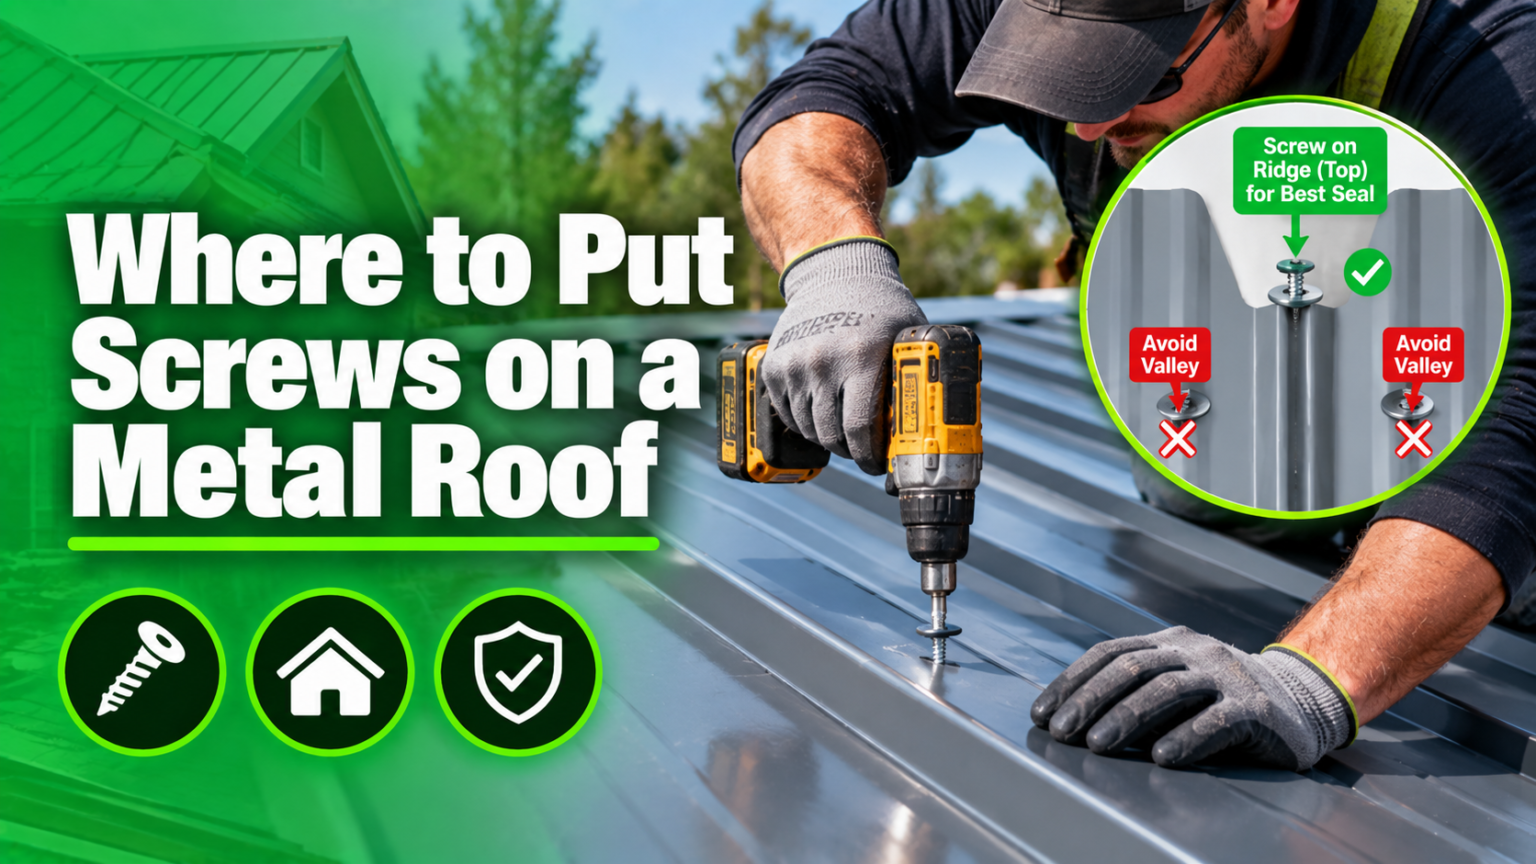
The single most important rule, and the direct answer to where to put screws on a metal roof, is this: screws go through the ribs, never through the flats or valleys.
The reasoning is straightforward. Ribs sit above the water flow line, so a screw placed there stays dry most of the time, and any water that does reach it drains away quickly. Flats, on the other hand, are exactly where water travels and pools during heavy rain. A screw placed in a flat is sitting directly in the path of moving or standing water, and even a tiny gap around the washer will eventually let water seep through.
This is one of the most common mistakes made by inexperienced installers, and it is also one of the leading causes of “mystery leaks” that show up years after installation.
Correct Screw Placement on Flat Areas of Panels
While the main rule is “ribs, not flats,” the exact spacing pattern along the flat field of the roof (meaning the open area between the side laps, not the vertical valleys of the panel itself) still needs to follow a defined interval.
Most manufacturers recommend the following general spacing, though the exact numbers vary by panel profile and local wind/snow load codes:
| Roof Area | Typical Screw Spacing |
|---|---|
| Field of the roof (flat sections between laps) | Every 1–2 ribs, roughly 12–24 inches apart |
| High-wind or coastal zones | Every rib, tighter spacing recommended |
| Low-slope roofs (under 3:12 pitch) | Closer spacing than standard-slope roofs |
Always check the manufacturer’s installation manual, since panel profiles differ and some require a specific fastening pattern printed directly on the product documentation.
Screw Placement at Panel Overlaps (Side Laps)
Where two panels meet side by side, the overlap needs its own row of fasteners, separate from the field screws. This side lap is a common leak point if it is skipped or under-fastened.
The typical recommendation is to place screws every 12 to 24 inches along the side lap, and many installers also add a bead of roofing sealant or butyl tape underneath the overlap before fastening. This combination of mechanical fastening and sealant creates a much more reliable water barrier than screws alone.
Screw Placement at Ridge, Eaves, and End Laps
Three additional zones need their own attention beyond the main field of the roof.
Ridge Cap Screw Placement
The ridge cap, which covers the peak where two roof slopes meet, should be fastened through the ribs of the underlying panels, following the same “ribs, not flats” logic. Ridge caps often need closures or foam fillers underneath to block wind-driven rain from entering at the peak.
Eave/Starter Row Placement
At the eaves (the lowest edge of the roof), the starter row of panels should be fastened securely, since this area experiences the highest concentration of runoff water. Extra attention to sealant and screw tightness here pays off over the life of the roof.
End Lap Overlap Screw Spacing
When one panel ends and another begins vertically (common on long roof runs), the end lap should have a tighter screw spacing than the open field, generally every 6 to 12 inches, along with sealant tape between the layers.
Upslope vs Downslope Screw Direction
Within each rib, there is often a preferred side for screw placement: the upslope side of the rib (the side facing up toward the ridge) rather than the downslope side. Placing the screw slightly upslope means gravity pulls water away from the fastener rather than toward it, adding an extra layer of protection even before the washer seal comes into play.
This detail is small, but it is part of what separates a professional installation from an amateur one, and it directly supports the goal of knowing exactly where to put screws on a metal roof for maximum durability.
Type of Screws to Use
Not all screws are appropriate for metal roofing, and using the wrong type undermines even perfect placement.
- Self-tapping screws are the standard choice, since they cut their own thread into metal panels and, when needed, into light steel framing without requiring a pre-drilled hole.
- Neoprene or rubber washer screws create a compressed seal around the screw shaft, which is what actually stops water from following the shank down into the building. The washer should compress slightly, not squeeze out flat, and not stay loose.
- Screw length should be chosen based on the combined thickness of the panel and whatever it is fastening into, typically extending at least three-quarters of an inch into solid wood framing, or through the full thickness of light steel purlins with a few exposed threads on the other side.
Common Mistakes to Avoid
Even experienced installers can slip into bad habits. The most frequent errors include:
- Screwing into the flats or valleys instead of the ribs, which invites standing water directly onto the fastener.
- Over-tightening, which crushes the rubber washer flat and destroys its ability to seal, effectively creating a tiny funnel straight into the roof.
- Under-tightening, which leaves a gap around the washer and lets wind-driven rain work its way in over time.
- Inconsistent spacing, which weakens the roof’s overall wind resistance and can cause panels to flutter or loosen in storms.
- Skipping sealant at laps, relying on screws alone to seal an overlap that really needs both mechanical fastening and sealant.
Step-by-Step Installation Process
For anyone installing or re-fastening a metal roof, the following sequence keeps the process consistent from start to finish.
Step 1 – Measure and Mark Spacing
Before driving a single screw, mark the spacing pattern along the panel using a chalk line or measuring tape, based on the manufacturer’s recommended interval for the specific panel profile and wind zone.
Step 2 – Pre-Drill If Needed
On thicker steel or when working near panel edges, a small pilot hole can help the self-tapping screw start cleanly and reduce the risk of the panel warping under torque.
Step 3 – Drive Screws at Correct Angle
Screws should be driven straight down, perpendicular to the panel surface, through the rib and into the framing below. Driving at an angle weakens the hold and damages the washer seal.
Step 4 – Check Washer Seal Compression
After each screw is set, look at the rubber washer. It should show a slight, even bulge around the edge, meaning it is compressed enough to seal but not so much that it has split or squeezed out from under the screw head.
Maintenance Tips for Screw Longevity
A metal roof is not entirely maintenance-free, even though it lasts decades longer than shingles. A short annual check extends its life significantly.
- Walk the roof (safely, or use binoculars from the ground) once or twice a year to look for rust streaks near screw heads, which often signal a failing washer.
- Replace any screw that shows rust, a cracked washer, or visible looseness, rather than waiting for a leak to appear inside the building.
- Reseal washers or replace fasteners every 10 to 15 years as part of general upkeep, even if no problems are visible yet, since rubber washers degrade with UV exposure over time.
FAQs
How many screws per metal roof panel? The number varies by panel width and manufacturer specification, but most residential panels use one screw every 12 to 24 inches along the ribs in the field, with tighter spacing at laps, ridges, and eaves.
Can you over-tighten roofing screws? Yes. Over-tightening crushes the rubber washer flat, which destroys its sealing ability and can actually cause a leak rather than prevent one.
What happens if screws are placed in the flat/valley? Water traveling down the roof pools directly around the screw, and over time this leads to leaks, rust, and eventual panel damage, even if the screw itself was installed tightly.
How often should roofing screws be replaced? As a general guideline, plan on inspecting and potentially replacing fasteners every 10 to 15 years, or sooner if rust, looseness, or cracked washers are spotted during an inspection.
Conclusion
Knowing where to put screws on a metal roof comes down to one core principle: fasten through the ribs, never the flats, and follow the manufacturer’s spacing pattern for the field, laps, ridge, and eaves.
Combine that with the right screw type, correct washer compression, and a periodic maintenance check, and a metal roof can comfortably last for decades without leaks.
When in doubt about spacing, wind zone requirements, or panel-specific instructions, it is always worth double-checking the manufacturer’s documentation or consulting a professional roofer before drilling the first hole.
Related Articles
Can You Flush a Toilet Without Power? Full Guide for Outages
How to Program a LiftMaster Garage Door Opener? Full Guide