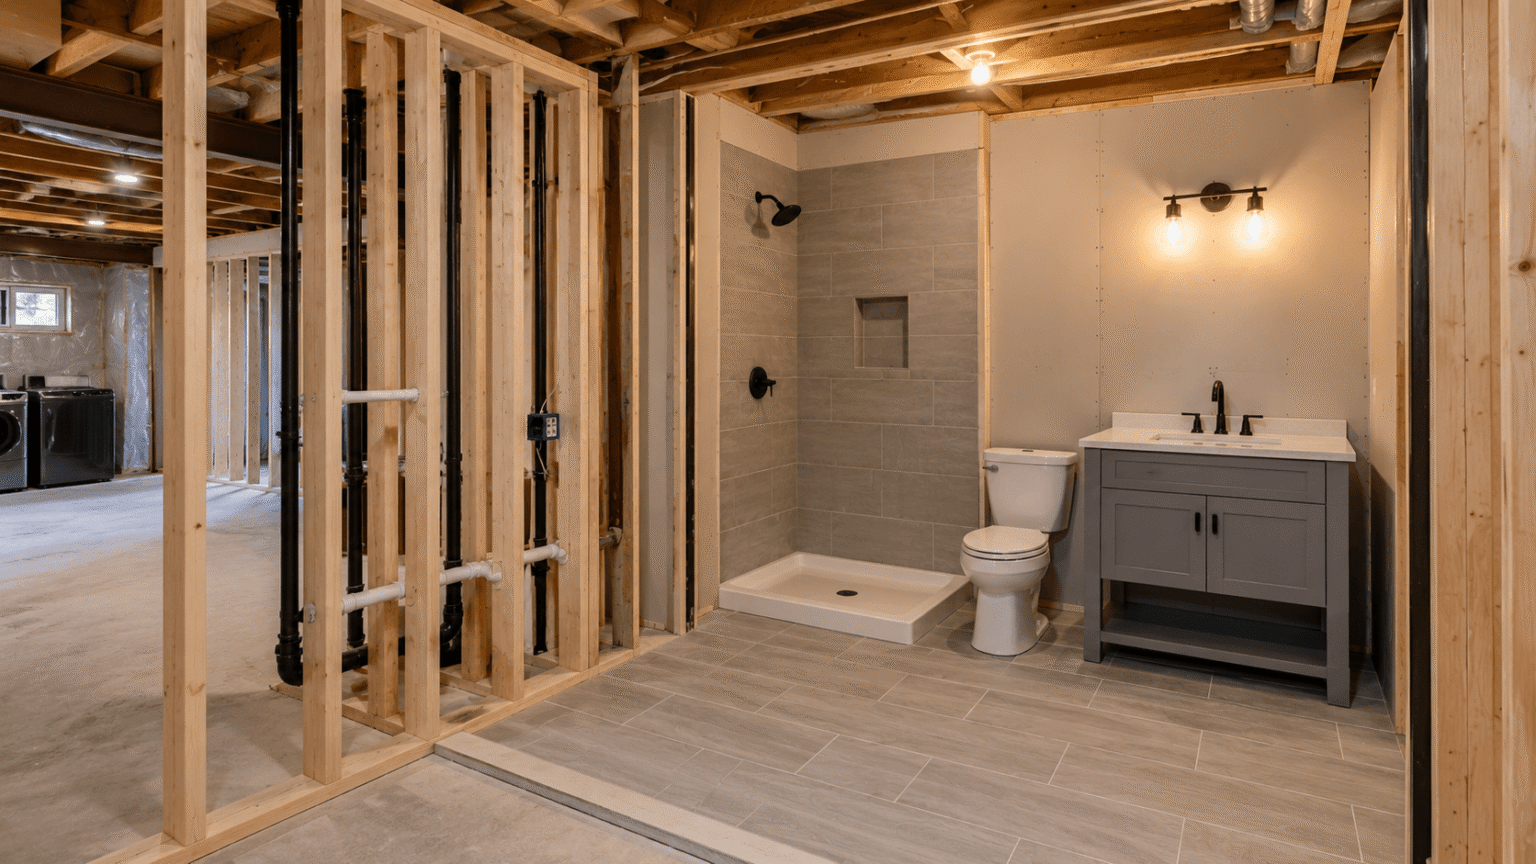

Figuring out how to add a bathroom to a basement comes down to solving one problem first: getting waste to flow up to your home’s main sewer line instead of down. Once you understand your drainage options, the rest of the project — framing, waterproofing, permits, and finishing — follows a predictable sequence.
This guide walks you through the entire process, from choosing a plumbing system to installing the last fixture, so you can plan a basement bathroom that holds up for decades instead of becoming a moisture problem in disguise.
Whether you’re finishing a basement for extra living space, prepping it as a rental unit, or just tired of walking upstairs every time nature calls, this guide covers what the average DIY tutorial leaves out: how to choose between plumbing systems, how to work around low ceilings and joists, realistic cost breakdowns, and a decision framework for what to DIY versus what to hire out.
Why Basement Bathrooms Are Different From Any Other Bathroom
Every other bathroom in your house sits above the main sewer line, so waste drains downhill by gravity. A basement floor slab often sits level with or below that line, which means gravity alone can’t move waste out of the house. That single fact drives almost every decision in this project — which plumbing system you use, how much you’ll spend, and how long the job takes.
The upside is worth the extra complexity. A finished basement bathroom typically returns a large share of its cost at resale, makes the lower level usable as a guest suite or rental unit, and gives a growing household a second (or third) bathroom without an addition. It’s one of the few basement projects that changes how a home actually functions day to day.
Step 1: Choose Your Drainage System
Before you touch a stud or a pipe, decide how wastewater will leave the bathroom. This decision affects your budget, timeline, and how much of the project you can do yourself.
Gravity Drain (If You Already Have a Rough-In)
Some homes are built with a “rough-in” — capped drain, waste, and vent pipes stubbed up through the slab during original construction, specifically for a future basement bathroom. Walk your basement floor and look for capped pipe stubs, usually near a corner or utility area. If you find one, you’re in luck: you can connect a standard toilet, sink, and shower using normal gravity drainage, no pump required.
If no rough-in exists but your basement floor sits high enough above the municipal sewer line, a plumber can still install a gravity-drain system — but it means cutting into the concrete slab to lay new drain pipe, then patching it. This is the most permanent, lowest-maintenance option, and it’s the only route that lets you use a standard toilet without a pump. Budget extra time and money for the concrete work, and expect some noise and dust during that phase.
Sewage Ejector Pump
An ejector system is the standard professional solution when there’s no existing rough-in and gravity drainage isn’t possible. A sealed pit is set into the slab; the toilet, sink, and shower all drain into it, and a submersible pump automatically grinds and pushes the waste up into the home’s main drain line.
Ejector systems handle full bathroom volumes reliably and are a good fit if you’re finishing more than just a half bath — say, a full bath with a tub-shower combo that a household will use daily.
Macerating (Up-Flush) Toilet System
An up-flush system sits entirely above the floor, so there’s no concrete to break. A macerator unit — bolted to the wall behind a rear-discharge toilet — shreds waste and pumps it through a narrow discharge line, often just ¾ to 1½ inches in diameter, up and over to the existing drain stack.
Shower and sink lines still use gravity to reach the macerator, then it does the pumping work for everything. Brands like Saniflo dominate this category. This is the fastest, least disruptive option and the most realistic one for a confident DIYer, since it avoids slab work entirely. The tradeoffs: some operational noise, a motor with a finite lifespan, and a requirement for a dedicated GFCI outlet nearby.
Quick decision guide:
| Your situation | Best system |
|---|---|
| Existing capped rough-in in the slab | Gravity drain |
| No rough-in, want the most permanent setup, budget allows slab work | New gravity drain |
| No rough-in, full bathroom, want a durable pro install | Sewage ejector pump |
| No rough-in, want to avoid breaking concrete, DIY-friendly | Macerating/up-flush system |
Step 2: Check Ceiling Height, Joists, and Layout Before You Commit
This is the step most guides skip — and it’s often the one that determines whether your bathroom plan actually works. Basements are full of obstructions that upstairs bathrooms never deal with: support beams, HVAC ductwork, and joist bays that limit where plumbing and drain lines can run.
- Measure your lowest ceiling point, not just the average. Most building departments require a minimum ceiling height of 7 feet for habitable space, with limited allowances for beams, ducts, and soffits dipping lower. If a support beam runs straight through your planned bathroom footprint, you may need to reroute the layout around it rather than boxing it in and losing headroom.
- Map your ductwork and any existing plumbing stacks. Bathrooms are often planned tight against an existing waste stack to minimize new pipe runs — that’s smart, but only if the stack’s location doesn’t force your ceiling height below code.
- Plan for a shower step-up if you’re using a macerator. Because a macerating shower drain relies on gravity to reach the pump, the shower base typically needs to sit 6 or more inches above the surrounding floor to create enough drop. In a basement with an 8-foot ceiling, this step-up can push your shower ceiling height into a gray area — measure before you frame.
- Keep the bathroom footprint efficient. A half bath needs as little as 15–18 square feet; a full bath with a shower is comfortable starting around 35–40 square feet. Wall-hung or compact-elongated toilets, floating vanities, and corner shower units all help a basement bathroom feel bigger than its actual square footage.
Step 3: Pull Your Permits First
Every basement bathroom addition requires permits — plumbing, electrical, and framing all need inspection in virtually every U.S. jurisdiction. This isn’t optional paperwork you can skip and clean up later. Unpermitted bathroom work is a red flag on a home inspection, can complicate an insurance claim if something leaks, and may need to be torn out and redone at resale.
Before you start demolition or framing, confirm these items with your local building department:
- Ceiling height minimums (typically 7 feet for habitable space)
- Mechanical ventilation requirements — an exhaust fan vented directly to the exterior is required by code; venting into an attic or wall cavity is not allowed
- GFCI protection on every outlet within 6 feet of a water source
- Egress requirements if the bathroom is part of a bedroom suite (the bedroom needs a code-compliant egress window)
- Drain venting rules, including whether your jurisdiction allows air admittance valves (AAVs) as an alternative to running a vent pipe through the roof
Expect permit costs in the range of a few hundred dollars, plus one to three weeks of lead time for approval before work can start. Factor that into your project timeline now, not after your contractor is already on-site.
Step 4: Waterproof Before You Frame
A basement bathroom adds a steady source of moisture — steam, standing water, humidity — to a space that’s already prone to dampness. Skipping waterproofing prep is the single most expensive mistake homeowners make on this project, because moisture trapped behind tile or drywall can rot the framing and grow mold long before you notice a problem.
Handle these items before any framing goes up:
- Resolve any existing water intrusion. If your basement has ever shown signs of seepage, efflorescence, or dampness, get it corrected before you build anything on top of it.
- Seal any active foundation cracks so you’re not tiling or drywalling over a future leak path.
- Apply a vapor barrier to the walls and floor of the bathroom footprint before framing.
- Use cement board or a waterproof foam tile backer (not standard or even moisture-resistant drywall) on any wall that will be tiled in the shower or tub surround. Waterproof foam board systems have become a popular alternative to traditional cement board because they’re lighter, easier to cut, and pair with a taped, waterproofed seam system.
- Spec mold-resistant drywall for the non-wet walls and ceiling.
- Choose 100% waterproof flooring — tile or luxury vinyl plank (LVP). Skip carpet and sheet vinyl with exposed seams; both trap moisture in a below-grade room.
Step 5: Build the Bathroom — The Actual Construction Sequence
With drainage decided, layout confirmed, permits pulled, and waterproofing planned, here’s the order the physical build happens in:
- Frame the walls. Lay out the bathroom footprint based on your drain location (existing rough-in, planned ejector pit, or macerator placement). Non-load-bearing partition walls are a reasonable DIY task if you’re comfortable with basic carpentry.
- Rough in plumbing and electrical. This is where a licensed plumber and electrician should take over, even on an otherwise DIY project. They’ll set the toilet flange or macerator, run supply lines, install the ejector pit if applicable, and wire a dedicated GFCI circuit plus the exhaust fan.
- Install the shower step-up or pit, if needed. For macerator systems, this means building a platform with enough drop for the P-trap and drain slope toward the pump — usually a minimum 6-inch rise. For ejector systems, this is when the pit is set into the slab.
- Install subfloor. A raised, insulated subfloor panel system (interlocking moisture-barrier panels are a popular choice) lifts your finish floor off the cold concrete and adds a layer of protection against minor slab moisture.
- Hang cement board or waterproof tile backer around the shower/tub area, taping and sealing every seam and screw hole per the manufacturer’s system.
- Hang and finish drywall on the remaining walls and ceiling using mold-resistant board.
- Tile the shower/tub surround and floor, or install a prefabricated shower base and surround kit if you want a faster, more forgiving install for a first-time tiler.
- Paint, install flooring, and add trim.
- Set the vanity and toilet, connecting to the capped supply lines and drain.
- Install the shower door or curtain, fixtures, and final touches — light fixtures, towel bar, mirror, exhaust fan cover.
DIY vs. Hiring a Professional
Plumbing and electrical work should go to licensed professionals — full stop. These are the two trades that require permits and inspections, and the cost of getting them wrong (a sewage backup, a shorted circuit near a water source) is far higher than any labor savings. A below-grade plumbing failure can mean mold remediation and structural drying that dwarfs what you’d have paid a licensed pro in the first place.
Where DIY makes sense: framing non-load-bearing walls, hanging and taping drywall, running cement board, tiling if you have some experience (or are willing to accept an imperfect first attempt), painting, and installing finish fixtures like the vanity, mirror, and towel bar once the rough-in has passed inspection. A hybrid approach — licensed trades for anything behind the walls, DIY for everything visible — is how most homeowners strike the best balance between cost control and code compliance.
Ventilation: Don’t Treat It as an Afterthought
A below-grade bathroom has no natural airflow, which makes mechanical ventilation a code requirement, not a nice-to-have. Size your exhaust fan using roughly 1 CFM (cubic feet per minute) per square foot of bathroom area, with 50 CFM as a practical floor even for a small half bath.
Route the duct through the rim joist to the exterior — never into the attic or an enclosed wall cavity, which just relocates the moisture problem instead of solving it. A fan with a built-in humidity sensor or timer is worth the small upcharge, since it keeps running after you leave the room instead of stopping the moment you flip the switch off.
Frequently Asked Questions
Do I need to break the concrete floor to add a basement bathroom? Not necessarily. If your home has an existing plumbing rough-in under the slab, you can connect to it with no concrete work at all. If there’s no rough-in and you want a standard gravity-drain toilet, then yes, the slab needs to be cut and patched. The alternative is a macerating/up-flush system, which sits above the floor and avoids slab work entirely, at the cost of some operating noise and a pump that will eventually need replacing.
How much does it typically cost to add a bathroom to a basement? Costs vary widely by region, bathroom size, and plumbing system, but a half bath (toilet and sink only) is generally the least expensive option, while a full bath with a tub or walk-in shower costs considerably more due to tile work, a larger fixture package, and additional plumbing runs. Getting itemized quotes from at least two or three licensed plumbers and contractors in your area is the most reliable way to nail down a number for your specific project.
Do I need a permit to add a bathroom in my basement? Yes, in virtually every U.S. jurisdiction. Plumbing, electrical, and framing work all require permits and inspections. Skipping this step creates real problems at resale and can affect insurance coverage if a plumbing issue ever causes damage. Confirm requirements with your local building department before any work begins.
What’s the best toilet option if my basement floor is below the sewer line? A macerating toilet is usually the simplest choice, since it avoids breaking the slab and can be installed almost anywhere power and a drain stack are accessible. If you have an existing rough-in or are willing to do gravity-drain slab work, a standard toilet works fine — consider a compact-elongated or wall-hung model if floor space is tight.
Can I do the whole project myself? Parts of it, yes — framing, drywall, tile, and finish work are all realistic DIY tasks for a reasonably handy homeowner. Plumbing and electrical rough-in should go to licensed professionals, both because most jurisdictions require it for permit sign-off and because the consequences of a mistake in a below-grade bathroom are severe.
How long does the whole project take? A straightforward half bath using an existing rough-in can often be finished in one to two weeks. A full bath requiring new plumbing, an ejector pit, or slab work typically runs four to eight weeks once permits are approved, with permit approval itself adding another one to three weeks before construction even starts. Custom tile and specialty fixtures can add further lead time, so order early if your design calls for them.
Final Thoughts
Adding a bathroom to a basement is a bigger project than it first appears, but it’s a manageable one once you break it into the right order: pick your drainage system, confirm your ceiling height and layout will actually work, pull your permits, waterproof before you frame, and bring in licensed trades for the plumbing and electrical rough-in. Skip any one of those steps and you risk a bathroom that looks finished but causes problems — moisture, code violations, or a failed inspection — within a few years.
If you’re planning your own basement bathroom, start by walking your basement floor to check for an existing rough-in, then call two or three licensed plumbers for quotes based on your specific drainage situation. That single call will tell you more about your real budget and timeline than any general guide can.
Related Articles
How to Install a Ceiling Medallion: Complete Step-by-Step Guide (2026)
How to Make the Basement Warmer: 8 Proven Fixes for a Cozy Space
How to Make the Basement Warmer: 8 Proven Fixes for a Cozy Space