
Engineered hardwood floors are popular for their durability and realistic wood appearance, but many homeowners wonder if they can be refinished like solid hardwood. The answer is yes, but only under certain conditions. This guide explains how to determine if your floor is a good candidate and walks through the refinishing process step by step.
Understanding Engineered Hardwood Construction
Engineered hardwood is made of multiple layers, with a real wood veneer on top and plywood or fiberboard underneath. This construction affects how many times, if any, the floor can be sanded and refinished. Knowing the structure of your floor is the first step before starting any refinishing project.
What the Wear Layer Means for Refinishing
The wear layer is the top veneer of real wood that sits above the core layers, and its thickness determines how much sanding the floor can handle. A thicker wear layer, usually around two to six millimeters, allows for one or more refinishing sessions over the floor’s lifetime. Thinner wear layers, common in budget-friendly engineered floors, may not survive even a single light sanding. Checking this measurement early prevents accidentally ruining the floor during refinishing.
How to Check Your Floor’s Wear Layer Thickness
Manufacturers often list the wear layer thickness in product documentation or on the original packaging, which is the easiest way to check. If that information isn’t available, a small area near a vent or closet edge can be examined by removing a floor vent cover or looking at the exposed edge. Measuring with a small ruler or caliper gives an accurate idea of how much real wood is present. This step is essential before deciding whether refinishing is a safe option.
When Refinishing Engineered Hardwood Is Possible
Not every engineered floor can be refinished, so understanding the right conditions helps avoid costly mistakes. Certain wear layer thicknesses and floor conditions make refinishing more practical than others. This section explains when refinishing makes sense.
Ideal Wear Layer Thickness for Sanding
Floors with a wear layer of three millimeters or more are generally considered good candidates for a light sanding and refinish. This thickness allows for the removal of surface scratches and old finish without sanding through to the core layers. Anything below two millimeters is usually too risky to sand, as even a light pass can expose the plywood underneath. Confirming this thickness gives a clear answer to whether refinishing is realistic for your floor.
Signs Your Floor May Not Be Suitable
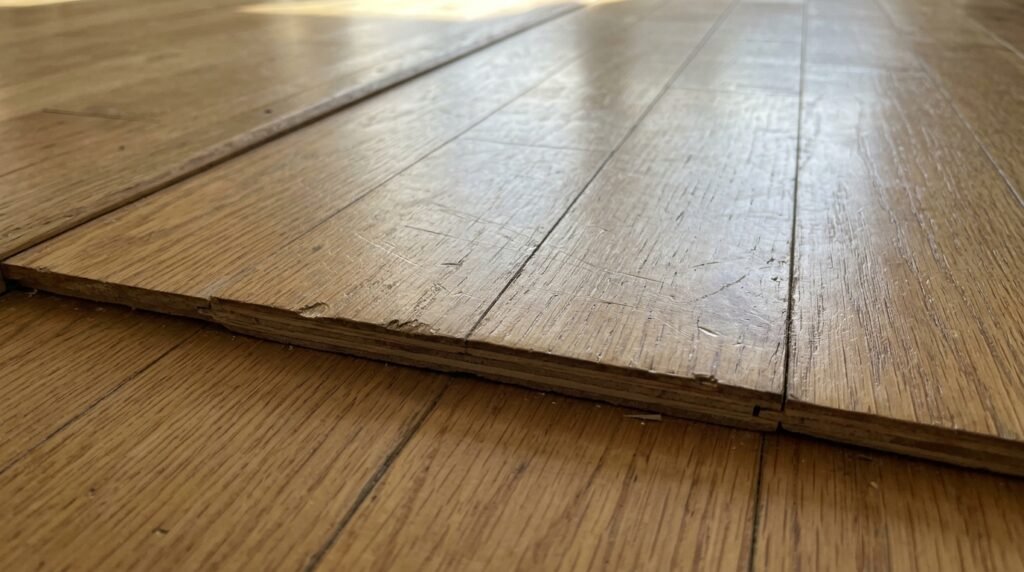
If the floor already shows signs of previous refinishing, such as a slightly thinner appearance near seams, it may not handle another round of sanding. Visible plywood layers at the edges or in worn spots are a clear indicator that refinishing is no longer an option. Floors with deep water damage or warping are also poor candidates, since sanding won’t fix structural issues. Recognizing these warning signs early saves time and prevents further damage.
Steps to Refinish Engineered Hardwood Floors
Once you’ve confirmed your floor is suitable for refinishing, following the right process ensures a smooth result. Skipping steps or rushing through sanding can lead to uneven finishes or damage. This section covers the refinishing process in detail.
Preparing the Room and Floor Surface
Before sanding begins, all furniture, rugs, and floor vents should be removed from the room to allow full access to the surface. The floor should be swept and vacuumed thoroughly to remove dust and debris that could interfere with sanding. Any protruding nails or staples should be checked and fixed to avoid damaging sanding equipment. Proper preparation makes the rest of the process much smoother.
Light Sanding Techniques for Thin Veneers
Because engineered floors have a limited wear layer, a light touch with fine-grit sandpaper is essential rather than aggressive sanding used on solid hardwood. A random orbital sander with 120 to 150 grit paper is often recommended to avoid removing too much material. Sanding should be done evenly across the entire floor to prevent uneven color or texture after refinishing. Taking this careful approach protects the thin veneer from being sanded through.
Applying Stain and Finish Coats
After sanding, the floor should be cleaned of all dust before applying stain, if desired, followed by a protective finish coat. Water-based finishes are often preferred for engineered floors since they dry faster and have less odor than oil-based options. Applying thin, even coats and allowing proper drying time between layers results in a smoother, more durable finish. Rushing this step often leads to a tacky or uneven surface that requires additional work.
Comparison: Refinishing Engineered vs Solid Hardwood
Understanding the differences between refinishing engineered and solid hardwood floors helps set realistic expectations. The table below highlights the main distinctions.
| Factor | Engineered Hardwood | Solid Hardwood |
| Wear layer thickness | Limited, 0.6mm to 6mm | Solid wood throughout |
| Number of refinishes | Usually 1 to 2 times max | Multiple times over decades |
| Sanding approach | Light, careful sanding required | Can handle deeper sanding |
| Risk of damage | Higher due to thin veneer | Lower due to thicker material |
| Best finish type | Water-based, thin coats | Oil-based or water-based |
Alternatives to Full Refinishing
If your engineered floor’s wear layer is too thin for sanding, there are still ways to improve its appearance without full refinishing. These methods focus on surface-level restoration rather than sanding down to bare wood. This section explores those alternatives.
Screening and Recoating the Surface
Screening involves lightly buffing the existing finish without removing the wood veneer, followed by applying a fresh coat of finish on top. This method works well for floors with minor scuffs or dullness but no deep scratches or discoloration. It’s a much safer option for thin veneer floors since it doesn’t risk sanding through to the core. Recoating can extend the floor’s appearance for several more years without the risks of full sanding.
Using Floor Restoration Products
Certain floor restoration products, such as polish or rejuvenating treatments, can temporarily improve shine and hide minor imperfections. These products are best suited for floors that aren’t showing deep damage but simply look worn or faded. While not a permanent fix, they offer a low-risk way to refresh the floor’s appearance between deeper restoration projects. Always test these products in a small area first to check compatibility with your floor’s finish.
Conclusion
So, can you refinish engineered hardwood floors? The answer depends largely on the thickness of the wear layer and the current condition of the floor. Floors with a thicker veneer can typically handle one or two light sandings, while thinner veneers are better suited to screening or recoating instead. Checking your floor’s specifications before starting any project prevents costly mistakes and helps you choose the safest restoration method. With the right approach, engineered hardwood floors can look refreshed and last for many more years.
FAQs
How many times can engineered hardwood be refinished?
Most engineered floors can be refinished once or twice, depending on the wear layer thickness.
Is it risky to sand engineered hardwood floors?
Yes, sanding carries some risk since too much sanding can expose the plywood core underneath the veneer.
What is the difference between screening and refinishing?
Screening buffs the existing finish without removing wood, while refinishing involves sanding down to bare wood before applying a new finish.
Can a professional check if my floor is refinishable?
Yes, a flooring professional can measure the wear layer and inspect the floor’s condition before recommending a refinishing plan.
Related Articles
How to Get Rid of Stucco Ceilings?
How to Program Genie Garage Door Opener Complete Guide 2026
Rub-on Transfers for Furniture: Transform Your Decor with Ease
24 Inch Kitchen Sink Drop In Complete Guide: Types, Benefits, Installation
How to Measure Room for Furniture: Step-by-Step Guide for Perfect Fit