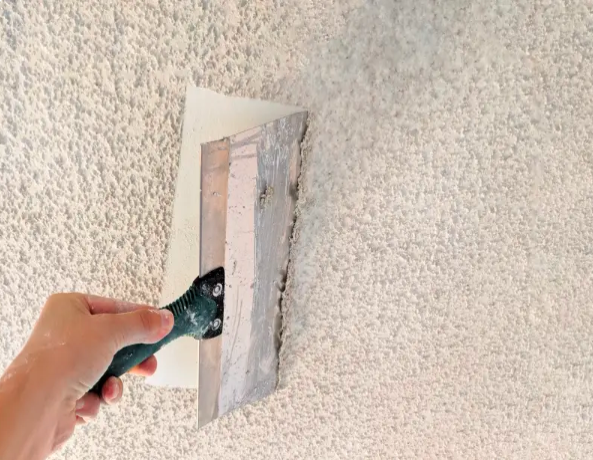

Stucco ceilings are rough, textured surfaces that were hugely popular in mid-century homes for hiding imperfections and reducing noise on a budget.
Over time, they’ve become a design headache — collecting dust, resisting paint, and making spaces feel outdated. Today, homeowners across the country are eager to swap them out for clean, modern finishes.
In this guide, we’ll cover How to Prepare Your Room the Right Way, DIY vs. Hiring a Professional — How to Decide, and How to Patch, Sand, and Repair After Removal to help you get the job done right.
Tools and Materials You Actually Need

The right protective gear, the right tools, and the right materials to take your stucco ceiling from rough and outdated to smooth and modern without unnecessary setbacks or surprises along the way.
Respirator Mask (N95 or Higher)
A regular dust mask simply won’t cut it when you’re dealing with stucco removal. An N95 respirator or higher filters out the fine particles and debris that become airborne during scraping, protecting your lungs from prolonged exposure to harmful dust that can cause serious respiratory issues over time.
Safety Goggles
Chunks of wet stucco and fine debris will fall directly toward your face as you scrape overhead, making eye protection non-negotiable.
Choose goggles that seal fully around your eyes rather than standard glasses, as they offer complete coverage and prevent particles from sneaking in through the sides.
Disposable Coveralls
Stucco dust clings to everything, and your regular clothing will carry it through the rest of your home the moment you step out of the room. Disposable coveralls create a full-body barrier that you can simply peel off and throw away when the job is done, keeping contamination contained.
Rubber Gloves
Prolonged contact with wet joint compound, plaster, and chemical primers can dry out and irritate your skin significantly. A sturdy pair of rubber gloves protects your hands throughout the removal and repair process, giving you a better grip on tools while keeping your skin safe from harsh materials.
Garden Sprayer or Spray Bottle
Water is your best friend during stucco removal. Lightly misting the ceiling before scraping softens the texture, reduces the amount of airborne dust produced, and makes the material come off far more cleanly and easily without gouging the drywall beneath.
Wide Plastic Scraper or Drywall Knife
This is your primary weapon for the job. A wide plastic scraper or a 6 to 8 inch drywall knife gives you the leverage and surface coverage needed to remove stucco efficiently without constantly digging into or damaging the delicate drywall layer underneath.
Ladder
Since you’ll be working directly overhead for extended periods, a sturdy and stable ladder is essential for both reach and safety. Choose a ladder that places you close enough to the ceiling to work comfortably without overstretching, which can throw off your balance and lead to accidents.
Heavy-Duty Plastic Sheeting
Stucco debris falls fast and spreads everywhere, so covering your floors, furniture, and walls with heavy-duty plastic sheeting before you begin is absolutely essential. It dramatically cuts down on cleanup time and prevents wet stucco from staining carpets, hardwood floors, or anything else left uncovered in the room.
Joint Compound (Mud)
Once the stucco is off, the ceiling will likely have gouges, uneven patches, and imperfections that need to be filled and smoothed. Joint compound, commonly called mud, is the go-to material for skim coating and patching the ceiling surface to create the clean, flat finish you’re working toward.
Sanding Block or Pole Sander
After your joint compound dries, sanding is what transforms a rough, patchy surface into a truly smooth ceiling. A pole sander is especially valuable here because it lets you sand large areas while standing on the ground, saving your arms and making the process significantly faster and more consistent.
Drywall Tape
Wherever you find cracks, seams, or damaged areas in the drywall after stucco removal, drywall tape reinforces those weak spots before you apply joint compound. Skipping this step often leads to visible cracks reappearing through your fresh finish after just a few months, undoing all your hard work.
Primer
Never skip priming before painting your newly smoothed ceiling. A quality primer seals the joint compound, evens out surface porosity, and ensures your topcoat of paint adheres properly and looks uniform — without it, you risk blotchy, uneven results that will require multiple extra coats of paint to cover.
Shop Vacuum with HEPA Filter
A standard vacuum will simply blow fine stucco dust right back into the air, making the problem worse. A shop vacuum equipped with a HEPA filter captures even the tiniest particles throughout the process, keeping your workspace manageable and preventing dust from migrating into other areas of your home.
How to Prepare Your Room the Right Way?
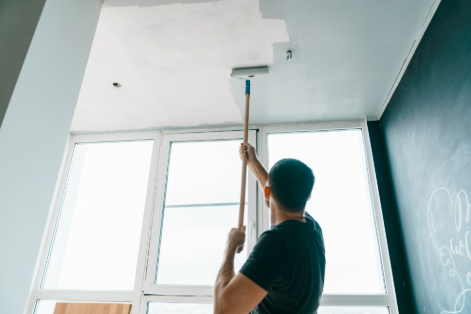
Proper preparation is what separates a smooth stucco removal from a costly, messy disaster. Before any scraping begins, setting up your room correctly saves you hours of cleanup and protects everything in it — let’s break down exactly how to do it.
Clear the Room Completely
Remove every piece of furniture, décor, and movable item from the room before anything else. Even items pushed to the center and covered will collect fine dust that works its way through plastic, so getting everything fully out is always the smarter move.
Cover the Floors with Heavy-Duty Plastic Sheeting
Lay thick plastic sheeting across the entire floor and tape the edges securely to the baseboards to prevent wet stucco from seeping underneath. Stucco debris is heavy and wet, and without proper floor protection it will stain hardwood, grout into tile, and mat permanently into carpet fibers.
Seal the Doorways
Use painter’s tape and plastic sheeting to completely seal every doorway and air vent in the room during the project. Stucco dust is extremely fine and travels fast, and an unsealed doorway can spread debris throughout your entire home within minutes of starting.
Turn Off Electricity and Cover Light Fixtures
Switch off the electricity to the room at the breaker box and cover all light fixtures, fans, and outlets with plastic and tape before you begin. Water is used heavily during stucco removal, and any contact between moisture and live electrical components creates a serious and immediate safety hazard.
Remove or Cover the Walls
Take down any wall hangings, switch plates, and outlet covers, then tape plastic sheeting along the walls from ceiling to floor. Falling stucco chunks can scuff, dent, and stain painted walls, and protecting them now means you won’t be dealing with additional repairs once the ceiling work is done.
How to Patch, Sand and Repair After Removal
Once the stucco is gone, the ceiling will reveal gouges, cracks, and torn drywall that need proper attention before paint. Here is exactly what to do:
Address Imperfections First
- Walk the entire ceiling and mark every gouge, crack, and torn drywall paper before touching anything else
- Fill each imperfection with joint compound, slightly overfilling to account for shrinkage as it dries
- Reinforce any torn or bubbled drywall areas with drywall tape embedded in a thin layer of compound before filling over it
Skim Coat the Entire Ceiling for a Uniform Look
- Apply a thin, even layer of joint compound across the entire ceiling in long overlapping strokes using a wide drywall knife
- Hold a work light at a low angle once dry to spot any remaining ridges or uneven areas that need a second pass
- Feather the edges of any second coat carefully so it blends seamlessly into the surrounding dried compound
Priming and Painting for a Smooth Modern Finish
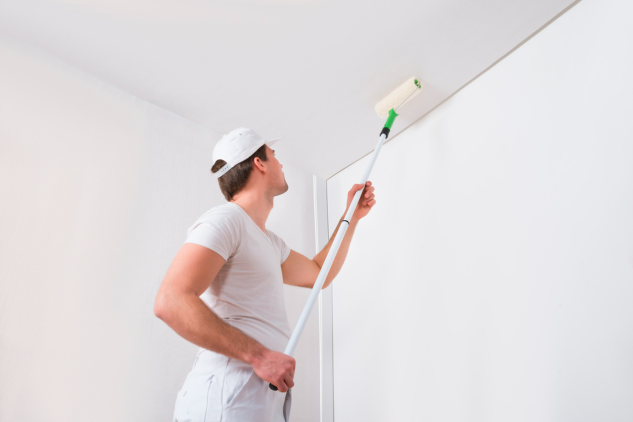
Priming and painting is the final step that pulls everything together and delivers the clean, modern ceiling you have been working toward — but only if the right products are applied the right way.
Applying a Dedicated Primer on a Sanded Smooth Surface
Always wipe the ceiling clean with a microfiber cloth before priming and use a dedicated drywall primer rather than an all-in-one product, as it seals fresh joint compound far more effectively. Once dry, lightly spot-sand any rough patches the primer may have raised before moving on to paint.
Using High-Quality Paint with Conditioners
Choose a premium ceiling paint with built-in conditioners, as they slow drying time and allow the paint to self-level before setting, eliminating brush marks and roller texture that cheaper paints leave behind. Always stir thoroughly rather than shaking the can to avoid introducing air bubbles onto your freshly primed surface.
Applying Thin, Even Coats to Avoid Brush Marks or Roller Texture
Apply paint in long, slow, overlapping strokes with a moderately loaded roller — never heavy — to avoid ridges and uneven buildup that dry into a textured finish. Always apply two thin coats rather than one thick one, letting each dry fully in between, as thin coats level out beautifully while thick ones sag and streak.
Safety, Dust Control and What Professionals Do Differently
Stucco removal comes with real health risks and mess that demand proper planning from the very start. Here is what separates a safe, professional approach from a costly DIY mistake:
Safety First
- Always wear an N95 respirator or higher, safety goggles, disposable coveralls, and rubber gloves before any scraping begins
- Switch off electricity at the breaker box and cover all outlets, fixtures, and vents before introducing any moisture to the ceiling
- Never skip asbestos testing on pre-1980 ceilings — one wrong move with asbestos-containing material carries serious and permanent health consequences
Dust Control Throughout the Process
- Seal every doorway and air vent with plastic sheeting and tape before starting to prevent fine dust from spreading through the entire home
- Keep a shop vacuum with a HEPA filter running continuously during scraping to capture airborne particles before they settle across the room
- Mist the ceiling consistently throughout the process as moisture is the single most effective way to keep stucco dust from becoming airborne
What Professionals Do Differently
- Professionals set up fully sealed work zones with negative air pressure to ensure dust flows out of the space rather than spreading through the home
- They run industrial-grade HEPA air scrubbers continuously throughout the job rather than relying on a single shop vacuum alone
- The discipline to never cut corners on environment control and air quality protection is what consistently separates a professional finish from an amateur result
DIY vs Hiring a Professional — How to Decide
Deciding whether to tackle stucco removal yourself or hire a professional comes down to four honest questions — how safe is the project, how complex is the ceiling, what is your budget, and how much time can you realistically commit.
If asbestos is present, the ceiling is heavily damaged, or the room is large and complicated, the risk and complexity alone make professional hiring the smarter and safer financial decisions.
On the other hand, if the ceiling is asbestos-free, the damage is minimal, and you have the time and patience to do it right, DIY is absolutely achievable and can save you a significant amount of money in labor costs.
Common Mistakes Homeowners Make
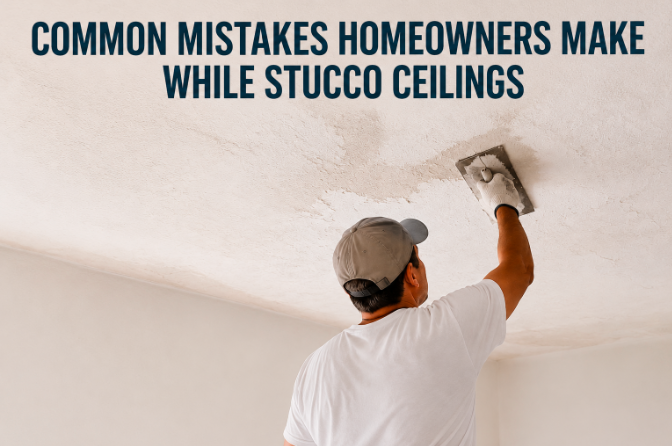
Most homeowners make the same preventable mistakes that quietly turn into costly repairs over time. Here are the three most common ones you need to stop overlooking right now.
Skipping Routine Roof Inspections
Most homeowners never schedule a roof inspection until visible damage forces their hand, by which point the underlying problem has already been spreading for months.
A basic annual inspection catches cracked shingles, failing flashing, and weakened seals early enough to fix them cheaply before they escalate into repairs that cost thousands of dollars.
Ignoring Small Water Leaks
A small ceiling stain or occasional drip is never as harmless as it appears — moisture is already spreading through your structure long before you notice it.
Ignoring even the smallest leak allows it to silently destroy surrounding drywall, insulation, and framing, turning a minor fix into a costly structural repair that could have been avoided entirely.
Neglecting to Clean Gutters
A small ceiling stain or occasional drip is never harmless — by the time you notice it, moisture is already spreading silently through your drywall, insulation, and framing. Addressing a leak the moment it appears is always far cheaper than dealing with the full structural damage it causes when left ignored.
Frequently Asked Questions
How long does the entire stucco ceiling removal process take from start to finish?
The timeline depends heavily on the size of the room and the method you choose, but most average-sized rooms take anywhere from one to three days when you factor in prep, removal, patching, drying time between coats, and final painting.
Will removing a stucco ceiling increase my home’s resale value?
Yes, in most cases it does — modern buyers strongly prefer smooth ceilings, and removing dated stucco texture is widely considered a worthwhile cosmetic upgrade that makes spaces feel cleaner, larger, and more updated to current design standards.
Can I remove a stucco ceiling in a room that has recessed lighting or ceiling fans already installed?
Yes, but all electrical fixtures must be fully switched off at the breaker, carefully removed or covered before work begins, and reinstalled only after the ceiling is completely dry, patched, primed, and painted.
What happens if my drywall gets too wet during the removal process?
Over-saturating the ceiling causes the drywall paper to separate, bubble, and tear, which significantly increases the repair work needed afterward — always mist lightly in small sections rather than soaking large areas all at once.
Is stucco ceiling removal a good idea in humid climates or older homes?
In high-humidity environments or older homes with moisture issues, removing stucco without first addressing the underlying cause can expose water-damaged drywall that requires full replacement rather than simple patching and repair.
How do I dispose of stucco debris safely and legally after removal?
Non-asbestos stucco debris can generally be bagged in heavy-duty contractor bags and disposed of with regular construction waste, but asbestos-containing material must be handled and disposed of exclusively by a licensed abatement professional following local regulations.
How soon after stucco removal can I paint the ceiling?
You should never paint until all joint compound layers are completely dry, the surface has been fully sanded, and a coat of drywall primer has been applied and cured — rushing to paint over damp compound is one of the most common reasons finished ceilings crack, peel, and bubble within weeks.
Conclusion
Removing a stucco ceiling is one of the most rewarding home renovation projects you can take on, instantly modernizing your space and adding real value to your home when done correctly.
By following the right steps — from asbestos testing and proper room preparation all the way through patching, skim coating, priming, and painting — you give yourself the best possible chance at a result that looks genuinely professional.
Whether you choose to go the DIY route or bring in a professional, the key is to never rush the process, never skip the safety steps, and always let the work be done right the first time.
Related Articles
Can You Paint Metal Roofing? The Complete Guide for Homeowners & Pros
Average Door Thickness: A Complete Guide to Standard Sizes and Measuring Tips
18 Inch Deep Base Cabinets: A Smart Storage Solution for Every Kitchen
Rub-on Transfers for Furniture: Transform Your Decor with Ease