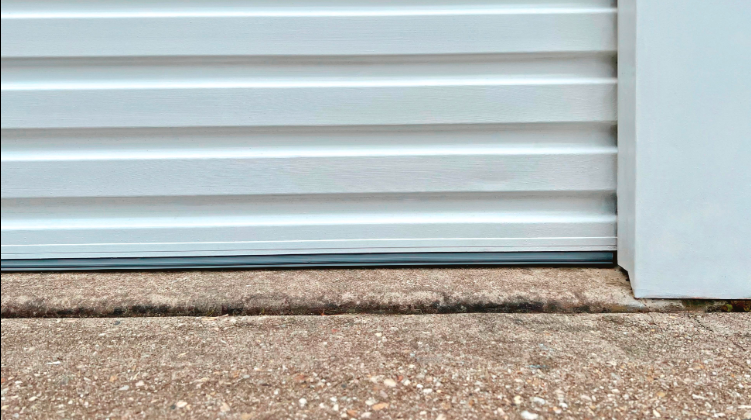

Your garage door bottom seal is a small strip that does a big job — blocking water, dust, insects, and cold drafts every single time your door closes. Over months and years of heat, freezing temperatures, and daily use, that seal cracks, hardens, and stops doing its job. Knowing when and how to replace it can save you from water damage, high energy bills, and uninvited pests.
In this complete guide, you’ll find: the right seal type for your door, clear warning signs of damage, a step-by-step installation walkthrough, honest cost estimates, and maintenance tips that extend your seal’s lifespan.
What Is a Garage Door Bottom Seal?
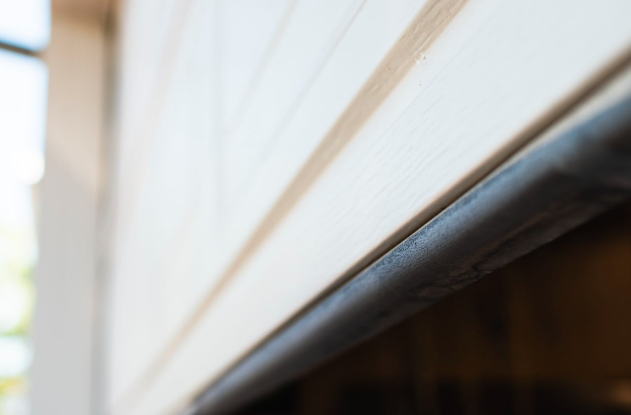
A garage door bottom seal — also called a door sweep, weatherstrip, or astragal — is a flexible strip that runs along the bottom edge of your garage door. When the door closes, it presses against the garage floor to create an airtight barrier.
Without it, rain, dirt, leaves, cold air, and small pests find their way inside — and once moisture gets in, you risk mold, rust, and damaged flooring. It also supports better temperature control inside the garage by reducing air leaks and improving overall protection throughout the year.
Signs You Need a Garage Door Bottom Seal Replacement
Most homeowners don’t notice a failing seal until water or pests are already inside. Here are the warning signs to catch early:
✓ Daylight visible under the door — if sunlight streams under your closed garage door, the seal is no longer making contact with the floor.
✓ Water puddles inside after rain — even a small gap lets water pool near the door, which can warp flooring and cause mold.
✓ Cracked, stiff, or crumbling rubber — visually inspect the seal by running your hand along it. Any brittleness means it’s no longer flexible enough to seal properly.
✓ Insects or rodents getting inside — even a 1/4-inch gap is an open door for mice, ants, and spiders.
Types of Garage Door Bottom Seals
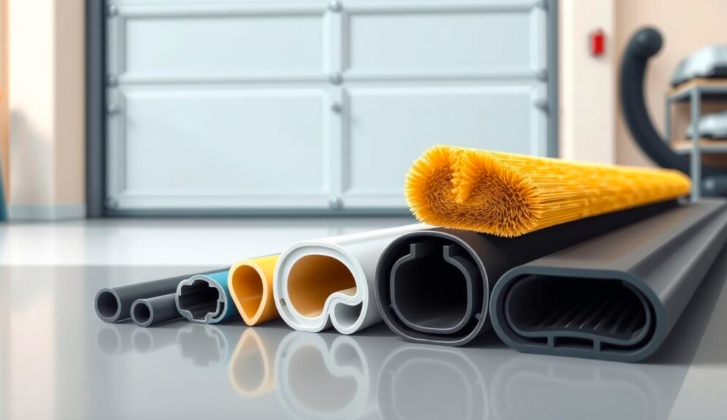
Not all bottom seals fit all garage doors — the right type depends on your door’s track style and whether your garage floor is level. Use the quick guide below to identify which seal type matches your setup:
T-Style Bottom Seal
The most common residential seal. Its T-shaped edges slide into the retainer channel on the bottom of the door. Best for: standard modern garage doors with a retainer already installed. This design creates a secure fit and helps the seal stay firmly in place.
T-style seals are available in different sizes depending on the width of the track. They are highly effective at blocking water, dust, and air. Many modern garage doors use this seal because it is simple to install and replace.
Bulb-Type Seal
A round, tube-shaped seal that compresses on contact. Ideal for uneven or slightly sloped garage floors because the bulb flexes to fill irregular gaps. Best for: garages with uneven concrete slabs.
These seals are commonly used in areas with extreme weather conditions. They help keep rainwater and cold air outside while improving energy efficiency inside the garage.
Beaded Seal
Features rounded edges that snap into circular retaining tracks. Common on older garage doors made before the T-style became standard. Best for: vintage doors where the retainer channel is round, not T-shaped. These seals provide reliable protection against outdoor elements.
J-Type Seal
Curves into a J-shape that presses tightly against the floor, offering extra flexibility. Best for: garages with slightly uneven flooring or where extra floor contact is needed. This shape creates extra flexibility and allows the seal to press tightly against the floor.
J-type seals are useful for garages with slightly uneven flooring. They help reduce air leaks and prevent debris from entering the garage.
Threshold Seal
Unlike other seals, this one mounts to the garage floor with adhesive, forming a raised rubber ridge. Best for: low-lying garages prone to flooding, or as an extra layer of protection combined with a door-mounted seal. It forms a raised barrier that blocks water and dirt from entering underneath the garage door.
How to Measure Your Garage Door Bottom Seal?
Before you buy anything, take these three measurements to avoid returning the wrong product:
1. Door Width — Measure the full width of the garage door at the bottom edge. Standard single doors are 8–9 ft; double doors are 16 ft. Always buy slightly longer than your measurement — you’ll trim the excess.
2. Track / Retainer Style — Look at the metal channel on the bottom of your door. A T-shaped slot takes a T-style seal; a rounded slot takes a beaded seal; a flat bottom with no channel takes a bulb or J-type seal.
3. Seal Width & Thickness — Measure the width of the existing retainer channel with a ruler. Common widths are 3/8 inch and 1/2 inch. A seal that’s too thin leaves gaps; one that’s too thick may prevent the door from closing fully.
Best Materials for Garage Door Bottom Seals
Once you know your seal type and size, choose your material based on your climate and budget:
- Rubber — The most popular choice. Stays flexible in temperatures from -20°F to 140°F. Provides excellent insulation and lasts 5–8 years under normal use. Best for: most climates.
- Vinyl — Budget-friendly and easy to slide into tracks, but cracks in temperatures below 20°F or above 110°F. Lifespan: 2–4 years. Best for: mild climates and renters who want a low-cost fix.
- Silicone — Premium option. UV-resistant, moisture-proof, and rated for extreme temperatures. Lifespan: 8–12 years. Best for: garages in harsh climates (desert heat or freezing winters).
Tools and Materials Needed
Before starting a garage door bottom seal replacement, it is important to gather the right tools and materials. Having everything ready makes the installation process easier and safer.
Most homeowners need a replacement seal, measuring tape, screwdriver, utility knife, cleaning cloth, and lubricant spray. Safety gloves are also recommended because old tracks and metal edges can be sharp.
Choosing a high-quality seal is important for long-term durability. Cheap materials may crack quickly, especially in extreme weather conditions. Always confirm the correct size and seal type before beginning the installation process.
Step-by-Step Garage Door Bottom Seal Replacement Process
Most homeowners complete this repair in 30–60 minutes. The following steps explain how homeowners can safely perform garage door bottom seal replacement.
Step 1 — Disconnect the Opener. Pull the red emergency release cord on your automatic opener to disconnect it. This prevents the door from activating while your hands are near the track. ⚠️ Never skip this step.
Step 2 — Remove the Old Seal. Slide the old seal out of the retainer channel from one end. If it’s stuck, spray a little WD-40 along the channel and wait 2 minutes before pulling again. A utility knife can help cut stiff sections into smaller pieces.
Step 3 — Clean the Retainer Channel. Wipe the entire channel with a damp cloth. Use a stiff brush or steel wool to remove rust spots. Dry completely before inserting the new seal — any moisture left behind can cause mold under the seal.
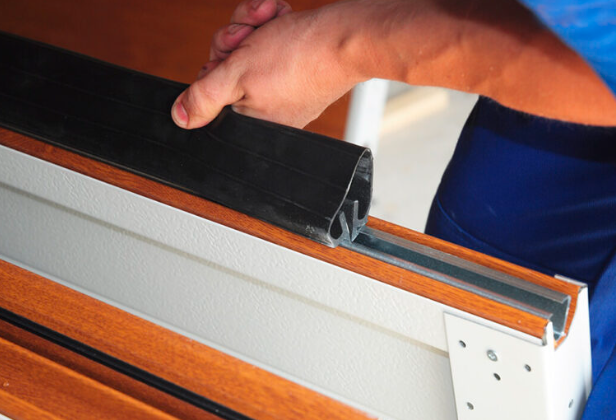
Step 4 — Install the New Seal. Starting from one end, slide the new seal into the channel. Spray a thin layer of silicone lubricant inside the channel first — this makes the seal glide smoothly and prevents tearing during installation.
Step 5 — Trim the Excess. Once the seal is fully seated, use a sharp utility knife to trim any overhang at both ends. Leave about 1/4 inch extra on each side — trimming flush to the door edge can cause the seal to pull back over time.
Step 6 — Test the Seal. Lower the door and press a sheet of paper under different sections of the seal. You should feel resistance when pulling it out. If the paper slides freely, there’s a gap — adjust the seal or consider adding a threshold seal for extra coverage.
DIY vs Professional Garage Door Bottom Seal Replacement
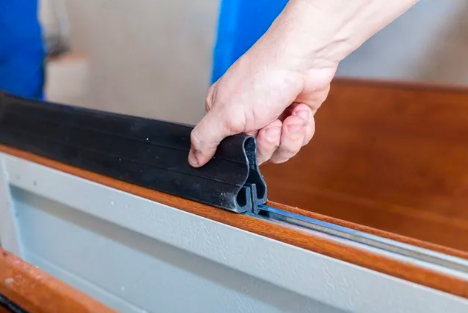
Replacing a bottom seal is one of the most beginner-friendly garage repairs you can do. No specialized tools required — just a utility knife, a cloth, and some lubricant. DIY installation can save money and usually requires only basic tools.
Call a professional if: your retainer channel is bent, cracked, or detached from the door; your door has alignment problems that prevent it from closing flush; or your torsion springs appear damaged (never attempt spring repairs yourself — they are under extreme tension).
| DIY Replacement | Professional Service |
| Lower cost | Expert installation |
| Suitable for simple repairs | Handles complex issues |
| Requires basic tools | Saves time |
| Good for beginners | Professional warranty |
Garage Door Bottom Seal Replacement Cost
Garage door seal replacement is one of the most affordable home maintenance tasks. Here’s what to expect:
Professional labor typically runs $75–$200 depending on your region and whether additional track repairs are needed. If you DIY, your total cost is usually under $40.
Common Problems & Troubleshooting
Even with careful installation, problems can occur. Here’s how to diagnose and fix the most common ones:
Problem: Seal won’t slide into the channel.
Fix: Spray silicone lubricant into the channel and let it sit for 2–3 minutes. Pull the seal through slowly with even pressure — rushing causes the seal to fold or tear. If it still won’t fit, double-check the seal’s track width (3/8″ vs 1/2″).
Problem: Gaps remain after installation on an uneven floor.
Fix: Switch to a bulb-type seal, which compresses unevenly to fill irregular gaps. Alternatively, add a threshold seal to the floor beneath the door — this creates a raised barrier that fills even large gaps.
Problem: Seal falls out of the track or feels loose.
Fix: The seal’s bead or T-edge is likely undersized for your retainer. Measure the channel width again with a vernier caliper for accuracy, then purchase the correct size. Don’t force an undersized seal — it will fall out when the door vibrates.
Maintenance Tips After Seal Replacement

A well-maintained seal can last 2–3 years longer than a neglected one. Follow this simple routine:
- Every 3 months — Wipe the seal and retainer channel with a damp cloth to remove dirt, grit, and leaves. Grit acts like sandpaper and accelerates wear.
- Every 6 months — Apply a thin coat of silicone-based lubricant (not WD-40, which dries out rubber) to keep the seal pliable and prevent cracking.
- Annually — Inspect the full seal by pressing along its length. Any section that feels hard, flat, or crumbly should trigger a full replacement before the next winter.
Frequently Asked Questions
How often should garage door bottom seals be replaced?
Garage door bottom seals usually need replacement every 3 to 5 years depending on weather conditions and daily usage. Regular inspections can help identify cracks, gaps, or wear before major problems occur.
Can I replace the seal without removing the garage door?
Yes, in most cases the bottom seal can be replaced without removing the entire garage door. The old seal simply slides out of the track and the new one slides into place.
What is the best material for garage door seals?
Rubber and silicone are considered the best materials because they are flexible, durable, and weather-resistant. They also perform well in both hot and cold temperatures.
Why is water still entering after replacement?
Water may still enter if the garage floor is uneven or if the seal was installed incorrectly. In some cases, a threshold seal may also be needed for extra protection.
Are universal garage door seals reliable?
Universal garage door seals can work well if they match the correct track size and door type. However, checking compatibility before installation is always important for the best results.
Conclusion
Garage door bottom seal replacement is a simple but important maintenance task that helps protect your garage from water, dust, insects, and air leaks.
Replacing a damaged seal at the right time can improve insulation, increase energy efficiency, and keep the garage cleaner throughout the year.
By choosing the correct seal type and following proper installation steps, homeowners can extend the life of their garage door and avoid costly repairs in the future.
Related Articles
How to Get Rid of Mold in the Bathroom: Complete Step-by-Step Guide
Roof Repairs Worcester: Your Complete Local Guide to a Safe and Lasting Roof
How to Measure Room for Furniture: Step-by-Step Guide for Perfect Fit
How to Get Rid of Stucco Ceilings?
Shower Door Repair: Complete Guide to Fix Common Shower Door Problems