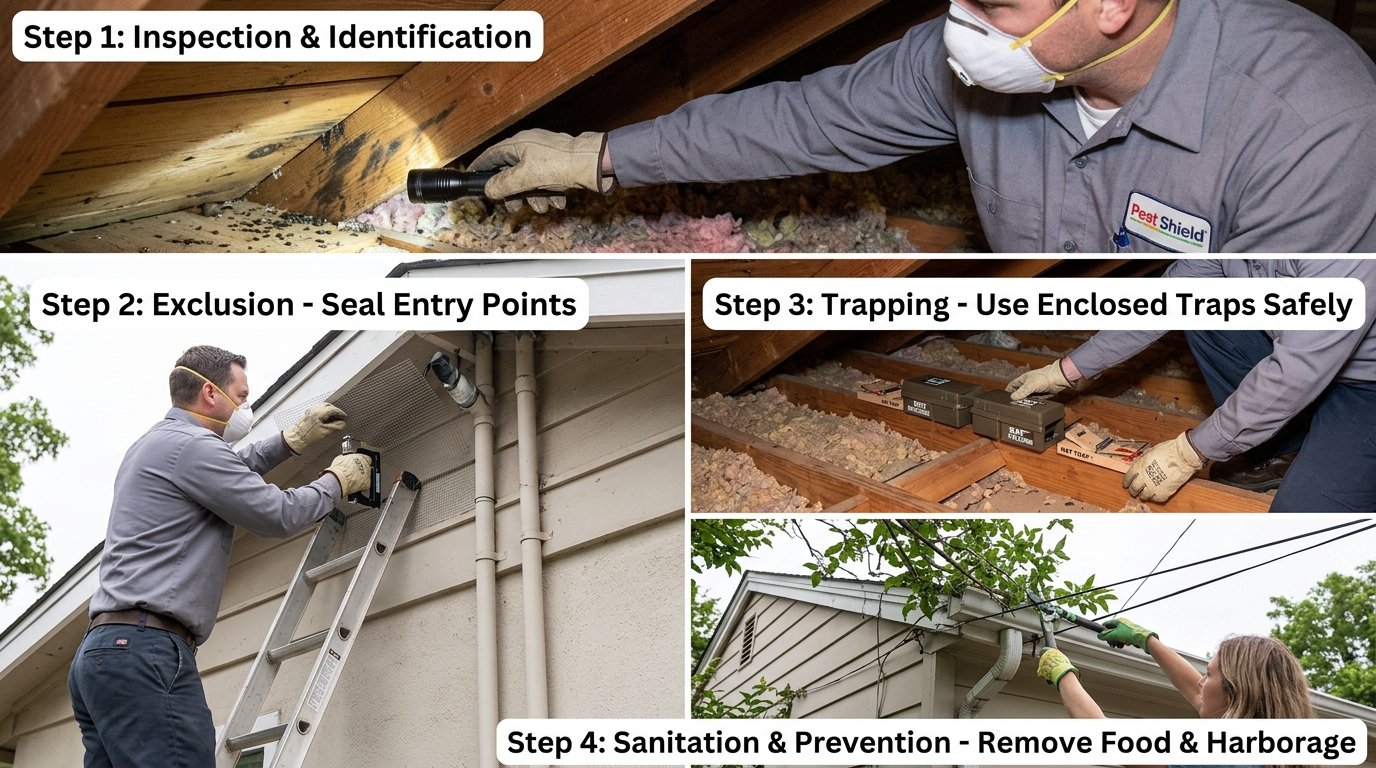

Roof rats are one of the most frustrating pests a homeowner can face because they climb, nest above ground, and often go unnoticed until real damage has already occurred. Learning how to get rid of roof rats starts with understanding their behavior, spotting the early warning signs, and acting before a small problem becomes a full-blown infestation.
This guide walks through identification, removal steps, trap comparisons, and long-term prevention in plain, practical language. By the end, you will have a clear action plan rather than a vague list of tips.
Key Takeaways
- Roof rats nest above ground, so attics, eaves, and rooflines are the first places to inspect.
- Sealing entry points is more effective long-term than relying on traps alone.
- Snap traps remain the most reliable method for most households.
- Trimming trees and shrubs near the roofline removes their main access route.
- Persistent infestations usually require professional pest control support.
What Are Roof Rats?
Roof rats are slender, agile rodents that prefer elevated spaces over ground-level burrows, which is exactly why attics and rooflines are their favorite hiding spots. Recognizing their appearance and behavior early makes the entire removal process faster and less stressful.
Physical Identification
Roof rats are typically dark brown to black with a lighter underside, and they measure around 13 to 18 inches including the tail. Their tail is longer than their body, which is one of the clearest ways to distinguish them from other rodents. Their large ears and pointed nose also set them apart from bulkier ground-dwelling rats.
How They Differ from Norway Rats and Mice
Norway rats are heavier, burrow at ground level, and have shorter tails compared to their body length, while mice are noticeably smaller overall. Roof rats, by contrast, are excellent climbers and rarely dig burrows outdoors. This climbing ability is exactly why they end up in attics, soffits, and wall voids rather than basements.
Signs of an Infestation
Common indicators include pencil-sized droppings near beams, gnaw marks on wood or wiring, and scratching sounds coming from the ceiling at night. Grease marks along walls or rafters, caused by their oily fur rubbing against surfaces, are another strong indicator. Noticing these signs early is often the difference between a quick fix and an expensive repair.
Why Roof Rats Invade Homes
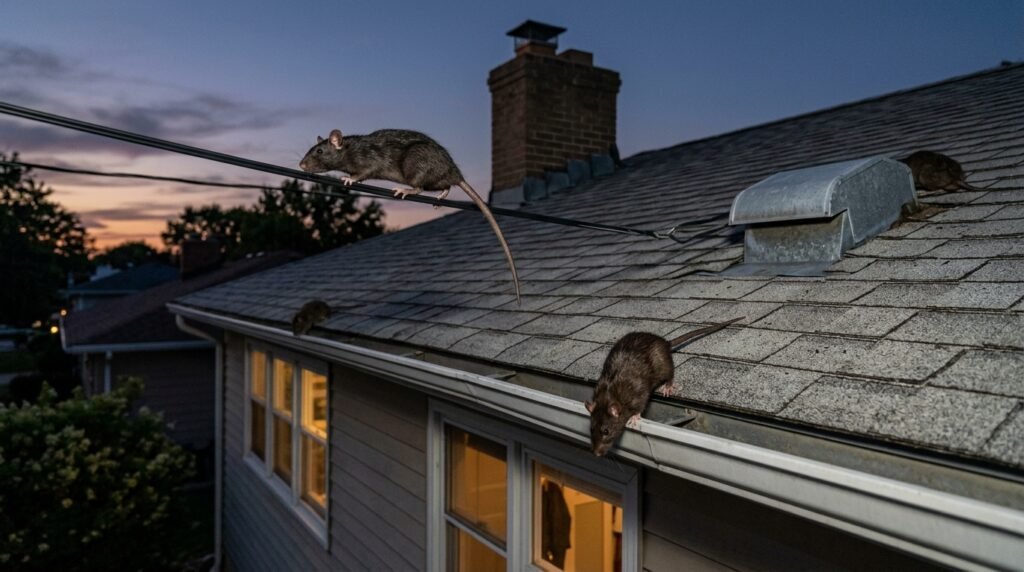
Homes provide roof rats with everything they need to thrive: shelter, warmth, and a steady food supply. Understanding what draws them in helps homeowners remove the incentive before it becomes a recurring issue.
Common Attractants
Open trash cans, pet food left outside, fruit trees, and bird feeders are among the most common attractants for roof rats. Cluttered garages and unused storage boxes also offer ideal nesting material and cover. Removing these attractants is often the fastest way to reduce activity around a property.
Seasonal Patterns
Roof rat activity tends to increase in cooler months as they search for warmer indoor spaces to nest in. In warmer climates, however, infestations can occur year-round, particularly in areas with dense tree cover. Knowing the seasonal pattern in your region helps with timing inspections and preventive maintenance.
Risks of a Roof Rat Infestation
Beyond the noise and nuisance, roof rats create risks that go far beyond simple annoyance, affecting both property and health if left unaddressed.
Property Damage
Roof rats frequently chew through insulation, wiring, and wooden beams to build nests and wear down their constantly growing teeth. This gnawing can weaken structural elements over time and lead to costly attic repairs. Left unchecked, the damage tends to compound quickly since rats reproduce rapidly.
Health and Disease Risks
Roof rats can carry parasites and pathogens linked to illnesses such as leptospirosis and salmonellosis, which can spread through droppings or contaminated food. Their urine and droppings can also trigger allergic reactions in sensitive individuals. This makes prompt removal a health priority, not just a property concern.
Fire Hazard from Chewed Wiring
One of the most overlooked dangers is the risk of electrical fires caused by rats gnawing through wire insulation in attics and walls. Exposed wiring near flammable insulation material significantly raises the risk of a house fire. This alone is reason enough to treat any sign of roof rat activity seriously.
How to Identify Entry Points

Before any removal method can work, every possible entry point around the home needs to be located and understood, since rats only need a gap the size of a coin to get inside.
Roofline, Eaves, and Vents
Roof rats commonly enter through damaged eaves, gaps in the roofline, and poorly sealed vents. These areas should be inspected closely for chew marks or gaps that have widened over time. A flashlight inspection during daylight hours often reveals openings that are easy to miss from the ground.
Utility Lines and Tree Branches
Power lines, cable lines, and overhanging tree branches act as bridges that give roof rats direct access to the roof. Trimming branches back at least four to six feet from the roofline removes this pathway almost entirely. Utility lines are harder to modify, so sealing the point where they meet the house becomes the priority instead.
Gaps and Cracks Checklist
Small gaps around pipes, chimneys, and siding are often the actual entry point even when the roofline looks intact. A simple checklist covering vents, pipe collars, chimney caps, and foundation gaps helps ensure nothing is missed. Sealing these gaps with steel wool and caulk is typically enough to close them permanently.
Step-by-Step Removal Process
Once entry points are mapped out, the actual removal process follows a logical sequence that moves from inspection to long-term monitoring.
Step 1: Inspect and Locate Nests
Start by checking attics, crawl spaces, and wall voids for nesting material such as shredded insulation or fabric. Identifying the nest location helps target trap placement more accurately. This step also confirms how widespread the infestation actually is.
Step 2: Seal Entry Points
Use steel wool combined with caulk, or hardware cloth for larger gaps, to close off every entry point identified earlier. Sealing should happen only after most of the rats have been removed, otherwise they may become trapped inside. This step is what prevents the problem from returning after removal.
Step 3: Trim Vegetation and Trees
Cutting back branches and shrubs near the roofline removes the natural bridges rats use to access the home. This step also improves overall yard maintenance and reduces hiding spots near the foundation. Regular trimming should become part of ongoing home maintenance.
Step 4: Remove Food and Water Sources
Store pet food and birdseed in sealed containers, pick up fallen fruit promptly, and fix any leaking outdoor faucets. Reducing available food and water makes the property far less appealing to remaining rats. This step works best when combined with sealing entry points.
Step 5: Set Traps
Snap traps baited with peanut butter, nuts, or dried fruit remain one of the most effective tools for roof rat removal. Placing traps along rafters, attic beams, and known travel paths increases the chances of success significantly. Checking traps daily ensures quick removal and accurate monitoring of activity levels.
Step 6: Use Bait Stations Carefully
Tamper-resistant bait stations can help with larger infestations but should be placed away from children and pets. Many homeowners prefer to have a licensed pest control technician handle rodenticide placement for safety reasons. This step is generally reserved for infestations that traps alone cannot control.
Step 7: Declutter and Monitor
Clearing out unused boxes, old furniture, and clutter in attics and garages removes potential nesting material. Ongoing monitoring after the initial removal helps catch any new activity before it becomes a repeat infestation. This final step turns a one-time fix into a lasting solution.
Best Traps and Tools Comparison
Choosing the right tool depends on the size of the infestation, budget, and comfort level with handling rodents directly.
| Method | Effectiveness | Approximate Cost | Safety Considerations |
| Snap Traps | High for small to moderate infestations | Low | Safe if placed away from pets and children |
| Electronic Traps | High, with easy disposal | Moderate | Very safe, minimal handling required |
| Bait Stations | High for larger infestations | Moderate to High | Requires careful placement; best handled by professionals |
| Glue Traps | Low to Moderate | Low | Considered less humane; not commonly recommended |
Natural and DIY Remedies
Some homeowners prefer natural deterrents before moving on to traps or professional treatment.
Common Natural Deterrents
Peppermint oil, ammonia-soaked cotton balls, and predator scent products are often used to discourage rats from lingering in an area. These methods can reduce activity temporarily but rarely solve a full infestation on their own. They work best as a supplement to sealing and trapping rather than a standalone solution.
When to Call a Professional Exterminator
Some infestations grow beyond what DIY methods can reasonably handle, especially when the nesting area is difficult to access.
Signs the Infestation Is Beyond DIY
Persistent noises after weeks of trapping, visible damage to wiring, or multiple nesting sites are signs that professional help is needed. A pest control technician can access hard-to-reach areas safely and assess the full scope of the problem. Waiting too long often increases both the cost and extent of repairs.
What Professional Treatment Involves
Professionals typically combine inspection, exclusion work, trapping, and monitoring visits to fully resolve an infestation. This comprehensive approach addresses both the current rats and the conditions that allowed them to enter. Most reputable companies also offer a follow-up guarantee period.
Approximate Cost Considerations
Professional roof rat removal costs vary widely depending on the severity of the infestation and the extent of exclusion work needed. Getting a few quotes from local licensed pest control companies is the best way to gauge a fair price for your specific situation. Cost should be weighed against the potential expense of ongoing structural damage if the problem is left untreated.
Long-Term Prevention Tips
Preventing a repeat infestation depends on consistent maintenance rather than a single one-time fix.
Seasonal Home Maintenance Checklist
Inspecting the roofline, vents, and attic access points at least twice a year helps catch new gaps before rats find them. This seasonal habit is especially useful heading into cooler months when rats search for warm shelter. A quick checklist makes this an easy habit to maintain.
Landscaping Practices
Keeping trees trimmed, removing fallen fruit promptly, and maintaining tidy shrubs around the home reduces the outdoor conditions rats rely on. Good landscaping habits work hand in hand with sealing entry points for lasting results. This is one of the simplest ongoing prevention steps available.
Ongoing Monitoring
Periodically checking attics, garages, and storage areas for new droppings or gnaw marks helps catch activity early. Early detection almost always means a faster, less costly resolution. This habit closes the loop on the entire prevention process.
Frequently Asked Questions
How do I know if I have roof rats instead of mice?
Roof rats are noticeably larger, with a tail longer than their body, while mice are much smaller overall.
Are roof rat droppings dangerous to handle?
Yes, droppings can carry pathogens, so gloves and proper cleaning precautions are recommended when clearing them.
How long does it typically take to get rid of roof rats?
Most infestations can be resolved within one to three weeks when sealing and trapping are done together consistently.
Do roof rats return after removal?
They can return if entry points remain open, which is why sealing gaps is just as important as trapping.
What smells help keep roof rats away?
Peppermint oil and similar scents can help deter activity temporarily but work best alongside other prevention methods.
Is rat poison safe to use around the house?
It carries risks around children and pets, so many homeowners prefer traps or professional bait station placement instead.
Conclusion
Getting rid of roof rats comes down to a combination of accurate identification, prompt sealing of entry points, and consistent trapping or professional treatment when needed.
Many generic guides online stop at basic tips like “set traps” without explaining the full sequence of inspection, sealing, and prevention covered here.
Following the complete process outlined in this guide gives homeowners a far more reliable and lasting solution than scattered, surface-level advice.
Related Articles
What Is an Asbestos Stucco Ceiling? Learn the risks and stay safe.
Shower Door Repair: Complete Guide to Fix Common Shower Door Problems
What Are Styrofoam Ceiling Tiles? Discover their benefits & tips.