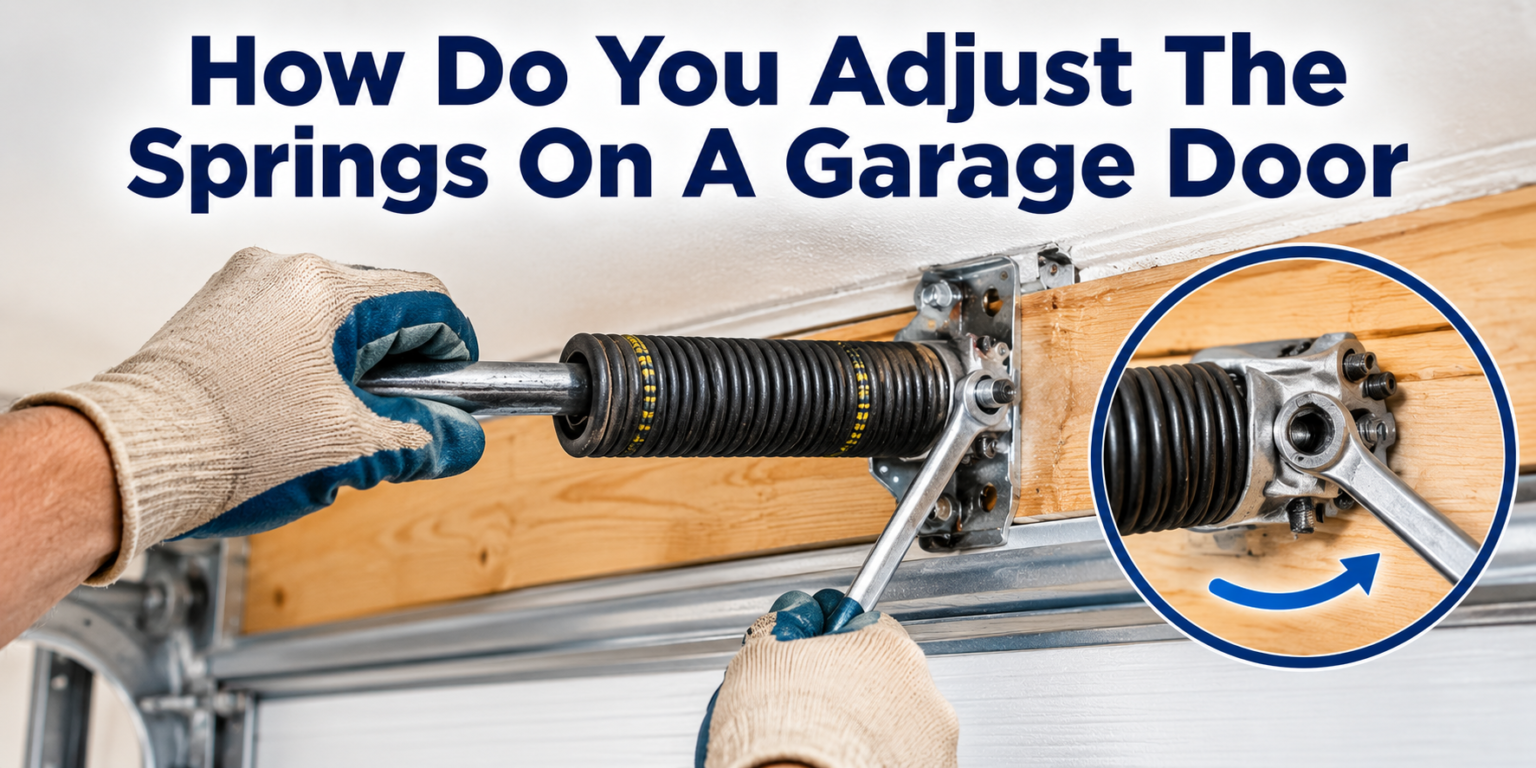

A garage door depends heavily on its springs to open and close smoothly, and when those springs lose the right amount of tension, the door starts behaving unpredictably.
Many homeowners ask how do you adjust the springs on a garage door because a door that slams shut or refuses to stay open is not just annoying, it can also be dangerous. This guide walks you through the entire process in plain language, from identifying your spring type to testing the door once the adjustment is complete.
Whether you are dealing with torsion springs above the door or extension springs along the tracks, the steps below will help you understand what is involved and why caution matters at every stage.
What Garage Door Springs Do And Why They Matter?
Springs counterbalance the weight of the garage door so that lifting it manually or through an opener does not require excessive force. Without properly tensioned springs, the door mechanism becomes strained, and the opener motor can burn out much faster than expected.
There are two main spring systems used in residential garage doors, and each one behaves differently under tension. Knowing which type sits on your door is the first real step toward understanding how do you adjust the springs on a garage door correctly, since the tools and methods differ significantly between the two.
Torsion Springs
Torsion springs are mounted horizontally on a metal shaft directly above the closed door. They work by twisting and storing rotational energy, which is released gradually as the door opens. These springs are generally more durable and provide smoother operation compared to extension springs, but they also store far more energy, making them riskier to handle without proper winding bars.
Extension Springs
Extension springs stretch and contract along the horizontal tracks on either side of the door, usually above the upper track section. They are more common in older or budget-friendly garage door systems. Adjusting extension springs typically involves relocating a hook or clip to a different hole to change the tension, which is comparatively simpler than working with torsion springs.
Signs Your Springs Need Adjustment
Before jumping into any adjustment work, it helps to confirm that the springs are actually the source of the problem. A door that shows an unusual gap on one side when closed, or one that makes a loud grinding sound during operation, often points directly to spring imbalance.
Common warning signs include a door that will not stay open on its own, a door that closes faster than normal, visible gaps between spring coils, or an opener that strains audibly while lifting the door. If you notice any combination of these symptoms, it is a strong indicator that tension adjustment is needed rather than a simple lubrication fix.
Safety First
Spring adjustment ranks among the riskiest DIY tasks around the house because of the enormous stored energy involved. A torsion spring under full tension can cause serious injury if it slips or releases suddenly, so understanding the safety requirements is not optional.
Before touching any spring, the door must be secured, the opener disconnected, and the correct tools gathered. Rushing through this stage is one of the most common reasons DIY spring adjustments go wrong, so take the time to prepare properly rather than skipping ahead.
Why Spring Adjustment Is Dangerous
Torsion springs in particular can hold hundreds of pounds of rotational force even when the door looks completely still. If the winding bar slips or the set screws are loosened incorrectly, the spring can unwind violently, causing broken bones, deep cuts, or worse. This is why professional technicians treat every torsion spring as if it were fully loaded, regardless of how the door currently appears.
Essential Safety Gear
Protective gloves and safety glasses are the bare minimum requirement before starting any spring work. Sturdy winding bars made specifically for garage door springs are essential, since screwdrivers or makeshift tools are far too weak and unstable for this job. A stable ladder positioned away from the door’s swing path also reduces the risk of falling while reaching the spring assembly.
When To Call A Professional Instead
If you have never adjusted a torsion spring before, or if your garage door uses a dual-spring system, hiring a professional is genuinely the safer choice. Technicians carry specialized tools and experience that dramatically reduce the risk of injury, and most spring services are affordable compared to the potential cost of a serious accident.
Tools And Materials Needed
Having the right equipment on hand before you begin prevents unnecessary interruptions and reduces the temptation to substitute unsafe alternatives midway through the job.
| Tool/Material | Purpose |
| Winding bars (steel) | Safely wind or unwind torsion springs |
| Vice grips or locking pliers | Clamp the door track to prevent movement |
| Safety glasses and gloves | Protect eyes and hands from snapping components |
| Sturdy ladder | Reach the spring assembly safely |
| Adjustable wrench | Loosen and tighten set screws |
| Marker or tape | Mark reference points on the shaft for accurate winding |
Understanding Your Spring System
Every garage door spring system has specific characteristics that determine how much force it can handle and how it should be adjusted. Misjudging these details can lead to an improperly balanced door even after the adjustment work is finished.
Taking a moment to inspect the shaft, cones, and mounting brackets closely will tell you far more about your specific setup than guessing based on general assumptions.
How To Identify Torsion Springs?
Torsion springs sit on a metal rod centered above the closed door, often with one or two springs depending on the door’s weight. Look for a stationary cone plate on one end and a winding cone with set screws on the other, since this is where adjustments actually take place.
How To Identify Extension Springs?
Extension springs run parallel to the horizontal tracks near the top of the garage door opening. They typically have a pulley and cable system attached, and the tension adjustment happens by moving the spring’s hook to a different anchor hole along a perforated bracket.
Reading Spring Specs
Spring specifications such as wire diameter, coil length, and wind direction are usually printed or stamped directly on the spring itself. These details matter because replacing or adjusting a spring incorrectly for its rated door weight can throw off the entire balance system.
Pre-Adjustment Checks
Before making any physical adjustment, a few preliminary checks confirm whether the spring is actually the issue and prepare the door for safe handling.
Disconnect the automatic opener first, since operating it during adjustment work can cause unexpected movement. Next, manually test how the door currently balances by lifting it partway and observing whether it holds position or drifts. Finally, secure the door firmly in place using clamps or locking pliers on the track before touching any spring hardware, since an unsecured door can shift suddenly during the process.
Step-By-Step: Adjusting Torsion Springs
This is the section most people are referring to when they search how do you adjust the springs on a garage door, since torsion systems are the most common in modern homes and require the most precise technique.
Insert one winding bar fully into the winding cone and hold it steady while loosening the set screws slightly with a wrench. Keep firm downward pressure on the bar at all times, since letting go even briefly can cause the spring to spin uncontrollably. To increase tension for a door that feels too heavy or won’t stay open, wind the spring gradually, typically in quarter-turn increments, using the second bar to hold position while repositioning the first.
To decrease tension for a door that slams or feels too light, unwind using the same quarter-turn method in the opposite direction. Once the desired tension is reached, tighten the set screws firmly while the bar remains in place, then carefully remove the bars only after confirming the screws are secure. If your system uses two springs, repeat the exact same process on the second spring to keep both sides evenly balanced.
Step-By-Step: Adjusting Extension Springs
Extension spring adjustment follows a simpler mechanical process compared to torsion systems, though care is still required throughout.
Locate the hook or clip connecting the spring to the perforated adjustment bracket near the track. Moving this hook to a hole further along the bracket increases tension, while moving it closer reduces it. Always adjust both springs by the same number of holes so the door remains level and balanced on both sides.
Testing And Fine-Tuning
Once adjustments are made, testing confirms whether the door is properly balanced before returning it to regular use.
Manually lift the door to roughly waist height and let go gently. A properly adjusted door should remain in place without drifting upward or falling downward on its own.
Manual Lift Test
This test is the simplest and most reliable way to check spring tension without any special equipment. If the door stays exactly where you release it, the tension is correctly balanced for the door’s weight.
Signs Of Over-Tension Or Under-Tension
A door that shoots upward on its own indicates too much tension, while one that sinks downward points to insufficient tension. Both situations require small incremental corrections rather than large adjustments made all at once.
Reconnecting The Opener
Once manual balance feels correct, reconnect the automatic opener and run the door through a few complete cycles. Listen closely for straining sounds or jerky movement, which would suggest further fine-tuning is still needed.
Common Mistakes To Avoid
Many DIY attempts fail not because of a lack of effort, but because of a few recurring errors that compromise both safety and results.
- Using screwdrivers or improvised tools instead of proper winding bars
- Skipping the door-locking step before starting adjustments
- Making large tension changes instead of gradual quarter-turn increments
- Ignoring visibly rusted, cracked, or stretched springs that need replacement rather than adjustment
Maintenance Tips
Regular maintenance extends spring life considerably and reduces how often adjustments become necessary in the first place.
Apply a silicone-based lubricant to the springs and moving hardware every few months to reduce friction and rust buildup. Check the door’s balance periodically using the manual lift test described earlier, and keep an eye on the general condition of the coils for early signs of wear so replacement can be planned before a complete failure occurs.
When To Call A Professional
Certain situations call for professional help rather than continued DIY attempts, particularly when personal safety is at stake.
If the spring appears rusted through, visibly cracked, or if you are uncertain about which direction to wind a torsion spring, stop and contact a licensed technician. Professional spring adjustment or replacement services are widely available and typically cost far less than an emergency room visit resulting from a mishandled spring.
Conclusion
Understanding how do you adjust the springs on a garage door gives homeowners valuable insight into a system they rely on daily, even when the actual hands-on work is best left to professionals for torsion systems.
Extension springs offer a somewhat more approachable adjustment process for confident DIYers, while torsion springs demand serious caution, proper tools, and ideally professional handling. Regular maintenance and early attention to warning signs will keep your garage door balanced, quiet, and safe for years to come.
FAQs
How often do garage door springs need adjustment? Most springs need occasional fine-tuning every year or two, though this varies based on usage frequency and climate conditions.
Can I adjust garage door springs alone? Extension springs can sometimes be adjusted alone, but torsion spring work is safer with a second person present in case of emergency.
How do I know if my springs need replacement instead of adjustment? Visible rust, cracks, gaps between coils, or a spring that has already snapped indicates replacement is needed rather than simple adjustment.
Is it cheaper to adjust springs myself or hire a professional? DIY adjustment saves on labor costs but carries injury risk, while professional service typically costs a modest fee and guarantees safer, more accurate results.
Related Articles
What Gets Hair Dye Off Sink? Easy & Effective Removal Guide
How to Program Garage Remote Control Complete Guide 2026
Can You Line Your Garage in Plywood? Complete Guide 2026
How Many Bags of Mulch in a Yard Complete guide 2026
How to Make the Basement Warmer: 8 Proven Fixes for a Cozy Space