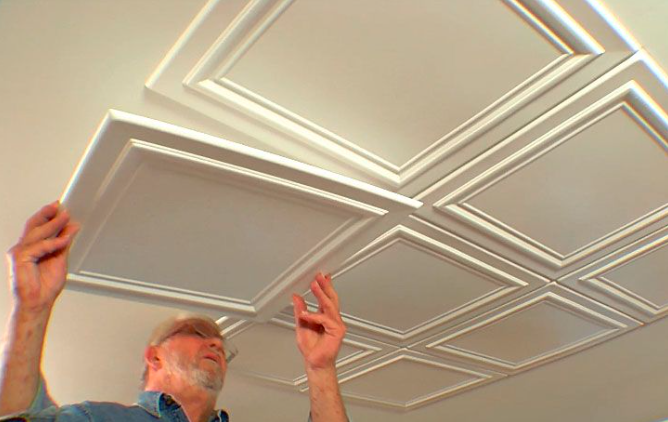

Styrofoam ceiling tiles are lightweight decorative panels made from polystyrene foam, designed to mimic the look of traditional tin or pressed-metal ceilings. They’re a popular budget-friendly way to add texture and style to a plain ceiling without the cost or weight of real metal.
What Material Are They Made From
These tiles are manufactured from rigid polystyrene foam, the same general family of material used in packaging and insulation products, though formed into decorative molds. The foam is pressed or cast into detailed patterns that replicate ornate metalwork, giving the finished tile a dimensional, embossed look once it’s painted.
Because the material is so light, a full box of tiles weighs only a fraction of what comparable metal or plaster tiles would weigh.
This lightness is a major part of why the tiles are so approachable for a do-it-yourself project.
Common Uses Around the Home
Homeowners typically use these tiles to cover plain drywall ceilings, dated popcorn texture, or even old stucco surfaces that are still structurally stable.
They work well in bedrooms, bathrooms, kitchens, and basements, and are sometimes used on accent walls or inside cabinet backs for a decorative touch.
Because the tiles come in so many pattern styles, they can be matched to almost any design theme, from a vintage tin-ceiling look to a more modern geometric pattern. Many people choose them specifically to update a room without the expense or mess of a full ceiling renovation.
Benefits of Installing Styrofoam Ceiling Tiles
Styrofoam tiles offer several practical advantages that make them appealing for budget renovations. Two of the biggest draws are their affordability and how simple they are to put up.
Cost and Installation Advantages
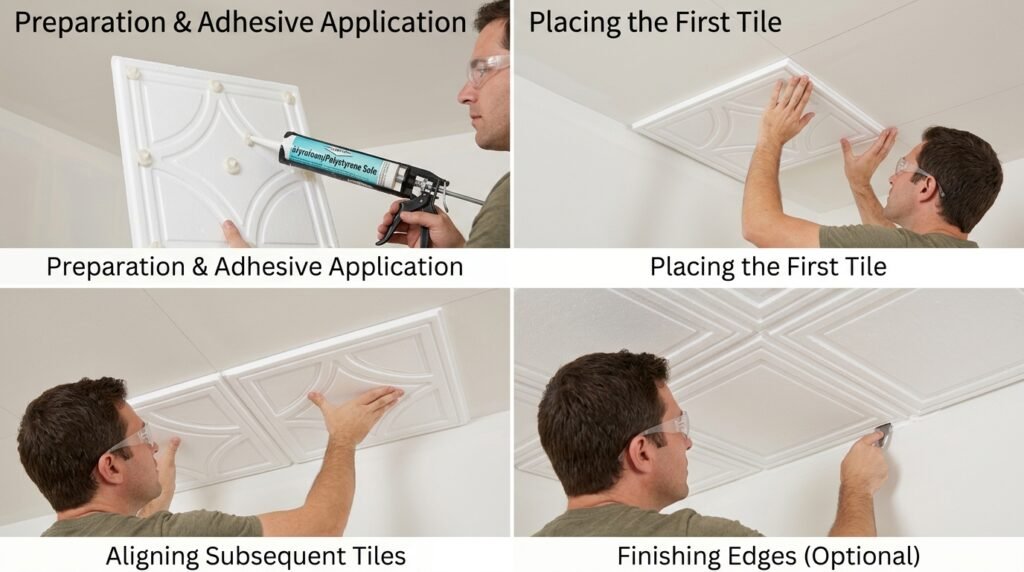
These tiles are generally one of the most affordable ceiling upgrade options on the market, especially compared to real tin, wood, or plaster alternatives. Installation typically only requires basic tools like adhesive, a utility knife or scissors, and a measuring tape, which means most homeowners can complete the project themselves without hiring a contractor.
The tiles are easy to cut and shape around light fixtures, vents, or outlets, which makes fitting them into oddly shaped rooms more manageable than it sounds.
This combination of low material cost and minimal labor expense is a major reason the tiles remain popular for weekend projects.
Insulation and Noise Reduction
Beyond their visual appeal, styrofoam ceiling tiles add a layer of thermal insulation that can help a room hold its temperature more consistently.
They also act as a mild noise barrier, absorbing some sound rather than letting it bounce around the room, which can be useful in bedrooms or home offices.
While they won’t fully soundproof a space, the difference is noticeable compared to a bare drywall ceiling. This added function makes the tiles more than just a cosmetic upgrade.
Drawbacks to Consider Before Installing
While styrofoam ceiling tiles have a lot going for them, there are a couple of downsides worth understanding before committing to the project.
Fire Safety Concerns
Because the tiles are made from foam, they are flammable, and this is a detail that doesn’t always get mentioned clearly by sellers or in installation guides. In the event of a house fire, the material can melt, drip, and release toxic gases as it burns. This is an important factor to weigh, particularly for ceilings in bedrooms or rooms where people sleep, and it’s worth checking local building codes or fire safety ratings before installing them in certain spaces.
Fragility During Installation
The tiles themselves are somewhat delicate and can dent or tear if handled roughly during cutting or gluing.
Tools like caulk guns and scissors can leave marks if they bump the surface, so installation requires a careful, light touch throughout the process.
This fragility doesn’t make the project difficult, but it does mean patience is necessary to avoid having to replace damaged pieces partway through.
How Styrofoam Tiles Are Typically Installed
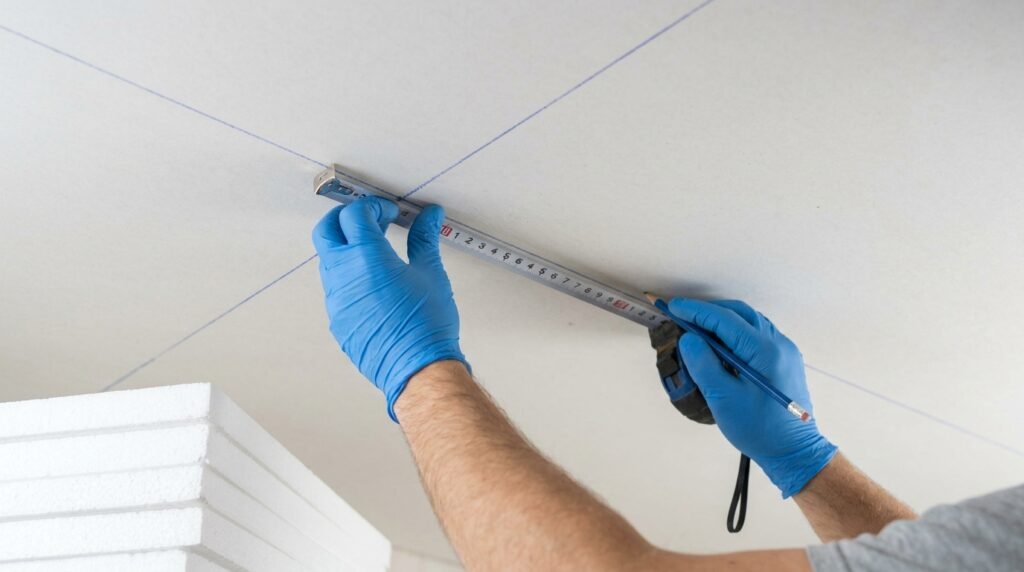
The installation process generally follows a few core stages, starting with measuring and ending with finishing touches that make the seams disappear.
Measuring, Painting, and Layout Planning
Before any tile goes up, the ceiling needs to be measured carefully to determine how many tiles are needed, usually with some extra ordered to account for cuts and mistakes. Many tiles arrive unfinished on top, so painting them beforehand on a flat surface is far easier than trying to paint overhead once they’re installed. Planning the layout in advance, often by taping tiles up temporarily, helps ensure the pattern looks balanced and avoids small, awkward slivers at the edges of the room.
Adhesive Application and Trimming
Once the layout is set, tiles are typically attached using a strong adhesive applied evenly across the back of each piece, then pressed firmly into place starting from a marked center line. Edge pieces usually need to be trimmed to fit using scissors or a utility knife, with careful measuring on both sides to account for any unevenness in the walls.
Cutouts for light fixtures or outlets are done individually, often by tracing the shape before cutting. After all tiles are placed, caulk is commonly used to fill any visible seams, followed by a final coat of paint to blend everything together.
Where Styrofoam Ceiling Tiles Work Best
| Room Type | Suitability | Notes |
| Bedrooms | Use with caution | Flammability is a key concern |
| Bathrooms | Good fit | Needs proper ventilation to avoid mold |
| Kitchens | Good fit | Holds up well to humidity |
| Basements | Good fit | Helps with insulation and sound |
| Home offices | Good fit | Adds mild noise dampening |
| Rentals | Possible option | Lightweight enough for removable adhesive methods |
Frequently Asked Questions
Can styrofoam ceiling tiles be installed over a popcorn ceiling?
Yes, as long as the existing popcorn texture is stable and not crumbling, the tiles can typically be applied directly over it without removing the texture first.
Do these tiles work well in a bathroom?
They can work well in bathrooms as long as there’s adequate ventilation, since excess moisture without airflow can lead to mold growth on the surface over time.
Is it possible to use these tiles in a rental property?
Because the tiles are so lightweight, some renters have successfully installed them using removable adhesive strips instead of permanent glue.
How long does a typical installation take?
Smaller rooms can often be completed in a day or two, while larger or more detailed layouts may take longer due to painting and cutting time.
Conclusion
Styrofoam ceiling tiles offer an affordable and approachable way to transform a plain ceiling into something with real visual character. They’re easy to install, help with insulation and noise, and come in styles to match almost any room.
The main tradeoffs are their flammability and the careful handling they require during installation, both of which are worth factoring in before choosing where to use them
Related Articles
Garage Door Bottom Seal Replacement: Complete Guide for Homeowners
How Deep Are Kitchen Counters? Standard Depths for Every Counter Type
How to Install a Curtain Rod? Complete Beginner’s Guide
Shower Door Repair: Complete Guide to Fix Common Shower Door Problems
Roof Repairs Worcester: Your Complete Local Guide to a Safe and Lasting Roof