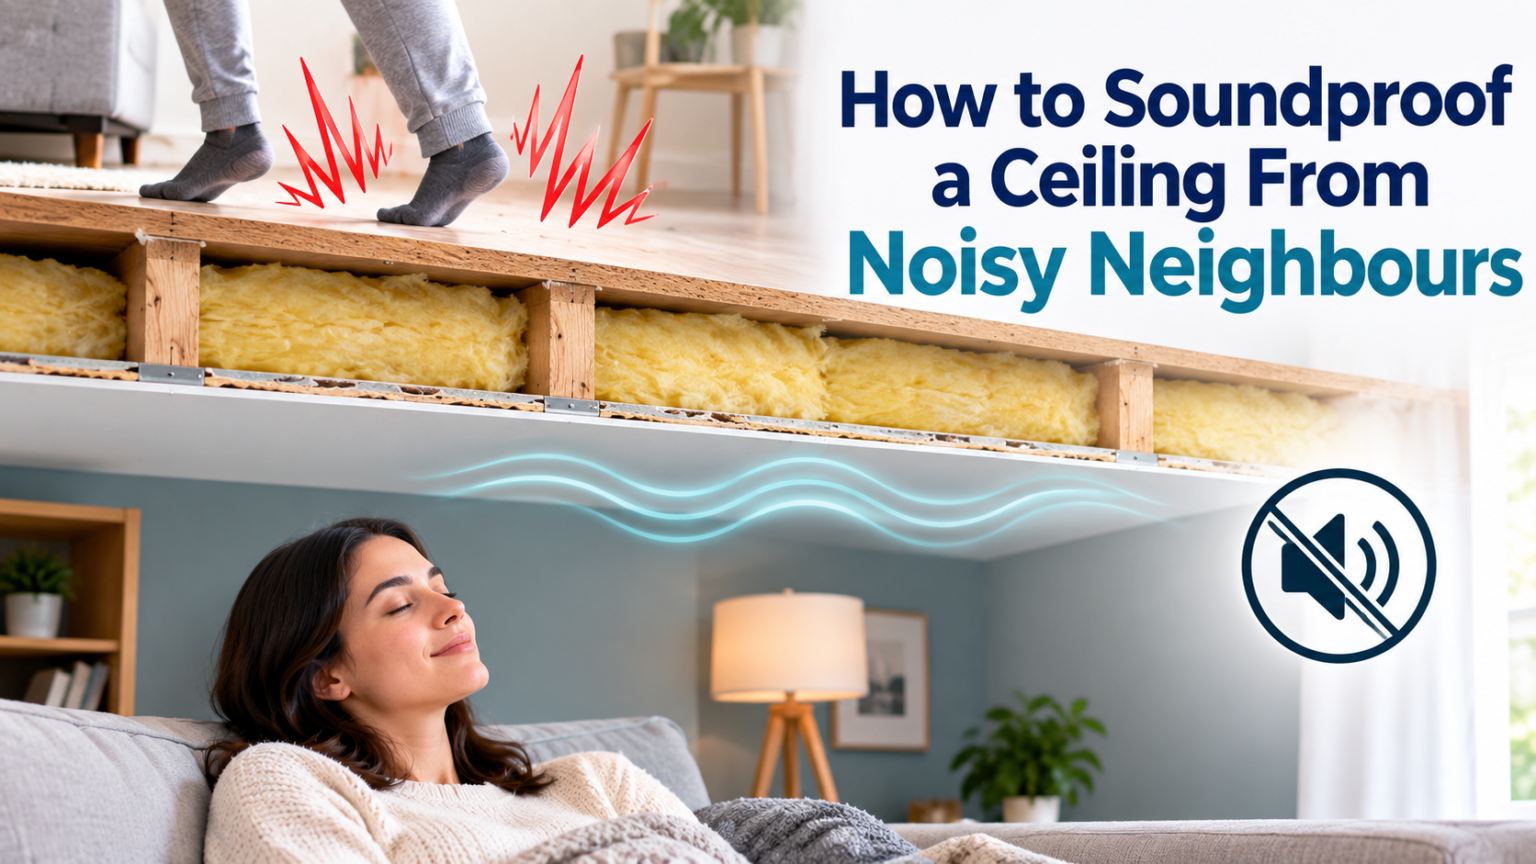

Living under a noisy household can turn your own home into a source of daily stress, especially when footsteps, dragging furniture, or loud conversations travel straight through your ceiling. Knowing how to soundproof a ceiling from noisy neighbours is not about one quick fix but about combining a few proven techniques that work together.
This guide walks through the science, the materials, the costs, and a complete step-by-step process so you can choose an approach that actually fits your home, your budget, and your patience.
Understanding the Two Types of Noise
Before picking a method, it helps to know that not all ceiling noise behaves the same way, and treating the wrong type of noise wastes both time and money. Two categories dominate almost every noisy-neighbour complaint, and each needs a slightly different fix.
Airborne Noise
Airborne noise includes voices, television sound, and music that travels through the air and passes through gaps, cracks, and thin materials in your ceiling. This type of noise is generally easier to reduce because it responds well to added mass and sealed gaps. Thicker drywall layers and acoustic caulking make a noticeable difference against airborne sound.
Impact Noise
Impact noise comes from footsteps, dropped objects, or furniture being dragged across the floor above you, and it travels through the physical structure of the building rather than the air. This is the harder problem to solve because it requires breaking the vibration path itself. Decoupling techniques, discussed later in this guide, are specifically designed to handle this stubborn category of noise.
How Sound Travels Through a Ceiling
A standard residential ceiling is not built with soundproofing in mind, so vibrations from the floor above pass almost directly into your living space through joists and drywall. Sound energy moves as vibration through solid materials, and a single layer of drywall offers very little resistance to that energy.
This is why homeowners often notice that even minor movement upstairs sounds unreasonably loud below. Understanding this transfer path explains why simply hanging foam panels rarely solves the real problem, since foam only manages echo inside a room rather than stopping vibration from entering it in the first place.
Assessing Your Situation Before You Start
Every home is different, so the right soundproofing plan depends on a few honest questions you should answer first.
| Factor | Why It Matters |
| Renting or owning | Renters may be limited to non-permanent solutions, while owners can open the ceiling |
| Budget available | Full assemblies cost more but deliver dramatically better results than surface add-ons |
| Type of ceiling | Drywall, concrete, or plaster ceilings each respond differently to treatment |
| Noise severity | Occasional footsteps need less work than constant loud impact or voice transfer |
| Time you can invest | A weekend project differs greatly from a full renovation-level fix |
Taking a few minutes to evaluate these points prevents wasted spending on a method that was never suited to your specific ceiling or living arrangement.
Method 1: Add Mass to the Ceiling
Adding mass is one of the most reliable ways to block airborne noise, and it works on the simple principle that heavier, denser materials are harder for sound waves to pass through.
Double-Layer Drywall With Green Glue
Installing a second layer of drywall with a damping compound like Green Glue sandwiched between the layers converts sound energy into a tiny amount of heat instead of letting it pass through. This method is affordable, widely available, and noticeably reduces mid-range and high-frequency noise such as voices and television sound.
Mass-Loaded Vinyl
Mass-loaded vinyl, often shortened to MLV, is a dense but flexible sheet that can be installed beneath a new drywall layer for additional sound blocking. It is thin enough to avoid taking up much ceiling height, yet heavy enough to meaningfully improve airborne noise resistance when combined with drywall.
Method 2: Decouple the Ceiling for Impact Noise
Decoupling is widely considered the single most effective step when the main problem is footsteps or impact noise from upstairs, because it physically interrupts the vibration path.
Resilient Channels
Resilient channels are thin metal strips installed before the new drywall that create a slight separation between the ceiling structure and the drywall surface. This separation prevents vibrations from travelling directly through solid contact points, which significantly reduces the thumping and footstep sounds that mass alone cannot fix.
Sound Isolation Clips and Hat Channel
Isolation clips paired with a hat channel system offer an even stronger decoupling effect than resilient channels alone, since the rubber-like clips absorb vibration before it reaches the drywall. This combination is considered the gold standard for impact noise reduction and is commonly recommended when neighbours’ footsteps are the primary complaint.
Method 3: Fill the Ceiling Cavity With Insulation
Once mass and decoupling are addressed, filling the empty cavity behind the ceiling boosts sound absorption and prevents noise from resonating inside the gap.
Mineral Wool (Rockwool)
Mineral wool is a dense, fire-resistant insulation material that performs exceptionally well at absorbing mid and high-frequency sound within the ceiling cavity. It is a preferred choice for serious soundproofing projects because of its density and its ability to hold shape without settling over time.
Fiberglass Insulation
Fiberglass insulation is a more budget-friendly alternative that still provides useful sound absorption, though it is generally considered slightly less effective than mineral wool for pure acoustic purposes. It remains a reasonable choice when cost is the primary concern and some absorption is better than none.
Method 4: Seal Every Gap and Crack
Even a perfectly built soundproof ceiling assembly will underperform if sound is allowed to leak through unsealed openings, since air gaps let sound pass almost as freely as an open window.
Acoustic Caulk Around Edges
Acoustic caulk should be applied around the entire perimeter of the ceiling where it meets the walls, since this junction is one of the most common places sound escapes unnoticed. This step is inexpensive but frequently skipped, which is why many soundproofing attempts fall short of expectations.
Sealing Fixtures and Vents
Light fixtures, vents, and any ceiling penetrations need to be sealed carefully, because these fixtures often create direct pathways for airborne sound to bypass your soundproofing layers entirely. Acoustic putty pads or sealant around these points close the gap without affecting the function of the fixture itself.
Method 5: Install a Drop or Suspended Acoustic Ceiling
For situations where opening the existing ceiling is not practical, a suspended acoustic ceiling offers a middle-ground solution that adds both an air gap and absorptive material without major construction.
This system hangs a new ceiling layer slightly below the original one, and the air pocket between the two surfaces helps interrupt sound transfer while acoustic tiles absorb some of the noise that does pass through. It is generally easier to install than a full decoupled assembly, though it will not perform quite as well against heavy impact noise from footsteps above.
Method 6: Budget-Friendly and Renter-Friendly Options
Not everyone can open a ceiling or install permanent materials, so several lighter alternatives exist for renters or those on a tighter budget.
| Option | Best For | Limitation |
| Acoustic foam panels | Reducing echo inside your own room | Minimal effect on transferred noise |
| Fabric wall or ceiling panels | Softening sound reflection and improving comfort | Does not block structural vibration |
| Requesting rugs upstairs | Reducing impact noise at its source | Requires cooperation from neighbours |
| Rearranging furniture | Creating a small buffer against sound | Very limited overall improvement |
These options rarely solve the problem completely, but they can meaningfully soften the experience when permanent changes are not possible.
The Best Combination Method Step by Step
The most effective approach combines several methods into one assembly rather than relying on a single technique. The general order that professionals and experienced DIYers follow is: install isolation clips and hat channel first, add mineral wool insulation into the open cavity, apply Green Glue between two layers of drywall, and finish by sealing every edge, fixture, and vent with acoustic caulk. Following this order ensures that impact noise is decoupled, airborne noise is blocked by mass, and any remaining sound is absorbed rather than allowed to resonate.
Tools and Materials Checklist
A clear checklist keeps the project organized and prevents mid-project trips to the hardware store.
| Category | Items Needed |
| Structural | Isolation clips, hat channel, screws, drywall sheets |
| Acoustic materials | Mineral wool or fiberglass, Green Glue, acoustic caulk |
| Tools | Stud finder, drill, level, utility knife, caulking gun |
| Safety gear | Dust mask, gloves, safety glasses |
Step-by-Step DIY Installation Guide
Beginning the project properly makes the entire process smoother and reduces the chance of costly mistakes along the way.
Preparing the Existing Ceiling
Start by removing the existing drywall carefully if a full assembly is planned, and inspect the joists for any existing damage or moisture issues before proceeding. This preparation stage sets the foundation for every later step, so it should not be rushed even though it feels like the least rewarding part of the project.
Installing Clips, Insulation, and Drywall
Attach the isolation clips to the joists, slide the hat channel into place, and fill the open cavity with mineral wool before screwing the new drywall layer onto the channel using Green Glue between two boards. Careful, methodical work at this stage directly determines how well the finished ceiling performs against both airborne and impact noise.
Finishing and Sealing
Once the drywall is installed, apply acoustic caulk around every edge, seal light fixtures and vents, and finish the surface with paint or texture to match the rest of the room. This final sealing step is what locks in the performance of everything installed beneath it.
Cost Breakdown
Costs vary widely depending on how far the project goes, and having a rough range helps with realistic planning.
| Approach | Estimated Cost Range |
| Budget foam or fabric panels | Low cost, minimal materials |
| Mid-range mass and sealing only | Moderate cost, noticeable improvement |
| Full decoupled assembly with insulation | Higher cost, best overall performance |
DIY Versus Hiring a Professional
Homeowners comfortable with basic construction work can often complete a decoupled ceiling assembly themselves over a weekend or two, especially with a clear checklist and enough patience for the detail work.
However, those dealing with concrete ceilings, structural concerns, or simply lacking the time may find it more efficient to hire a professional installer who can guarantee proper technique and a faster turnaround.
Frequently Asked Questions
Does soundproofing a ceiling completely block all noise? No method eliminates all sound, but a full decoupled assembly with mass and insulation can reduce both airborne and impact noise significantly enough to restore everyday comfort.
How long does a full ceiling soundproofing project take? A complete DIY assembly typically takes a few days spread across preparation, installation, and finishing, while professional crews often finish faster with proper equipment.
Is soundproofing worth it for renters? Renters benefit more from budget-friendly, non-permanent options like panels and rugs, since major structural changes usually require landlord approval first.
Conclusion
Learning how to soundproof a ceiling from noisy neighbours comes down to understanding the type of noise you are dealing with and applying the right combination of mass, decoupling, insulation, and sealing. Whether you choose a full professional-grade assembly or a lighter renter-friendly approach, the key is addressing both airborne and impact noise together rather than relying on a single quick fix for lasting, noticeable results.
Related Posts
Basement Drainage: Complete Guide to Systems, Costs & Solutions
How to Clean Vinyl Floors: The Complete Step-by-Step Guide
Can You Line Your Garage in Plywood? Complete Guide 2026
Fisher Wood Stove: The Complete Guide to America’s Most Trusted Wood Burner
How Much to Install a Bathroom in a Basement: The Complete 2026 Cost Guide