
How Hard Is It to Install a Ceiling Fan?
Installing a ceiling fan is considered a moderate difficulty task for most homeowners, especially when replacing an existing light fixture with wiring already in place. The difficulty increases significantly if new electrical wiring or additional structural support needs to be added.
Overall Difficulty Level for Beginners
For someone comfortable with basic tools and following instructions carefully, replacing an existing ceiling fixture with a fan typically falls into the beginner to intermediate range of home improvement projects. The main challenges usually involve physically supporting the fan while wiring connections are made, since fans are heavier and bulkier than standard light fixtures. Most of the difficulty comes from the physical handling of the fan rather than complex technical skill.
Factors That Determine Installation Difficulty
Several variables affect how challenging a ceiling fan installation will actually be, and understanding these factors helps set realistic expectations before starting the project.
Existing Electrical Setup
If a ceiling already has wiring in place from a previous light fixture, installation becomes considerably easier since the electrical groundwork is already done. Homeowners in this situation mainly need to connect wires correctly and mount the fan securely. Without existing wiring, an electrician typically needs to run new wiring through the wall or attic, which adds substantial time and complexity to the project.
Ceiling Box Support Strength
Standard light fixture boxes are often not rated to support the weight and movement of a ceiling fan, making this one of the most commonly overlooked difficulty factors. A fan-rated electrical box, which is specifically designed to handle the additional weight and vibration, usually needs to be installed if one isn’t already present. Checking and potentially replacing this box adds a moderate level of difficulty, particularly when working in tight attic spaces above the ceiling.
Ceiling Height and Accessibility
Fans installed on standard eight or nine-foot ceilings are generally easier to work with since a standard ladder provides adequate access. Vaulted or very high ceilings make the installation noticeably harder, often requiring specialized ladders, downrod extensions, or professional help due to the increased risk of working at height. Accessibility around the installation area, including nearby furniture or tight corners, can also add minor complications.
Fan Type and Features
The complexity of the fan itself plays a role in overall installation difficulty, with some models requiring more assembly and wiring steps than others.
| Fan Type | Difficulty Level | Notes |
| Basic fan with pull chains | Easy to Moderate | Simple wiring, standard mounting |
| Fan with remote control | Moderate | Requires receiver wiring inside canopy |
| Fan with integrated light | Moderate | Extra wiring connections needed |
| Smart/app-controlled fan | Moderate to Hard | May need additional wiring for smart hub compatibility |
Tools and Materials Needed
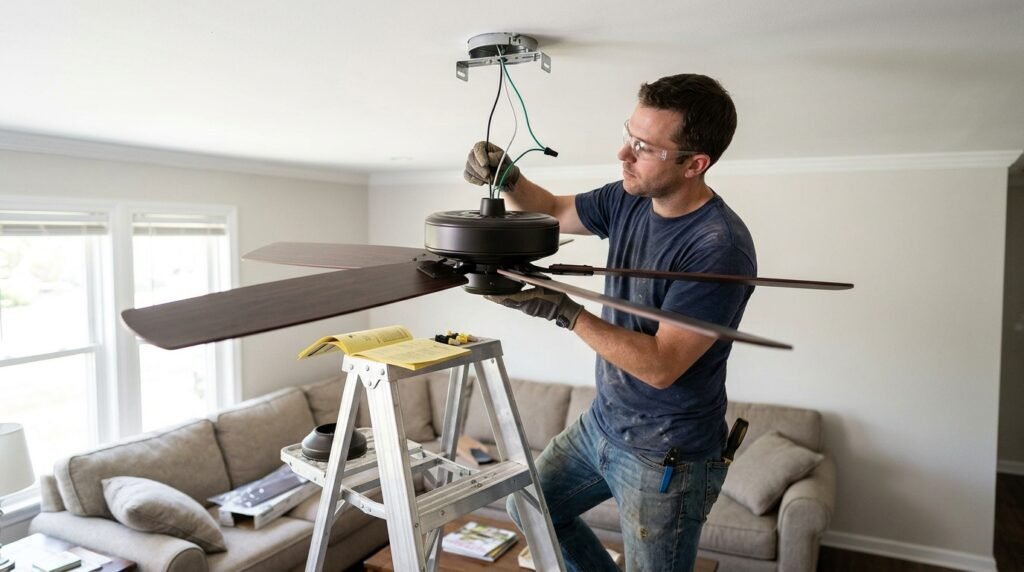
Having the right tools on hand before starting makes the installation process considerably smoother and reduces the chances of running into mid-project delays.
Essential Tools for Installation
A basic ceiling fan installation typically requires a set of common household and electrical tools rather than specialized equipment. The following items are generally necessary for most standard installations:
- A sturdy ladder appropriate for the ceiling height
- A non-contact voltage tester to confirm power is off
- A screwdriver set, both flathead and Phillips
- Wire strippers and wire nuts for electrical connections
- A fan-rated electrical box if one isn’t already installed
Having these tools organized and within reach before starting helps the installation move along without unnecessary interruptions.
Optional Helpful Equipment
Beyond the essentials, certain optional tools can make the process noticeably easier, particularly for larger or heavier fan models. A fan brace bar helps install a proper support box when working through an existing ceiling opening without full attic access. A second person to help hold the fan steady during wiring is also extremely helpful, since many fans are too bulky and heavy for one person to manage safely alone while also handling electrical connections.
Step-by-Step Installation Difficulty Breakdown
Breaking the installation into individual steps helps clarify exactly where the real difficulty lies in the overall process.
Turning Off Power and Removing Old Fixture
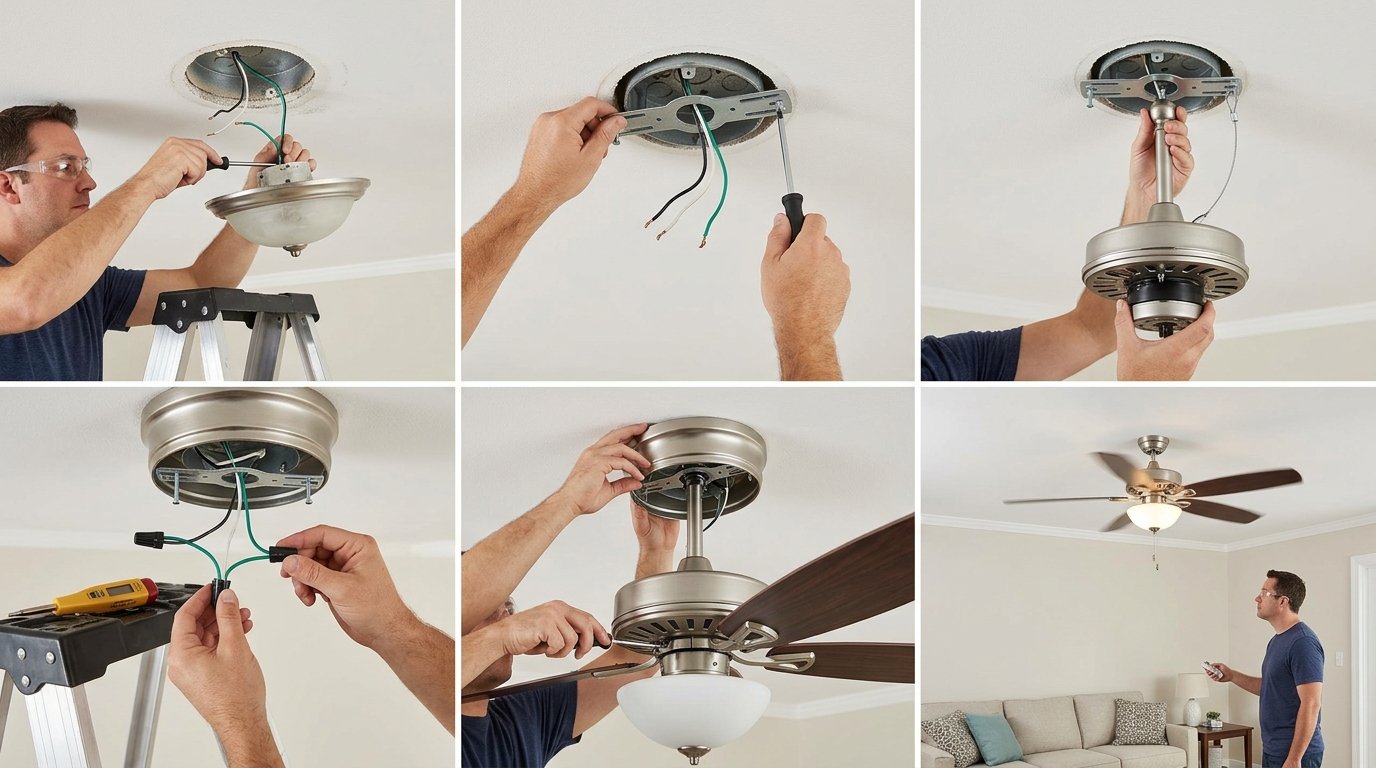
This initial step is generally the easiest part of the process, involving switching off the breaker and using a voltage tester to confirm the power is off before removing the existing fixture. Removing an old light fixture usually just requires unscrewing mounting screws and disconnecting a few wires. This step rarely presents difficulty beyond basic safety awareness.
Installing or Verifying the Fan-Rated Box
This step tends to be one of the more technically challenging parts of the project, especially if the existing box needs to be replaced with a fan-rated version. Accessing the ceiling from above, if there’s an attic, makes this easier, while working entirely from below through the existing hole is considerably trickier. This is often the point where homeowners without electrical experience choose to call in professional help.
Assembling and Mounting the Fan Bracket
Attaching the mounting bracket to the electrical box is usually straightforward, involving a few screws and following the manufacturer’s included instructions. The main challenge here is ensuring the bracket is completely secure, since the entire weight of the fan will hang from this connection point. Double-checking tightness at this stage prevents wobbling or safety issues later.
Wiring the Fan Connections
Wiring a ceiling fan involves matching color-coded wires, typically black to black, white to white, and green or copper to ground, similar to standard light fixture wiring with an added wire for fan speed control in some models. This step requires careful attention but doesn’t demand advanced electrical knowledge for most standard installations. Fans with additional features like remote controls may involve a couple of extra wiring steps for the receiver unit.
Attaching Blades and Testing Fan Operation
The final assembly step involves attaching the fan blades and light kit if included, then restoring power to test that the fan operates correctly in all speed settings. This part is generally considered easy, though it’s important to check for wobbling, which may indicate blades weren’t attached evenly or the mounting isn’t fully secure. Testing thoroughly before considering the job complete helps catch any issues early.
When to Call a Professional Electrician
While many ceiling fan installations are manageable for confident do-it-yourself homeowners, certain situations clearly call for professional assistance rather than attempting the work alone.
Situations Requiring New Wiring
If a ceiling doesn’t already have electrical wiring in place, running new wiring through walls or attic spaces requires a solid understanding of home electrical systems and local building codes. Attempting this without proper knowledge poses safety risks and may violate electrical codes if not done correctly. In these cases, hiring a licensed electrician is generally the safer and more efficient choice.
High or Vaulted Ceilings
Installations on very high or vaulted ceilings introduce fall risk that goes beyond typical home improvement comfort levels for many homeowners. Professionals have the proper equipment, such as extension ladders and scaffolding, along with experience working safely at height. This is a common scenario where even confident do-it-yourselfers choose to bring in outside help.
Comparing Difficulty Across Different Sources
Most home improvement resources agree that ceiling fan installation falls into a moderate difficulty category, particularly when replacing an existing light fixture with wiring already available. Some sources rate the task as easier than presented here, assuming the installer has some prior electrical experience, while others rate it higher due to safety concerns around working with electricity at height. The consensus across reliable sources aligns closely with the breakdown provided above, where the true difficulty depends heavily on existing wiring and ceiling accessibility rather than the fan installation itself.
Frequently Asked Questions
Can one person install a ceiling fan alone?
Yes, though it’s considerably easier and safer with a second person to help support the fan’s weight during wiring and mounting.
Do all ceiling fans need a special electrical box?
Yes, fans require a fan-rated box designed to support additional weight and vibration, which differs from standard light fixture boxes.
How long does a typical ceiling fan installation take?
A straightforward replacement installation with existing wiring generally takes between one and two hours for someone with basic tool familiarity.
Is it dangerous to install a ceiling fan without turning off the breaker?
Yes, working with live electrical wiring poses serious safety risks, so confirming the breaker is off with a voltage tester is an essential first step.
Conclusion
Installing a ceiling fan is a moderately difficult task that becomes considerably easier when existing wiring and proper support boxes are already in place. Homeowners comfortable with basic tools can often complete the job themselves, while situations involving new wiring or high ceilings are better left to a licensed professional.
Related Articles
Can You Use Ceiling Paint on Walls? The Surprising Benefits and Drawbacks
Joist Tape for Decking: The Complete Guide to Protecting Your Deck’s Substructure
Why Is My Toilet Bubbling? 7 Real Causes and How to Fix Them
What Is an Asbestos Stucco Ceiling? Learn the risks and stay safe.