

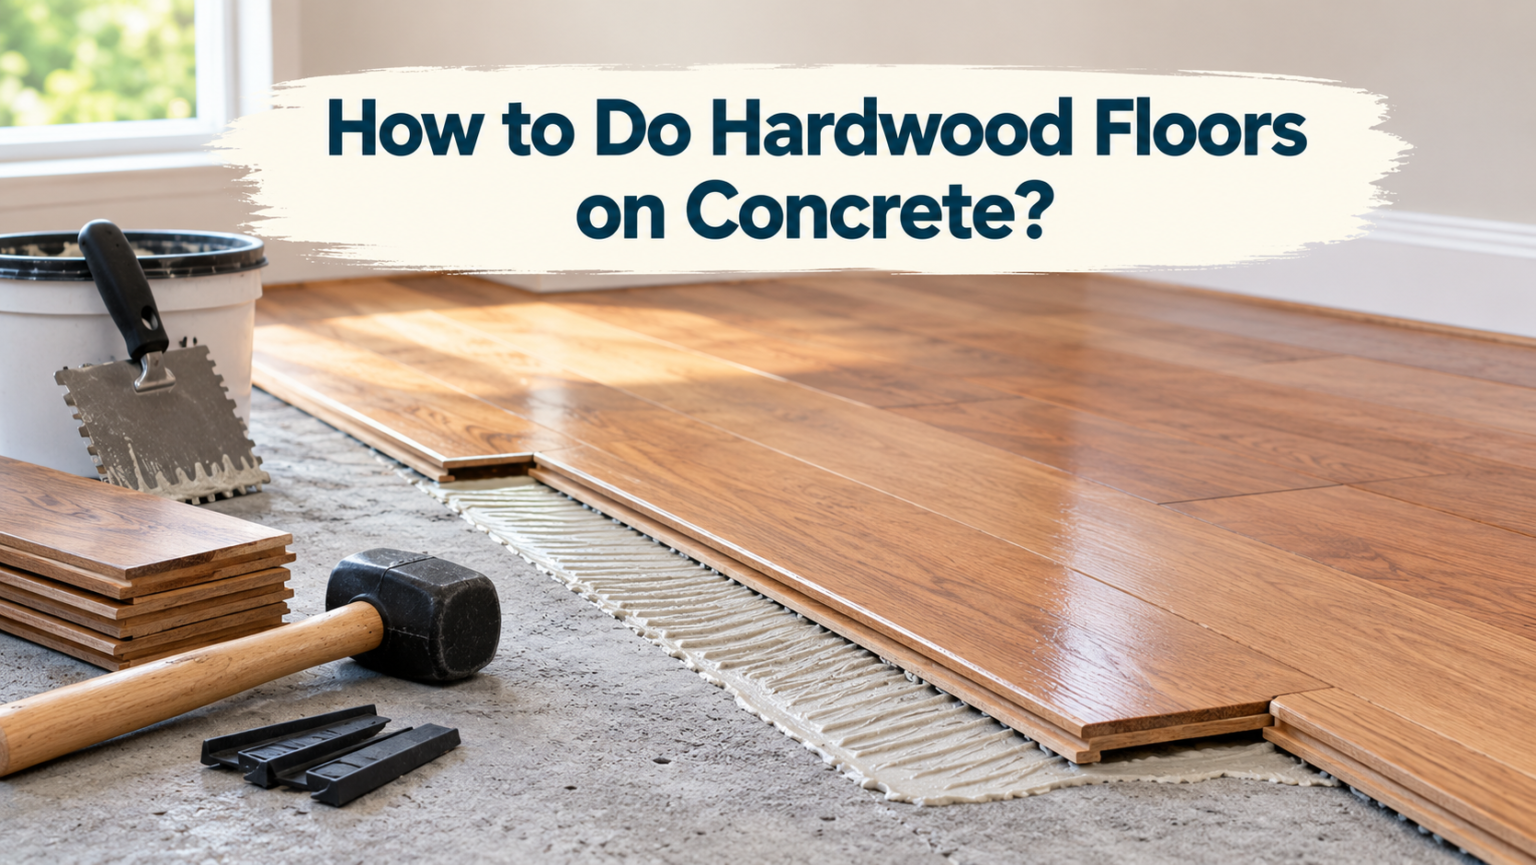

Installing hardwood over a concrete slab is entirely possible, but it follows different rules than installing over a wood subfloor. The slab must first be tested for moisture, because concrete continuously draws water vapor up from the ground and releases it into whatever sits on top of it.
Once the moisture reading is acceptable, the surface has to be cleaned, flattened, and sealed with a vapor barrier. Engineered hardwood is the safest choice on concrete, since its layered core resists swelling far better than solid planks.
From there you pick one of three approaches: gluing the boards down with urethane adhesive, floating them over an underlayment, or building a plywood subfloor and nailing into that. Finish by leaving a half-inch expansion gap around the entire perimeter so the floor can move without buckling.
Key Takeaways
- Concrete must be tested for moisture before any flooring is ordered, not after.
- Engineered hardwood performs far better than solid hardwood on a slab.
- A vapor barrier is mandatory in almost every installation, regardless of method.
- New concrete needs a minimum of 30 days to cure, and often longer.
- Glue-down, floating, and plywood subfloor are the three viable methods.
- Solid hardwood should never go below grade under any circumstances.
Can You Install Hardwood Floors on Concrete?
Yes, and it is done routinely, but the answer depends on three variables: where the slab sits relative to ground level, which type of hardwood you choose, and how long the concrete has cured. Each of these is worth understanding before you buy materials.
Above-Grade vs. Below-Grade Slabs
A slab is above grade when the floor sits higher than the surrounding soil, at grade when it is level with it, and below grade when it sits underneath, as in a basement. Below-grade slabs face constant hydrostatic pressure from surrounding earth, which makes them the most demanding environment for wood. Engineered hardwood is the only product rated for below-grade use, and even then only with a properly installed vapor barrier.
Solid Hardwood vs. Engineered Hardwood
Solid hardwood is a single piece of wood that swells and shrinks across its width as humidity shifts. Engineered hardwood uses a real wood wear layer bonded to a cross-laminated plywood or HDF core, which cancels out most of that movement. On concrete, engineered planks are the default recommendation, and solid boards are viable only above grade over a properly built plywood subfloor.
How Long Concrete Needs to Cure
Fresh concrete releases enormous amounts of water as it cures, and installing over it too early guarantees failure. The industry minimum is 30 days, but many installers wait 60 to 90 days on thicker pours or in humid climates. Curing time is not a substitute for testing, so the slab must still pass a moisture test regardless of age.
Why Moisture Is the Biggest Risk?
Nearly every failed hardwood installation over concrete traces back to moisture rather than workmanship. Understanding how water moves through a slab explains why the testing and barrier steps are non-negotiable.
How Concrete Transfers Moisture
Concrete is porous, and those pores connect into a network of capillaries that pull groundwater upward in the same way a paper towel absorbs a spill. That moisture eventually reaches the surface and evaporates as vapor. When flooring covers the slab, the vapor has nowhere to go and collects at the wood-to-concrete interface instead.
Signs of a Moisture Problem
Cupping is the most visible warning sign, where board edges rise higher than their centers because the underside absorbed water. Crowning is the opposite, with the center bulging upward, and it usually appears after a cupped floor has been sanded too early. Adhesive failure shows up as hollow-sounding boards, squeaking underfoot, or planks that shift when walked on.
How to Test Concrete for Moisture?
Testing is inexpensive and takes very little time compared to replacing a failed floor. Two standardized tests dominate the industry, plus one informal method useful for quick screening.
| Test | Standard | What It Measures | Typical Threshold |
| Calcium chloride | ASTM F1869 | Surface vapor emission rate | Under 3 lbs / 1,000 sq ft / 24 hr |
| In-slab RH probe | ASTM F2170 | Internal relative humidity | Under 75–80% RH |
| Plastic sheet | ASTM D4263 | Presence of moisture only | Pass / fail, no number |
Calcium Chloride Test
A pre-weighed dish of calcium chloride is sealed under a plastic dome on the bare slab for 60 to 72 hours. The salt absorbs moisture escaping from the surface, and the weight gain is converted into a vapor emission rate. This test only reads the top layer of concrete, which is why it has largely been supplemented by RH probes.
In-Slab Relative Humidity Test
Holes are drilled to 40 percent of slab depth, fitted with sleeves, and left to equilibrate for 72 hours before a probe records the internal humidity. Because it reads deep into the slab, it gives a far more accurate picture of long-term moisture behavior. Most flooring and adhesive manufacturers now specify this test in their warranty documentation.
Plastic Sheet Test
A two-foot square of clear plastic is taped down on all four edges and left for 24 to 48 hours. Condensation underneath, or darkening of the concrete, indicates moisture is present. It is a useful preliminary check but produces no measurable number, so it never replaces a proper test.
Preparing the Concrete Subfloor
Preparation determines how flat, quiet, and durable the finished floor feels. Three tasks matter most: cleaning, flattening, and sealing.
Cleaning and Degreasing
The slab must be free of paint, sealers, curing compounds, drywall dust, and adhesive residue, since none of these bond reliably. Mechanical removal by grinding or shot blasting is preferred over chemical strippers, which can leave films behind. Vacuum thoroughly afterward, because loose dust prevents adhesive from gripping the concrete.
Correcting Flatness
The accepted tolerance is 3/16 of an inch of variation across any ten-foot span. High spots are ground down with a concrete grinder fitted with a diamond cup wheel. Low areas are filled with a cement-based patching compound or, for larger dips, a self-leveling underlayment poured and spread to a feathered edge.
Installing the Vapor Barrier
Barriers come in three forms: six-mil polyethylene sheeting, a roll-on liquid membrane, or an adhesive that includes a built-in moisture block. Sheet plastic is used under floating floors and plywood systems, with seams overlapped at least eight inches and taped. Liquid membranes and moisture-cure urethane adhesives are the standard choice for glue-down installations.
Three Installation Methods
The method you choose depends on the flooring product, the ceiling height available, and the moisture reading from your test. Each has a clear best-use case.
Glue-Down Installation
Engineered planks are bonded directly to the slab with a moisture-cure urethane adhesive troweled on in small working sections. This produces the most solid feel underfoot and the quietest floor, with no hollow sound when walking. It is also the least forgiving method, since the correct trowel notch size and working time must be followed exactly.
Floating Installation
Click-lock engineered planks lock to each other rather than to the slab, resting on a foam or cork underlayment above a vapor barrier. Nothing is fastened down, which makes it the fastest and most DIY-friendly approach. The trade-off is a slightly softer, more resonant feel compared with glued floors.
Plywood Subfloor System
Sheets of 3/4-inch plywood are glued or mechanically fastened to the slab over a vapor barrier, creating a nailable surface. Solid hardwood is then blind-nailed into the plywood exactly as it would be over joists. The system adds roughly one inch of height, which affects door clearances and transitions.
Step-by-Step Installation Process
With preparation complete, the installation itself follows a predictable sequence. Rushing the first two steps causes most of the problems that appear later.
Acclimating the Wood
Bring the flooring into the room where it will be installed and leave the boxes there for three to five days. The room should be at normal living temperature and humidity during this period, not under construction conditions. Open or cross-stack the cartons so air circulates around the planks.
Layout and Starting Line
Measure the room and calculate how wide the final row will be, adjusting the first row so you never finish with a sliver. Snap a chalk line parallel to the longest wall, offset by the width of a plank plus the expansion gap. Dry-lay several rows first to check the board mix and stagger pattern.
Laying the Field
Work in manageable sections, keeping end joints staggered at least six inches apart between adjacent rows. For glue-down, spread only as much adhesive as you can cover within its open time, usually 30 to 60 minutes. Mix planks from several cartons as you go so color and grain variation distributes evenly.
Expansion Gaps and Finishing
Leave a half-inch gap at every wall, pipe, column, and door frame to allow seasonal movement. Cover the gap with baseboard or shoe molding, fastened to the wall rather than the floor. Install transition strips at doorways and where the hardwood meets a different flooring surface.
Tools, Materials, and Costs
Most of the cost of this project sits in the flooring and the adhesive rather than in tools, and several items can be rented by the day rather than purchased. The table below outlines what a typical installation requires.
| Item | Purpose | Typical Price |
| Moisture meter | Checking wood and slab readings | $50 – $200 |
| RH test kit | ASTM F2170 in-slab testing | $40 – $90 per probe |
| Concrete grinder (rental) | Removing high spots and coatings | $60 – $110 per day |
| Self-leveling compound | Filling low areas | $30 – $45 per bag |
| Moisture-cure urethane adhesive | Bonding and vapor blocking | $70 – $130 per pail |
| Notched trowel | Spreading adhesive to spec | $15 – $35 |
| Underlayment | Cushion for floating installs | $0.40 – $1.00 per sq ft |
| Engineered hardwood | The flooring itself | $4 – $12 per sq ft |
Installed professionally, expect roughly $8 to $16 per square foot including labor. A careful DIY installation typically runs $5 to $10 per square foot in materials.
Common Mistakes to Avoid
Failures on concrete tend to repeat the same handful of errors, and all of them are avoidable with planning.
- Skipping the moisture test. A visual inspection tells you nothing about what the slab will release over the next twelve months.
- Using solid hardwood below grade. No adhesive or barrier compensates for the dimensional instability of solid boards in a basement.
- Omitting or shortening the expansion gap. A floor pinned tight against walls has nowhere to expand and will lift in the middle.
- Using the wrong trowel notch. Too little adhesive leaves voids, and too much squeezes up between boards.
- Installing during active construction. Drywall mud, paint, and open windows create humidity swings that ruin acclimation.
Maintenance and Long-Term Care
A floor over concrete needs the same care as any hardwood floor, with slightly more attention to indoor humidity. Keeping conditions stable is what protects the installation over time.
- Hold indoor relative humidity between 35 and 55 percent year-round, using a humidifier or dehumidifier as the season requires.
- Sweep or vacuum with a hard-floor attachment, and clean with a manufacturer-approved wood floor cleaner rather than water.
- Place mats at entry points and felt pads under furniture legs to limit surface scratching.
- Refinish only if the wear layer allows it; many engineered products can be sanded once or twice, and some not at all.
Frequently Asked Questions
Do you need a vapor barrier under hardwood on concrete?
In nearly every case, yes. Either a sheet barrier or a vapor-blocking adhesive is required to keep slab moisture away from the wood.
How long should concrete cure before installing hardwood?
Thirty days is the accepted minimum, though 60 to 90 days is safer for thick slabs. The moisture test still governs the final decision.
Can you nail hardwood directly into concrete?
Not practically. Nailing requires a plywood subfloor fastened to the slab first, which then accepts standard flooring nails or staples.
What is the best hardwood for a concrete slab?
Engineered hardwood with a plywood core, because its cross-laminated construction resists the swelling that affects solid planks.
Can hardwood be installed in a basement?
Yes, using engineered flooring with a vapor barrier, provided the slab passes a moisture test and the space stays dry year-round.
Is glue-down or floating better on concrete?
Glue-down feels more solid and quieter underfoot, while floating is faster and easier to install. Both perform well when the slab is properly prepared.
Conclusion
Learning how to do hardwood floors on concrete comes down to respecting moisture. Test the slab, prepare the surface properly, install a vapor barrier, and choose engineered hardwood with a method suited to your space. Handle those four things correctly and the floor will perform just as well as one laid over joists.
Related Articles
Garage Door Bottom Seal Replacement: Complete Guide for Homeowners
How To Get Stains Off Marble: Complete Guide 2026
Mulled Windows vs Non-Mulled Windows: Which Is Right for Your Home