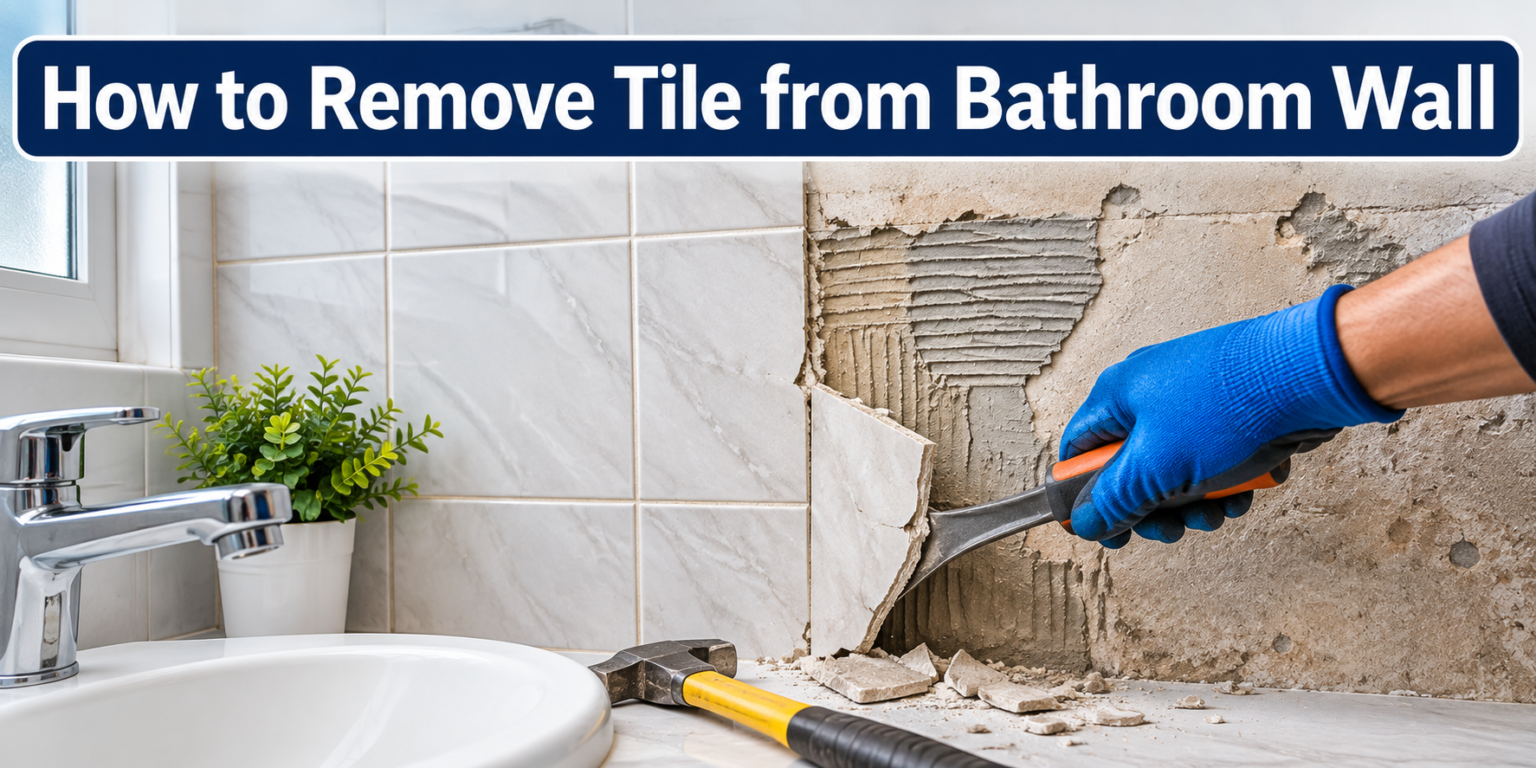

Removing tile from a bathroom wall is a task that many homeowners take on when they want to update their space, fix water damage, or replace cracked and outdated tiles.
Learning how to remove tile from bathroom wall the right way saves time, protects your wall structure, and reduces the mess that comes with demolition work.
This guide walks you through every stage of the process, from planning and safety to the actual removal and cleanup, using simple language and practical steps that anyone can follow at home.
Before You Start: Planning and Assessment
Before picking up any tool, it helps to look closely at your bathroom wall and decide exactly what kind of work you are dealing with. A little planning at this stage prevents a lot of frustration later when tiles are already half removed.
Signs You Need to Remove Tile
Cracked tiles, loose grout, visible mold growth behind the tile edges, or a hollow sound when tapping the surface are all signs that removal is necessary. Sometimes tiles simply look outdated and homeowners choose to remove them purely for a style upgrade. Whatever the reason, identifying the problem early helps you decide whether you need a full wall strip or just a partial patch.
Checking the Wall Type
Bathroom walls are usually built with drywall, cement backer board, or older plaster, and each material reacts differently to tile removal. Drywall is softer and can tear easily, cement board is more durable but heavier to work with, and plaster requires a gentler touch since it cracks under too much force. Knowing your wall type in advance helps you choose the right tools and avoid unnecessary damage.
Deciding Between Full Removal and Partial Repair
If only a few tiles near a corner or shower edge are damaged, a partial repair might save you time and money compared to stripping the entire wall. However, if there is widespread water damage, mold, or the tiles are original to an old bathroom, a full removal often makes more sense in the long run. This decision affects how many tools and how much time you will need for the project.
Estimating Time and Cost
A small section of tile can usually be removed in a few hours, while a full bathroom wall may take a full day or two depending on the adhesive strength and wall condition. Costs stay low if you already own basic tools, but renting a power scraper or hiring help for a large area will add to the budget. Planning this out ahead of time keeps the project realistic.
Safety Precautions
Tile removal involves sharp edges, flying debris, and dust, so taking safety seriously from the start protects both you and your home. This section covers the basic precautions every DIYer should follow before starting demolition.
Protective Gear
Wearing thick gloves, safety goggles, and a dust mask or respirator is non-negotiable when removing tile, since shards can break off unpredictably and dust particles can irritate your lungs. Long sleeves and closed shoes also help protect your skin from sharp tile fragments scattered on the floor. Investing in proper gear before starting saves you from unnecessary injuries.
Turning Off Water and Electricity
If your bathroom wall has plumbing lines or electrical outlets nearby, shutting off the water supply and power to that section prevents accidents while you are prying and chiseling. This step is especially important around shower walls where pipes often run close to the tiled surface. A quick check of your home’s shutoff valves before starting is always worth the extra few minutes.
Checking for Asbestos in Older Homes
Homes built before the 1980s sometimes used adhesives or backing materials that contain asbestos, which becomes dangerous when disturbed during removal. If your bathroom is from an older build and you are unsure about the materials used, it is safer to have a sample tested before you start breaking tiles. This precaution protects your long-term health far more than it costs in time.
Ventilating the Bathroom
Opening windows or running an exhaust fan while you work helps clear dust particles from the air and keeps the space breathable throughout the project. Bathrooms are typically small and enclosed, so ventilation becomes even more important when you are generating debris for several hours. Good airflow also helps any adhesive fumes dissipate faster.
Tools and Materials Needed
Having the right tools ready before you begin makes the entire process smoother and prevents mid-project trips to the hardware store. Below is a breakdown of what you will typically need.
Hand Tools
A hammer, flat pry bar, tile chisel, and a sturdy scraper form the core toolkit for most tile removal jobs. These tools let you score grout lines, pop tiles loose, and clean off leftover adhesive without needing anything electric. For smaller bathroom sections, hand tools alone are often enough to finish the job.
Power Tools
An oscillating multi-tool with a grout removal blade speeds up the scoring process significantly, while a grinder can help with tougher adhesive residue left on the wall. A heat gun is optional but useful for softening stubborn mastic before scraping it away. These tools are especially helpful for larger walls or thicker tile installations.
Safety Equipment and Cleanup Supplies
Beyond gloves and goggles, you will want heavy-duty trash bags for broken tile disposal, a shop vacuum for dust, and drop cloths to protect your bathroom floor and fixtures. Keeping these supplies within reach during the project saves time and keeps the work area manageable as debris builds up.
Here is a quick reference table summarizing the tools by category:
| Category | Tools/Items | Purpose |
| Hand Tools | Hammer, pry bar, chisel, scraper | Scoring and prying tiles loose |
| Power Tools | Oscillating multi-tool, grinder, heat gun | Faster grout cutting and adhesive removal |
| Safety Gear | Gloves, goggles, dust mask | Protecting eyes, hands, and lungs |
| Cleanup Supplies | Trash bags, shop vacuum, drop cloths | Managing debris and protecting surfaces |
Step-by-Step Tile Removal Process
Once your tools are ready and safety measures are in place, the actual removal follows a fairly consistent sequence regardless of wall type. Working through these steps in order keeps the process organized and reduces accidental wall damage.
Step 1: Prepare the Room and Cover Surfaces
Lay drop cloths across the bathroom floor and cover the bathtub or sink to catch falling debris and prevent scratches. Clearing the room of any movable items also gives you more space to work safely. This preparation step takes only a few minutes but saves considerable cleanup time afterward.
Step 2: Remove Fixtures and Accessories
Take down soap dishes, towel bars, mirrors, or any wall-mounted accessories attached to or near the tiled surface before you start prying tiles. Leaving these in place risks cracking them or making it harder to reach tile edges cleanly. Store removed fixtures somewhere safe if you plan to reuse them later.
Step 3: Score and Cut the Grout Lines
Use a grout saw or oscillating multi-tool to cut through the grout lines surrounding each tile you intend to remove. This step loosens the bond between tiles and makes individual removal far easier than trying to pry connected tiles apart. Take your time here since rushing often leads to cracked tiles or wall gouges.
Step 4: Start at a Corner or Edge Tile
Begin removal at a corner, edge, or any already-loose tile rather than the middle of the wall, since edges typically have less adhesive resistance. Insert your chisel or pry bar at a slight angle and tap gently with a hammer until the tile pops free. Starting from a weak point gives you leverage for the tiles that follow.
Step 5: Pry and Remove Tiles One by One
Continue working outward from your starting point, prying each tile loose individually rather than attempting to remove large sections at once. Working tile by tile keeps you in control and reduces the risk of damaging the underlying wall surface. Place removed tiles directly into a trash bag or bin as you go to keep the area clear.
Step 6: Handle Stubborn or Cracked Tiles
Some tiles resist removal due to stronger adhesive or aging mortar, and in these cases a heat gun can help soften the bond before you try prying again. For tiles that crack during removal, carefully extract the remaining pieces with a smaller chisel to avoid leaving sharp fragments embedded in the wall. Patience matters more than force in this step.
Step 7: Remove Leftover Adhesive and Mortar
After all tiles are off, scrape away the remaining thinset, mastic, or mortar using a flat scraper or grinder depending on how thick the residue is. Leaving old adhesive behind can interfere with new tile installation or paint adhesion later. This step often takes as long as the tile removal itself, so budget your time accordingly.
Step 8: Inspect and Repair the Wall Substrate
Once the wall is bare, check closely for cracks, soft spots, or water damage that may need patching before any new finish goes on. Press gently on the surface to feel for weak areas, especially near shower edges where moisture tends to collect. Addressing substrate issues now prevents bigger problems with your next wall treatment.
Dealing with Different Wall Types
Different bathroom wall materials respond differently to the same removal techniques, so adjusting your approach based on what is behind your tile matters for a clean result.
Removing Tile from Drywall
Drywall requires a gentler prying technique since the paper backing tears easily and excessive force can punch through the surface entirely. Working slowly with a wide, flat scraper reduces the chance of gouging the board underneath. If drywall damage does occur, small sections can usually be patched before retiling or painting.
Removing Tile from Cement Backer Board
Cement board holds up much better under pressure, which makes it more forgiving during tile removal compared to drywall. However, the adhesive bond on backer board tends to be stronger, so you may need more scraping effort to clear leftover mortar. This durability makes cement board a common choice for wet areas like showers.
Removing Tile from Plaster Walls
Plaster walls, common in older homes, crack more easily under sharp impacts, so a light touch with hand tools works better than power tools in most cases. Scoring grout lines carefully before prying helps minimize stress on the plaster surface. If cracks do appear, they can typically be patched with standard plaster repair compound.
Common Mistakes to Avoid
Even straightforward projects like tile removal come with pitfalls that can turn a simple job into a bigger repair. Being aware of these common errors helps you avoid them entirely.
Rushing the Grout Scoring Step
Skipping or rushing through grout scoring often leads to tiles that resist prying and crack unpredictably when force is applied. Taking a few extra minutes per tile at this stage saves significant time and frustration later in the process.
Using Too Much Force
Applying excessive pressure with a chisel or pry bar frequently results in dents, holes, or cracks in the wall substrate underneath the tile. Controlled, steady pressure combined with proper leverage almost always works better than brute force.
Ignoring Water Damage Behind Tiles
Some homeowners remove tile and immediately move on to the next step without checking for hidden mold or soft, water-damaged material behind the surface. Addressing this damage before covering it back up prevents much larger structural problems down the line.
Skipping Safety Gear
Working without gloves or eye protection might seem faster, but a single stray tile fragment can cause a serious injury in seconds. The few minutes it takes to put on protective gear are always worth the risk reduction.
Cleanup and Disposal
Once the tiles are off and the wall is prepped, proper cleanup ensures your bathroom is ready for the next stage of renovation without leftover hazards.
Sorting Debris
Separate broken tile pieces, grout dust, and adhesive scraps into different bags or bins, since some materials may be recyclable while others need standard disposal. Sorting as you go is far easier than trying to separate a mixed pile later.
Proper Disposal and Recycling Options
Many local waste facilities accept ceramic and porcelain tile for recycling, so checking with your municipal service before throwing everything into general trash can reduce landfill waste. Larger renovation projects may also require a dumpster rental depending on the volume of debris generated.
Final Wall Cleaning
Vacuum all dust from the wall and surrounding surfaces, then wipe down the area with a damp cloth to remove any remaining fine particles. A clean, dust-free wall is essential whether you plan to retile, paint, or install a different wall covering next.
What to Do After Tile Removal?
The work does not end once the last tile is off the wall, since the surface usually needs additional attention before it is ready for its next finish.
Repairing or Replacing Damaged Substrate
Any cracked drywall, damaged plaster, or compromised backer board should be patched or replaced before moving forward with new tile or paint. Skipping this step risks weak spots that could fail once new material is applied on top.
Prepping the Wall for New Tile, Paint, or Paneling
Depending on your next step, the wall may need sanding, priming, or a fresh layer of backer board to create a smooth, even surface. Proper prep work here directly affects how well your new wall finish holds up over time.
Waterproofing Considerations for Bathrooms
Since bathroom walls face constant moisture exposure, applying a waterproof membrane or sealant before retiling helps prevent future water damage and mold growth. This step is especially important around shower and tub areas where water contact is frequent.
Cost and Time Considerations
Budgeting realistically for a tile removal project helps you decide whether to handle it yourself or bring in professional help.
DIY Cost Breakdown
A basic DIY tile removal using hand tools typically costs very little beyond the price of protective gear and disposal bags, especially if you already own a hammer and chisel. Renting power tools for larger jobs adds a modest cost but significantly speeds up the work.
When to Hire a Professional
Extensive water damage, suspected asbestos, or very large bathroom walls are situations where hiring a professional contractor makes more sense than attempting the job alone. Professional help also reduces the risk of accidental damage to plumbing or electrical lines hidden behind the tile.
Average Time for Small vs Large Bathrooms
A small bathroom wall section might take between two to four hours to fully strip and clean, while a full bathroom with multiple tiled walls can take one to two full days depending on adhesive strength and wall condition.
Frequently Asked Questions
Can I remove tile without breaking it? It is possible to remove tiles intact if you score the grout carefully and pry gently, though older tiles with strong adhesive often break regardless of technique.
How do I remove tile without damaging drywall? Work slowly with a wide flat scraper at a shallow angle, applying steady rather than sharp force to avoid tearing through the drywall paper.
Do I need to remove all tiles or just damaged ones? This depends on the extent of damage; isolated cracks can often be patched individually, while widespread issues usually call for full wall removal.
How long does tile removal take? Most small sections take a few hours, while full bathroom walls can take one to two days depending on tools used and adhesive strength.
Conclusion
Learning how to remove tile from bathroom wall properly comes down to careful planning, the right tools, and a patient, step-by-step approach rather than rushing through demolition. From assessing your wall type to safely prying tiles loose and prepping the surface for its next finish, each stage plays a role in avoiding unnecessary damage and extra costs.
Whether you are tackling a small repair or a full bathroom renovation, following this structured process gives you a clean, damage-free wall ready for whatever comes next.
Related Posts
Roof Leaks in Heavy Rain: Causes, Signs & Fixes
Acid Staining Concrete Floor: Complete Guide
How to Attach Crown Molding to Cabinets: Complete Guide 2026