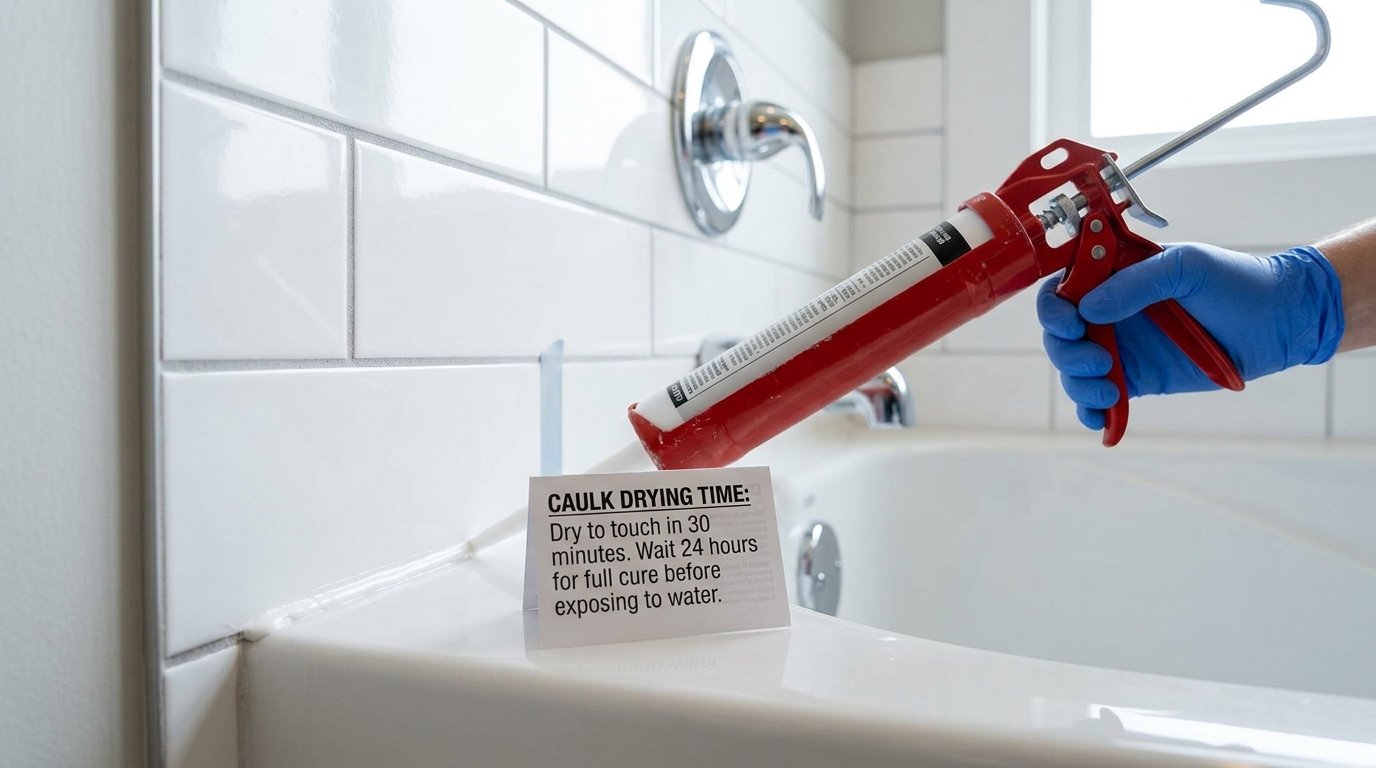

Bathroom caulk generally becomes dry to the touch within 30 minutes to a few hours, but full curing the point where it is truly waterproof and bonded takes anywhere from 24 hours to several days depending on the type of caulk used. Understanding this difference is what separates a seal that lasts years from one that fails within months.
Drying vs. Curing: Why the Difference Matters
Most people assume that once bathroom caulk feels dry on the surface, it is ready for water exposure. This is one of the most common and costly mistakes in any bathroom resealing project. Drying and curing are two separate stages, and confusing them almost always leads to seal failure.
When caulk is “dry to the touch,” only the outer skin has hardened. The inner material is still soft, flexible, and not yet properly bonded to the surface beneath it. Full curing means the entire bead from outer skin to the deepest point has hardened completely and is performing its sealing function. Think of it like baking a loaf of bread. The crust can feel firm while the inside is still raw. Caulk behaves the same way, especially silicone-based products, which cure from the outside inward.
Exposing caulk to water or pressure before curing is complete breaks down the bond before it even has a chance to form properly.
Drying and Curing Times by Caulk Type
Different caulk formulas behave very differently in the bathroom. Here is a detailed breakdown of the four most commonly used types:
Silicone Caulk
Silicone caulk is the go-to choice for bathrooms because of its strong water resistance, flexibility under temperature changes, and excellent adhesion to tiles, tubs, and fixtures. It does not absorb moisture and maintains its seal even in areas that are constantly wet.
Silicone caulk begins to skin over within 10 to 20 minutes of application. It becomes touch-dry in about 30 minutes. Light water exposure — such as a quick rinse — is generally safe after 30 to 60 minutes.
However, full shower or bathtub use should not resume until the caulk has had at least 24 to 48 hours to cure completely. In cooler or drier conditions, waiting the full 48 hours is strongly recommended.
Acrylic Latex Caulk
Acrylic latex caulk, sometimes called painter’s caulk, is water-based and easier to apply and clean up than silicone. While it can be used in bathrooms, it is better suited to lower-moisture areas such as around window frames, baseboards, and door trim.
This type skins over in 15 to 30 minutes and is typically dry to the touch in 1 to 2 hours. It can be painted over after 2 to 4 hours. Full curing, however, takes between 24 hours and up to 10 days, especially when applied in thicker beads or in humid conditions. Because it dries through water evaporation rather than a moisture-reaction process, good ventilation makes a significant difference.
Polyurethane Caulk
Polyurethane caulk is the most durable option and handles movement, UV exposure, and outdoor conditions extremely well. It is less commonly used for standard bathroom sealing but is excellent for expansion joints or areas where structural movement is expected.
It takes at least 24 hours to become touch-dry and can take up to 10 to 12 days to fully cure. This extended timeline surprises many homeowners. Polyurethane should not be disturbed, painted, or exposed to water for at least 3 to 5 days after application.
Butyl Rubber Caulk
Butyl rubber is a heavy-duty, highly durable sealant typically used outdoors on masonry, roofing, and metal surfaces. It is rarely the first choice for interior bathroom use but may appear in older homes or commercial settings.
It skins over in 2 to 24 hours, depending on conditions, and full curing can take up to two weeks, particularly in cold or low-humidity environments. It is one of the slowest-curing caulk types available.
Quick Reference: Bathroom Caulk Drying Times
| Caulk Type | Touch-Dry | Water-Safe | Fully Cured |
| Silicone | 30 minutes | 30–60 minutes | 24–48 hours |
| Acrylic Latex | 1–2 hours | 24 hours | 24 hours–10 days |
| Polyurethane | 24 hours | 3–5 days | 10–12 days |
| Butyl Rubber | 2–24 hours | Several days | Up to 2 weeks |
Factors That Affect How Long Bathroom Caulk Takes to Dry
Knowing the standard drying times is only part of the picture. Several environmental and application factors directly influence how quickly — or slowly — caulk cures in a bathroom setting.
Temperature
Caulk cures best between 40°F and 80°F (approximately 5°C to 27°C). When temperatures drop below 40°F, curing slows dramatically and the caulk may fail to bond at all. On the other hand, very high heat can cause the outer skin to form too quickly while the inside remains uncured.
Avoid caulking on extremely cold mornings or in overheated bathrooms without ventilation.
Humidity
This factor works differently depending on the type of caulk. Silicone caulk actually requires ambient moisture to cure, because it reacts with water vapor in the air as part of its curing process. Very dry conditions will slow silicone curing.
Acrylic latex, by contrast, cures through evaporation — lower humidity speeds up drying, while high humidity slows it down. A bathroom with poor ventilation and high steam levels can significantly delay acrylic caulk from curing properly.
Bead Thickness
Thicker beads of caulk take considerably longer to cure all the way through. A bead wider than about 6 to 8mm will have a cured outer skin while the interior stays soft for days longer than the stated cure time.
Applying caulk in thin, even lines is always recommended unless the gap specifically requires a thicker fill. For large gaps, using a foam backer rod first reduces the amount of caulk needed and leads to more even curing.
Air Circulation
Good airflow around the caulked surface helps acrylic and latex-based caulks dry faster by accelerating moisture evaporation. Running a bathroom exhaust fan or placing a small fan aimed at the caulked area (without directing heat) can noticeably shorten drying time for water-based formulas.
Surface Condition
If the surface was damp, oily, or dusty when the caulk was applied, it directly affects both adhesion and the curing timeline. Moisture trapped between the caulk and the surface prevents proper bonding and can cause premature failure.
Always prepare surfaces thoroughly before application — clean them, let them dry completely, and remove all traces of old caulk.
Tips to Help Bathroom Caulk Dry Faster
When time is limited, there are a few legitimate ways to encourage faster drying without compromising the quality of the seal:
- Apply thinner beads. Thinner lines cure more quickly and evenly. If the gap is wide, fill it partially with a backer rod first.
- Improve airflow. Run the bathroom exhaust fan continuously. A small fan on low, aimed at the caulked area, also helps with water-based caulks.
- Control room temperature. Keep the bathroom between 65°F and 75°F during curing. Avoid cold nights or humid mornings for freshly applied caulk.
- Use a dehumidifier. If bathroom humidity is consistently high, a dehumidifier in the space can meaningfully speed up acrylic latex curing.
- Choose a fast-cure formula. Many manufacturers now offer quick-dry versions of both silicone and acrylic caulk, which are ideal when you need a bathroom back in service sooner.
- Do not rush tooling. You have about 10 to 15 minutes after applying caulk to smooth it into shape. After that, it starts to skin and cannot be adjusted cleanly. Taking this step seriously avoids having to reapply.
What to Avoid When Drying Bathroom Caulk
Some commonly attempted shortcuts actually damage the caulk rather than helping it dry faster.
Avoid using a heat gun or hair dryer on high heat. Direct heat causes the outer layer to skin over too rapidly while the inside remains uncured, creating a seal that looks fine but fails quickly. Moderate warmth from a fan is acceptable; concentrated heat is not.
Do not expose the caulk to water before it has fully cured. Even a single shower taken too soon can force water behind the skin and prevent the interior from bonding to the surface. This is the most frequent cause of early bathroom caulk failure.
Do not press, smooth, or probe the caulk after the initial tooling window has passed. Touching it during curing misshapes the bead, breaks the outer skin, and allows air or moisture to interfere with the bonding process.
Avoid applying caulk in thick layers with the idea of completing the job in fewer passes. Thick applications trap moisture inside, extend curing significantly, and are far more prone to cracking as the outer skin hardens faster than the inner material can match it.
Signs That Bathroom Caulk Has Fully Cured
Rather than relying purely on the clock, look for these practical signs before resuming normal bathroom use:
- No tackiness. Press very lightly with a dry fingertip. Fully cured caulk leaves no sticky residue whatsoever.
- Colour change. Many caulks shift from slightly glossy to a more matte appearance as they cure. White caulks may also settle into a slightly warmer or cooler tone.
- No vinegar smell. Silicone caulk releases acetic acid during curing, which produces a distinct smell similar to vinegar. When this smell is gone, curing is well advanced.
- Firm under light pressure. Cured caulk holds its shape and does not indent noticeably when pressed gently.
If the caulk still feels soft, smells strongly, or leaves residue on your finger after the expected curing window, give it more time before using the bathroom normally.
What Happens If You Use the Bathroom Too Soon
The consequences of rushing bathroom caulk are not always immediate, which is why many people do not make the connection between premature use and later seal failure. Here is what actually happens when caulk is disturbed or wetted before it has fully cured:
The bond between the caulk and the surface breaks down at a structural level. Water finds its way behind the sealant and begins working underneath the tiles or around the tub surround. Mold and mildew establish themselves in those gaps.
The caulk itself begins to pull away at the edges or develop small cracks as it finishes curing unevenly. These issues may not appear for weeks or even months, but they almost always trace back to those first few hours of insufficient cure time.
Frequently Asked Questions
How long does silicone caulk take to dry in the bathroom?
Silicone caulk is touch-dry in about 30 minutes and safe for light water exposure within an hour. A full cure that makes the seal genuinely waterproof takes 24 to 48 hours. Do not take a shower or use a bathtub before that window has passed.
Can I speed up bathroom caulk drying with a hair dryer?
Using a hair dryer on low or cool settings is acceptable in moderation. High heat is not recommended, as it causes the surface to harden before the interior is ready, resulting in a compromised seal. A fan and good ventilation are safer options.
Is it necessary to remove old caulk before applying new caulk?
Yes, always. Applying new caulk over old, failed material means the new layer has nothing solid to bond to. Remove all traces of old caulk, clean the surface, let it dry completely, and then apply fresh caulk for a proper, lasting seal.
What is the minimum wait time before using a shower after caulking?
A minimum of 24 hours is the standard recommendation for most silicone and acrylic caulks in a bathroom setting. Waiting the full 48 hours is safer, particularly in cooler or humid conditions.
Conclusion
Knowing how long it takes for bathroom caulk to dry is not just a matter of convenience — it is the difference between a seal that lasts years and one that fails within months. The key takeaway is that drying and curing are not the same thing. Surface dryness gives a false sense of readiness.
Full curing, which takes a minimum of 24 to 48 hours for most bathroom-grade caulks, is when the seal is actually doing its job. Give it the time it needs, prepare surfaces properly, manage temperature and airflow, and avoid the common shortcuts that lead to premature failure.
A little patience at the caulking stage saves a great deal of time, money, and frustration down the line.
Related Articles
Kitchen Chopping Block Table: Complete Guide, Types, Benefits, Care & Buying Tips
How to Measure Room for Furniture: Step-by-Step Guide for Perfect Fit
Mulled Windows vs Non-Mulled Windows: Which Is Right for Your Home
Can You Use Ceiling Paint on Walls? The Surprising Benefits and Drawbacks
Should You Paint the Walls Before Staining Stairs? What Pros Recommend