
A garage door opener that stops responding to your remote or keypad can be frustrating, especially when you are in a hurry to leave or get back home. The good news is that most of these problems can be fixed without calling a technician.
Learning how to reset a garage door opener is a simple process that takes only a few minutes once you know where the right buttons are located. Whether your remote suddenly quit working, you replaced the batteries, or you just installed a new device, this guide walks you through every method in plain and easy language.
By the end of this article, you will understand exactly how to reset a garage door opener for standard remotes, full factory resets, and modern Wi-Fi enabled systems.
Understanding Your Garage Door Opener Before You Reset It
Before you attempt any reset, it helps to know what type of opener you have and which parts control the memory settings. Different openers use slightly different button layouts, so recognizing your system saves time and avoids confusion.
Types of Garage Door Openers
Garage door openers generally fall into a few categories: chain-drive, belt-drive, and screw-drive models, along with newer smart openers that connect to Wi-Fi. Chain-drive openers are the most affordable and durable but tend to be noisier, while belt-drive units run quieter and are common in homes attached to living spaces. Screw-drive openers use a threaded rod and require less maintenance, and smart openers add app control on top of traditional remote functions.
Common Garage Door Opener Brands
Popular brands include Chamberlain, LiftMaster, Genie, Craftsman, and Overhead Door, and each one uses a similar reset concept even though button names may differ slightly. Chamberlain and LiftMaster, for example, share very similar reset procedures since they are made by the same parent company. Knowing your brand ahead of time makes it easier to follow brand-specific instructions later in this guide.
Key Parts You Should Know
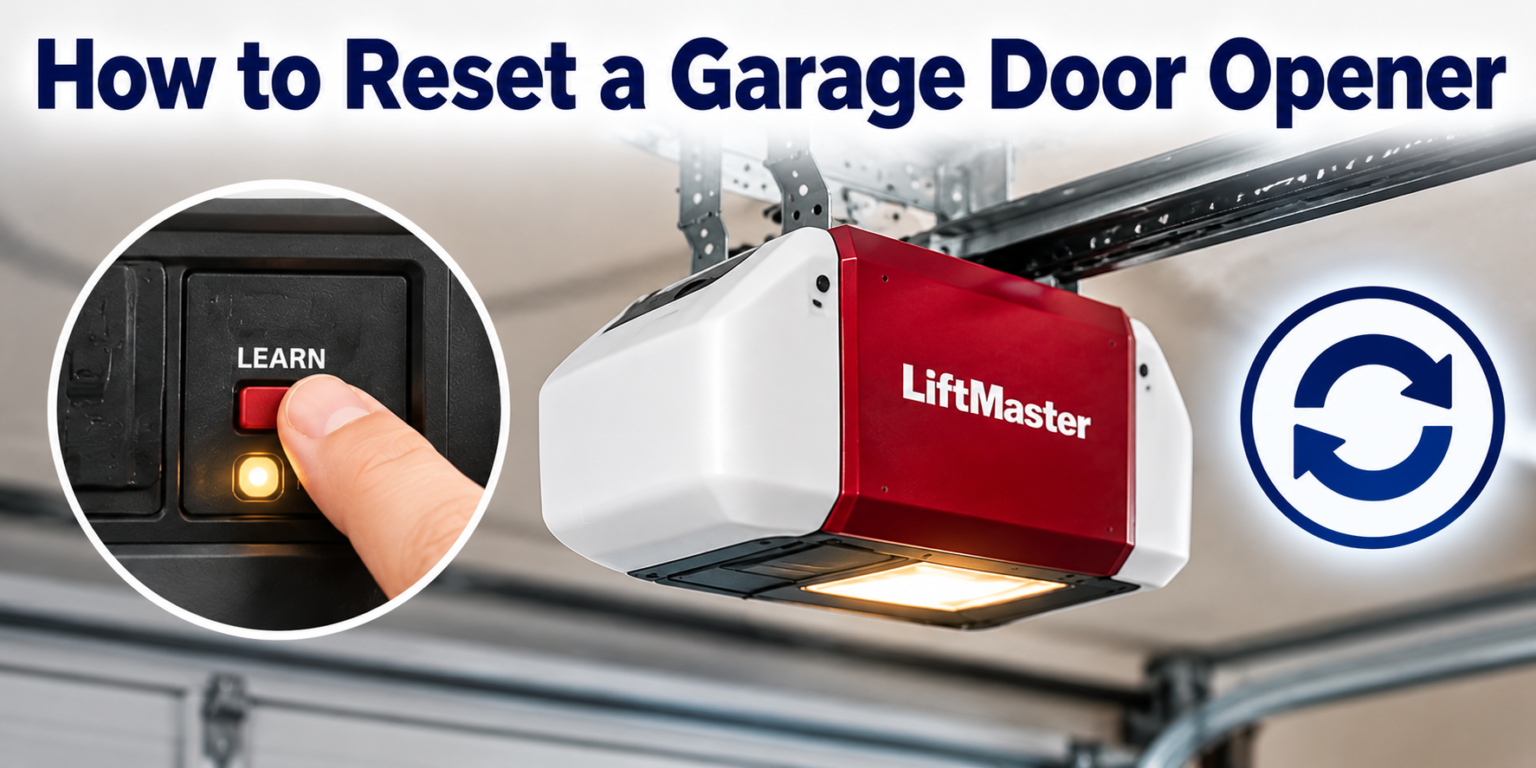
Every opener has a motor unit mounted on the ceiling, along with a small antenna hanging down and a button usually labeled “Learn” or “Smart.” This Learn button is the heart of any reset process because it controls which remotes and keypads are recognized by the system. Familiarizing yourself with this button’s location before you start will make the entire reset process much smoother.
Signs You Need to Reset Your Garage Door Opener
There are several situations where resetting becomes necessary rather than optional. Recognizing these signs early can save you from being locked out of your garage at an inconvenient time.
| Situation | Why a Reset Helps |
| Remote stops responding | Clears old signal and re-syncs the code |
| Keypad code not accepted | Refreshes stored programming |
| Door opens or closes randomly | Removes possible signal interference |
| After a power outage | Restores the opener’s saved memory |
| After changing batteries | Some units lose sync during battery swaps |
| Adding a new remote or keypad | Requires the Learn button to register it |
| Security concerns | Clears old codes for safety |
If you notice any of these issues, it is a strong indication that you should go through the process of resetting your device rather than replacing it entirely.
Safety Precautions Before You Start
Working with any electrical or mechanical home device requires a bit of caution, and garage door openers are no exception. Taking a few simple safety steps beforehand protects both you and the equipment.
Turn off the power switch or unplug the unit before touching any internal wiring, especially if your model requires opening a panel. Keep your hands and clothing away from moving chains, belts, or rollers at all times. If your motor unit is mounted high on the ceiling, use a stable ladder and have someone nearby if possible. It is also wise to write down your existing remote codes or settings in case you need to restore them later, particularly for shared household devices.
How to Reset the Remote or Keypad? (Standard Method)
This is the most common method people use when a single remote or keypad stops working properly. It does not erase every stored code, only the one you choose to reprogram.
- Locate the Learn button on the motor unit, usually near the antenna wire.
- Press and release the Learn button once; an indicator light will turn on and stay lit for about 30 seconds.
- Within that 30-second window, press and hold the button on your remote or enter your keypad code until the opener’s light blinks or you hear a click.
- Release the button and test the remote by pressing it from a short distance.
If the remote does not respond, repeat the process, making sure you are within range and that the battery is fresh. This simple method answers most cases of how to reset a garage door opener remote without needing any tools.
How to Perform a Full Factory Reset?
A full factory reset clears every remote and keypad code stored in the opener’s memory. This method is useful when you suspect unauthorized access, are selling your home, or simply want to start fresh.
- Find the Learn button on the motor unit, the same one used for a standard reset.
- Press and hold the button for approximately six to ten seconds until the indicator light turns off completely, confirming that all codes have been erased.
- Reprogram each remote and keypad individually using the standard reset steps described earlier.
Because this method removes access for every device connected to the opener, only use it when you are prepared to reprogram all your remotes and keypads afterward.
Resetting Smart or Wi-Fi Garage Door Openers
Modern smart openers, such as those using the myQ app, add an extra digital layer on top of the physical reset process. These systems often require both an app-based reset and a hardware reset to work correctly.
Open the manufacturer’s app, go into device settings, and select an option such as “Remove Device” or “Factory Reset” to disconnect it from your account. Next, hold the reset button on the physical unit, which is sometimes combined with the Learn button, for about ten seconds until the light responds. Finally, reconnect the opener through the app’s setup wizard, entering your Wi-Fi password again so the device can rejoin your home network. This combined approach is the most reliable way to fully reset a garage door opener that includes smart features.
Brand-Specific Reset Instructions
While the overall concept remains the same across brands, button locations and hold times can vary slightly. The table below offers a quick comparison so you can match it to your specific opener.
| Brand | Button Name | Typical Hold Time |
| Chamberlain | Learn Button | Hold 6–10 seconds for full reset |
| LiftMaster | Learn Button | Hold 6–10 seconds for full reset |
| Genie | Program/Learn Code | Hold 6–8 seconds until light flashes |
| Craftsman | Learn Button | Hold 6–10 seconds for full reset |
| Overhead Door | Smart Button | Hold until light blinks, usually 5–8 seconds |
Checking your owner’s manual or the manufacturer’s website is always a good idea if the button placement differs from what is listed above.
Common Problems After Resetting
Even after following the correct steps, a few issues can still occur. Understanding these common problems helps you troubleshoot quickly instead of repeating the same steps without success.
Sometimes the remote still does not work because the battery is weak or the remote itself is faulty rather than the opener. A keypad may refuse a new code if it was not fully synced within the required time window, so trying the process again slowly often resolves it. If the opener does not respond at all after a reset, check the power source and circuit breaker, since a simple electrical issue can mimic a programming problem. Loose wiring near the motor unit can also interfere with the antenna’s signal reception.
When to Call a Professional
Not every issue can be solved with a simple reset, and knowing when to bring in an expert saves time and prevents further damage. If the motor makes unusual grinding noises, the door moves unevenly, or the opener trips the circuit breaker repeatedly, these are signs of a mechanical or electrical fault beyond basic programming.
Attempting to force a reset on a unit with deeper hardware issues can also void any remaining warranty, so it is best to consult a certified technician in these cases.
Preventive Tips to Avoid Future Resets
A few simple habits can reduce how often you need to repeat this process. Replacing remote batteries every year, even before they seem weak, prevents sudden disconnections. Keeping remotes away from other wireless devices reduces the chance of signal interference that can disrupt the opener’s memory.
For smart openers, regularly checking for firmware updates through the manufacturer’s app ensures the system stays properly synced with your home network.
FAQs
How often should I reset my garage door opener?
There is no fixed schedule for resetting your opener, since it mainly depends on performance issues rather than routine maintenance. Most homeowners only need to reset it when a remote stops working, after a power outage, or when adding a new device. If you are not experiencing problems, there is no need to reset it unnecessarily.
Can I reset it without using the Learn button?
The Learn button is the standard method used by almost every major brand, so resetting without it is uncommon. Some smart openers allow a partial reset through their app, but the physical button is usually still required for a complete reset. Checking your specific model’s manual will confirm whether any alternative method exists.
Is resetting the same as reprogramming?
Resetting and reprogramming are related but not identical processes. A reset typically clears existing codes, while reprogramming is the step where you add new remote or keypad codes afterward. In most guides on how to reset a garage door opener, both steps are performed together for convenience.
What if I lost the manual for my opener?
If you no longer have the physical manual, most manufacturers provide free digital copies on their official websites by searching your model number. Alternatively, the Learn button location and reset steps described in this guide apply to the majority of standard openers. Contacting customer support with your model number is another reliable option.
Conclusion
Knowing how to reset a garage door opener gives you the confidence to solve common issues on your own without waiting for outside help.
From a simple remote resync to a full factory reset or reconnecting a smart Wi-Fi system, the process is straightforward once you locate the Learn button and follow the correct sequence.
Keeping safety in mind, checking brand-specific details, and practicing a few preventive habits will keep your garage door running smoothly for years to come.
Related Articles
How to Vent a Toilet: Complete Guide 2026
Glow in the Dark Epoxy Floor: The Ultimate Guide for Homeowners & Contractors
How to Measure for a Sink: Complete Step-by-Step Guide