
You’ve finally hung your new curtains — only to step back and realize the rod is crooked, the bracket is pulling out of the wall, or one side sits two inches higher than the other. Sound familiar? Installing a curtain rod is one of those tasks that looks easy until it goes wrong.
This step-by-step guide covers everything a beginner needs: how to measure correctly, where exactly to place the rod, how to install into any wall type, and how to fix common problems before they start.
Tools and Materials You’ll Need
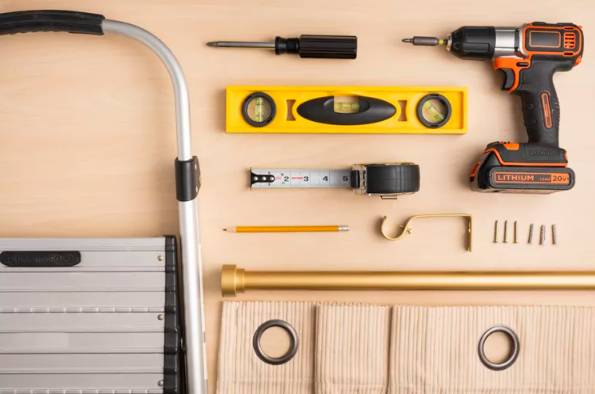
Before you start, gather everything listed below. Having your tools within arm’s reach means fewer trips to the garage mid-project and no risk of losing your level markings while you hunt for a screwdriver.
Essential Tools
- Drill
- Screwdriver (Phillips and flathead)
- Stud finder (magnetic or electronic)
- Level
- Tape measure
- Pencil
- Step ladder
Materials Required
- Curtain rod kit (with finials)
- Brackets (2 minimum; 3 for rods over 60 inches)
- Screws (No. 8 × 2-inch wood screws for studs)
- Wall anchors (self-drilling or toggle bolts, rated 50–100 lbs depending on curtain weight)
How to Measure for Curtain Rod Placement?
Accurate measurement is the single step most beginners rush — and the one that causes the most visible mistakes. Start by measuring the full width of your window frame from the inside of one side casing to the other.
Once you have this number, plan to extend the rod 4–12 inches beyond each side of the frame. This extension lets curtains pull fully clear of the glass when open — maximizing natural light and making your window look noticeably wider than it actually is.
For most standard windows, 6 inches per side is a reliable default. Use a larger extension only if you have enough wall space and want a grander look.
How High Should You Hang a Curtain Rod?
Standard practice is to install the rod 4–6 inches above the window frame — but for a more dramatic, high-end look, many interior designers recommend going 8–12 inches above the frame, or even mounting it within 2–3 inches of the ceiling if ceiling height allows.
Higher placement creates the visual illusion of taller walls and a more spacious room. Whatever height you choose, use consistent measurements on both sides so the rod sits perfectly level. A difference of even half an inch is clearly visible once curtains are hanging.
Step-by-Step: How to Install a Curtain Rod

Follow each step in order for a clean, secure installation with no guesswork.
Step 1: Gather Tools
Start by collecting all the tools and materials listed above so you don’t have to pause mid-installation. Lay them out on a flat surface near your work area — this one habit alone will cut your installation time in half.
Step 2: Mark Bracket Positions
Using your tape measure and pencil, mark the exact position for each bracket on both sides of the window. Measure from the top of the window frame up to your chosen height and mark the spot. Then measure outward to your chosen extension width and mark again. Use a level to draw a faint horizontal reference line connecting both marks.
Step 3: Check for Studs
Use a stud finder to check for wall studs behind your marked spots. Slide the stud finder slowly and horizontally — it will beep or flash when it crosses over a stud. Studs are typically spaced 16 inches apart. If your marks land on a stud, no anchors are needed. If not, proceed to Step 5 after drilling pilot holes.
Step 4: Drill Pilot Holes
Drill small pilot holes at each marked point using a bit slightly narrower than your screws. For drywall, a 3/32-inch or 1/8-inch bit is standard. Pilot holes prevent the wall surface from cracking and make driving screws much easier.
Step 5: Install Wall Anchors (If Needed)
If no studs are present, insert wall anchors into the pilot holes. For most standard curtains, self-drilling drywall anchors rated 50–75 lbs are sufficient. For heavy drapes, blackout panels, or velvet curtains, use toggle bolts rated at 100+ lbs. Always check the anchor’s weight rating on the packaging before purchasing.
Step 6: Attach Brackets
Drive screws through the bracket mounting holes and into either the studs or the anchors. Tighten firmly — brackets should feel completely solid with no wobble. Use your level again to confirm both brackets are still aligned before finalizing.
Step 7: Place the Curtain Rod
Set the curtain rod onto the mounted brackets and ensure it rests securely in the bracket cradles. For adjustable rods, set the length now and tighten any locking mechanisms before hanging curtains.
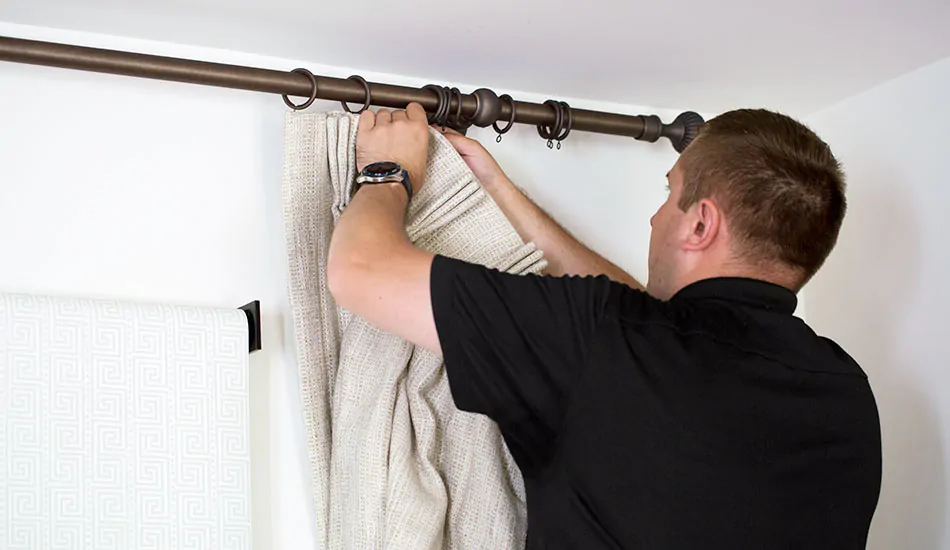
Step 8: Hang Curtains
Remove the finials (end caps), slide your curtain panels onto the rod through their eyelets or rings, then reattach the finials. Place the rod back onto the brackets.
Position the outer eyelets just outside the brackets for the cleanest look. Step back and check that both panels hang at the same height and the rod appears level.
How to Install a Curtain Rod Without Drilling (Renter-Friendly)
If you rent your home or apartment and can’t put holes in the walls, you still have practical options. Tension rods fit inside the window frame using spring pressure and require zero hardware — ideal for lightweight curtains and sheers.
For heavier panels, removable adhesive hooks rated at 5–10 lbs per hook can support a lightweight rod across the frame. Command strips rated for 7.5+ lbs are another popular choice.
Note that all adhesive solutions work best on smooth, clean, painted walls. They may not hold reliably on textured surfaces, wallpaper, or surfaces with a sheen. Always test adhesion on a small area first before committing.
How to Install a Curtain Rod Without Studs?
When wall studs aren’t available, use heavy-duty drywall anchors such as toggle bolts or self-drilling anchors. These grip the drywall from behind and distribute weight across a larger surface area than a plain screw.
Drill pilot holes at your marked positions, insert the anchors according to their instructions, then drive screws through the brackets into the anchors. Tighten until completely firm.
Curtain Rod Installation for Different Wall Types

Drywall
Drywall requires support beyond a plain screw. Use self-drilling drywall anchors for standard curtains or toggle bolts for anything heavier.
After inserting anchors, drive screws through the brackets and tighten firmly. When installed correctly, anchored brackets in drywall will easily support 40–80 lbs depending on anchor type.
Plaster Walls
Plaster walls are common in homes built before 1950 and require a different approach. Use a carbide-tipped drill bit — standard bits will skate across the surface. Drill at low speed to avoid cracking the plaster.
If the plaster is applied over wooden lathe, try to hit a lathe board for natural grip. Use anchors specifically rated for plaster (available at most hardware stores), as standard drywall anchors may not expand properly in plaster.
Concrete or Brick Walls
Concrete and brick require a masonry drill bit and a hammer drill setting if available. Drill slowly and clear dust regularly. Insert masonry wall plugs into the holes, then drive screws into the plugs. This creates an extremely strong hold — easily the most secure wall type for curtain rod brackets.
Wooden Walls
Wood offers natural grip, making installation the most straightforward. Drive No. 8 wood screws directly into the surface without anchors. Pre-drill pilot holes to avoid splitting the wood grain, especially near edges. Tighten firmly.
How to Hang Curtains After Installing the Rod?
- Remove the finials (end caps) from both ends of the rod.
- Feed curtain panels onto the rod through their eyelet holes, clip rings, or rod pocket, depending on your curtain style.
- Reattach the finials securely to prevent panels from sliding off.
- Place the assembled rod onto the mounted brackets.
- Position the outer eyelets or rings just outside the brackets for a neat, structured appearance.
- Adjust panel distribution so folds are even across the full width.
Common Mistakes to Avoid
Not Using a Level
Even a 1/4-inch height difference between brackets becomes very obvious once curtains are hanging. Always use a level — not just your eye — before drilling. It takes 30 seconds and prevents a problem that requires refilling holes and repainting to fix.
Ignoring Stud Locations
Studs provide dramatically stronger support than anchors alone. If you can position your brackets over studs, always do so — especially for heavier curtains. Use a stud finder rather than guessing, and mark stud edges clearly before drilling.
Choosing the Wrong Anchor for the Curtain Weight
Light plastic anchors will fail under the weight of heavy drapes. Before purchasing anchors, estimate your curtain weight and choose anchors rated for at least double that load. Toggle bolts and snap toggles are the most reliable choices for anything above 20 lbs total.
Forgetting to Account for Window Hardware
Window handles, locks, and exterior trim can all interfere with curtain movement. Before marking bracket positions, open and close your window while imagining curtain fabric in place — check that nothing will catch or bunch.
Troubleshooting Curtain Rod Problems

Curtain Rod Sagging
Sagging typically occurs on rods longer than 60 inches without a center support bracket. Add a third bracket at the midpoint of the rod — most rod kits include one for this reason. For very long or heavy setups, two center brackets may be needed.
Loose Brackets
Loose brackets usually mean the screws weren’t driven into a stud or proper anchor, or the anchor was undersized for the load. Remove the bracket, insert a heavier-duty anchor, and reinstall. If the hole has already been stripped, use a wall repair patch and re-drill in a slightly different position.
Uneven Installation
Take down the rod and brackets. Re-mark both positions using a level and a measured reference point from the floor (not from the window frame, which may itself be uneven). Re-drill and reinstall.
Curtains Not Sliding Smoothly
First check that rings or eyelets aren’t snagging on a rough bracket edge. If friction is the cause, apply a thin layer of beeswax, clear candle wax, or a silicone-based curtain rod lubricant along the rod surface. This is an inexpensive fix that dramatically improves curtain glide, especially on metal rods.
Pro Tips to Make Your Curtains Look Expensive
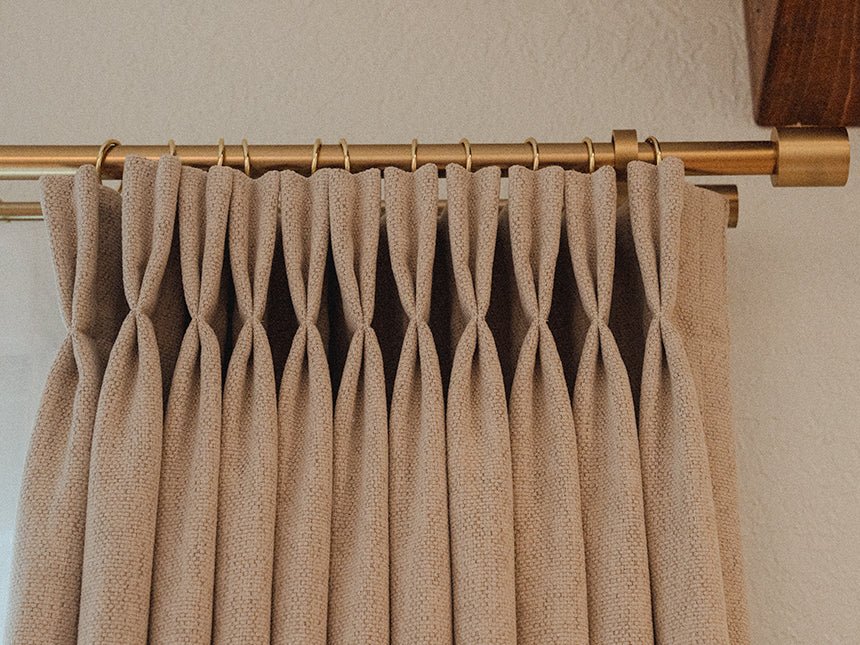
Mount the rod as high and wide as possible — within 2–3 inches of the ceiling and extending 6–12 inches beyond the frame. This is the single most impactful change you can make to window treatments without buying new curtains.
Let curtain panels graze or just barely touch the floor. Panels that end above the floor look unfinished; panels that puddle excessively look casual rather than refined. Aim for 1/2 inch of clearance from the floor for a clean tailored look.
Match your rod finish to other hardware in the room — if your door handles are brushed gold, choose a brushed gold rod. This small detail creates a cohesive, designer-intentional look that elevates the entire room.
For a layered look without a double rod, use a single rod with double-bracket hardware: hang sheer panels on clips behind, and blackout panels on rings in front. Cleaner and less expensive than a full double-rod system.
After hanging, steam your curtains for 5 minutes to release packaging creases. The difference is dramatic and takes almost no time.
Conclusion
A properly installed curtain rod is one of those small upgrades that punches well above its weight — it changes how light feels in a room, how tall the ceilings appear, and how finished the space looks overall. With the measurements, wall-type techniques, and troubleshooting fixes in this guide, you have everything you need to get it right the first time.
If this is your first time installing a rod, take an extra five minutes to double-check your level marks before drilling — that one step prevents the most common beginner mistake. Now grab your tape measure and get started.
Frequently Asked Questions
How do I install a double curtain rod?
Double curtain rods use specialized brackets that hold two rod tracks — one for sheers and one for blackout or decorative panels. Install the brackets the same way as single-rod brackets (mark, stud-check, pilot holes, anchors if needed, then screw in place).
Load the back track with sheer panels and the front track with your main panels before mounting. Ensure both tracks are level and the brackets are rated for the combined weight of both curtain sets.
How do I hide curtain rod brackets for a cleaner look?
Use decorative bracket covers that match your rod finish. Alternatively, paint the brackets the same color as the wall so they recede visually. Installing a valance, cornice board, or top treatment above the rod is the most effective option — it completely hides all hardware while adding a finished architectural detail to the window.
What type of screws are best for curtain rod installation?
No. 8 × 2-inch coarse-thread wood screws are the standard choice when drilling into studs. For drywall anchors, use the screw included with the anchor kit — anchor manufacturers match screw diameter to their anchor’s thread size. Using a mismatched screw can cause the anchor to spin in place rather than grip.
Can I extend a curtain rod beyond its standard size?
Yes. Most curtain rod manufacturers sell extension connectors or coupler pieces that join two rod sections end-to-end.
For wide windows, this is more reliable than a single long adjustable rod, which tends to sag at the center when extended to maximum length. Add a center support bracket wherever sections join.
How do I install a curtain rod over sliding glass doors?
Mark bracket positions 3–6 inches above the door frame and extend the rod 6–12 inches beyond each side to allow full curtain clearance when the door is in use. Use heavy-duty brackets and anchors rated for the full weight of your curtain panels, as sliding door curtains are opened and closed much more frequently than window curtains — the brackets take more stress over time.
Related Articles
How to Clean and Store Kitchen Tools: The Complete Guide
Joist Tape for Decking: The Complete Guide to Protecting Your Deck’s Substructure
486 Gelney Kitchen Exhaust Hood System: How It Works and Why It Matters
How to Clean Shower Tiles: Step-by-Step Guide for a Spotless Bathroom
18 Inch Deep Base Cabinets: A Smart Storage Solution for Every Kitchen